
|
Yes I finally got around to installing the STILLEN G3 intake. This is one of the most popular intake here on the forum. I needed an intake that's high up
|
|||||||
|
|
LinkBack | Thread Tools | Display Modes |
 06-29-2010, 10:43 PM
|
#1 (permalink) |
|
Administrator
Join Date: Sep 2008
Location: NJ
Posts: 9,931
Drives: 09 370Z MB Sports M6
Rep Power: 10   |
 DIY: Finally Installed The STILLEN G3 Intake today! Lots of Pics inside (AK370Z)
Yes I finally got around to installing the STILLEN G3 intake. This is one of the most popular intake here on the forum. I needed an intake that's high up ( I live in flood zone. Little rain and all the streets are flooded
 ) and something that doesn't sit in the engine bay. STILLEN G3 was the perfect candidate. It sits high and still brings in cool air from the outside. I did look at AEM and INJEN but they sit way to low from my desired height. ) and something that doesn't sit in the engine bay. STILLEN G3 was the perfect candidate. It sits high and still brings in cool air from the outside. I did look at AEM and INJEN but they sit way to low from my desired height. I'd like to take this time to THANK a. Josh@STILLEN for a great price and very quick shipping. This intake has been sitting in my garage since last monday! Thanks Josh. b. DIGITONIUM for his awesome DIY on how to remove front bumper. c. Last but not least, Snakes709 for his VERY detailed STILLEN G3 intake install. Also, thanks goes out to all the previous threads made by our members (i.e. RCZ, Semtex etc)  . .I was by myself. I had NO help during the install. It's a pretty straight forward install. The most scariest part was the taking off front bumper. I have NEVER taken off front bumper for any previous intake install. It actually wasn't bad at all. I'll post pictures below and write captions and explain along the way what I have discovered. If you see anything wrong or I put something backward or anything, please let me know. I did this by myself in 84 degree weather! Mistakes are not uncommon.   Very well packed.   What's included in the box. Notice the tubes are wrapped twice with paper.   I def recommend Craftsman tools. They carry lifetime warranty. However, I DO NOT recommend this cutting tool (I'll explain later why).  Stock intakes.  Unplug the negative terminal.  First, I took the engine cover off. The instructions mentioned that I can actually do the install without taking the strut tower brace off. We'll see how long I can go with it on!   It's actually a two piece engine cover. I always thought it was 1 piece. 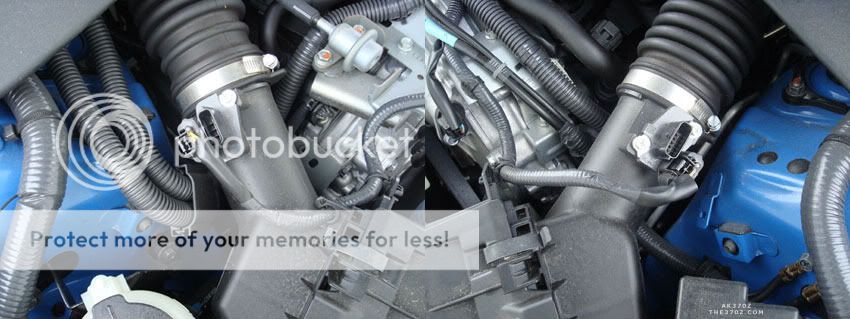 Unplug both MAF sensors! You can loosen the clamps at the throttle body. Then,  Take out this bolt. This is the ONLY both holding the stock intakes in place. 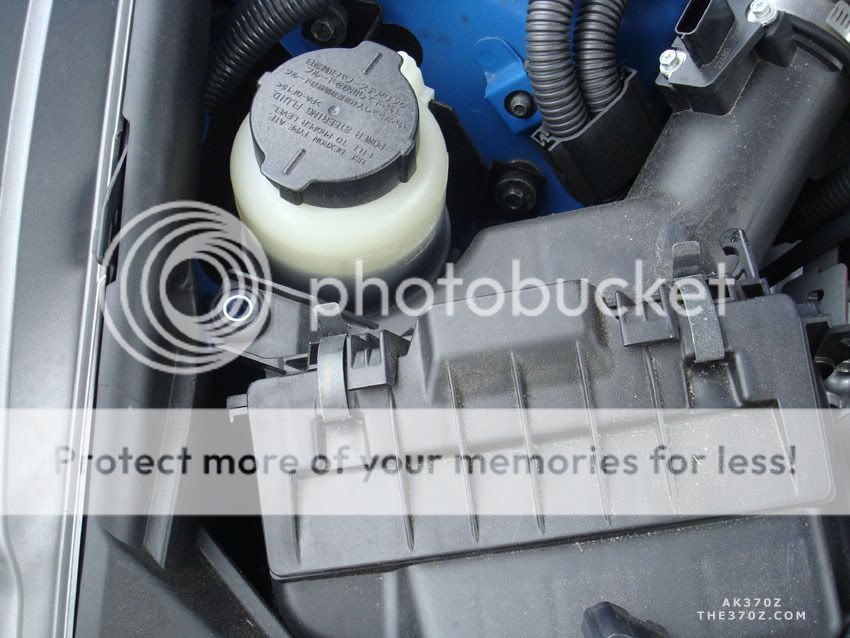 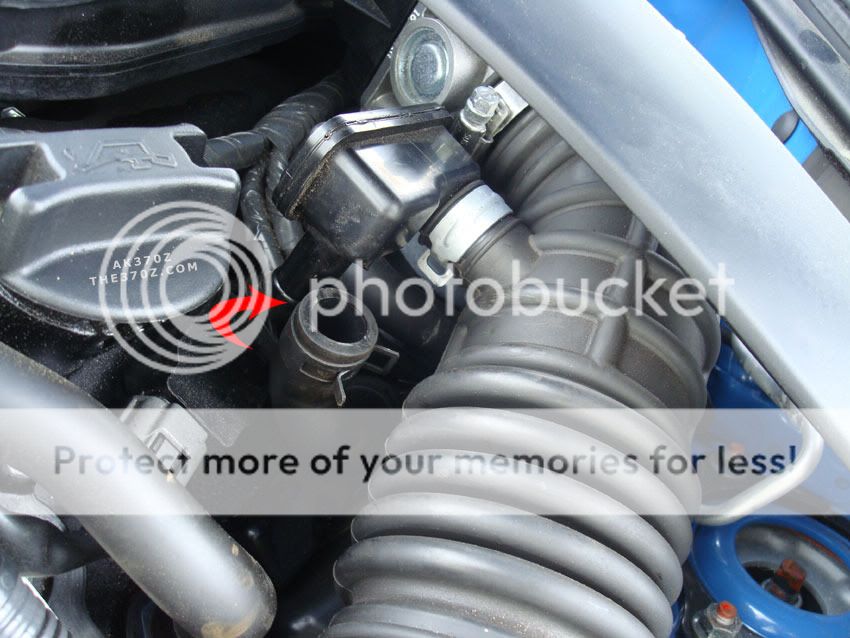 I actually found it easier to remove it here instead of intake area. I couldn't even close the silver clamp as you can see it's facing the firewall and there's no space to loosen it because of the bend!   Same thing with the passenger side. I actually removed the bolt and took the whole thing apart. Much easier to work it.  At this point, I couldn't pull the stock intakes out!  There simply wasn't enough space. I didn't want to force and break something (with my luck, I usually break it ). I am forced to remove the Strut Tower Brace. There simply wasn't enough space. I didn't want to force and break something (with my luck, I usually break it ). I am forced to remove the Strut Tower Brace.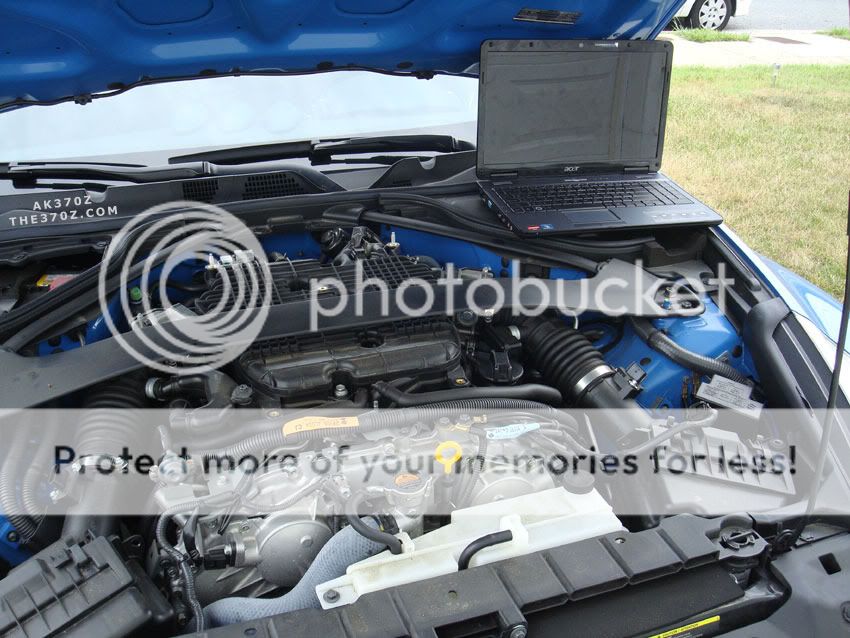  2 bolts and 1 nuts here.  2 nuts here. Please note, you have to remove a plastic cover pictured below. After you remove two plastic clips, pull hard on the plastic cover. It'll come off. It's connected with many pull clips.  Clips that you can pull away.  Actually removing this Strut Tower Brace made my install much much easier. I actually recommend you to take this off first 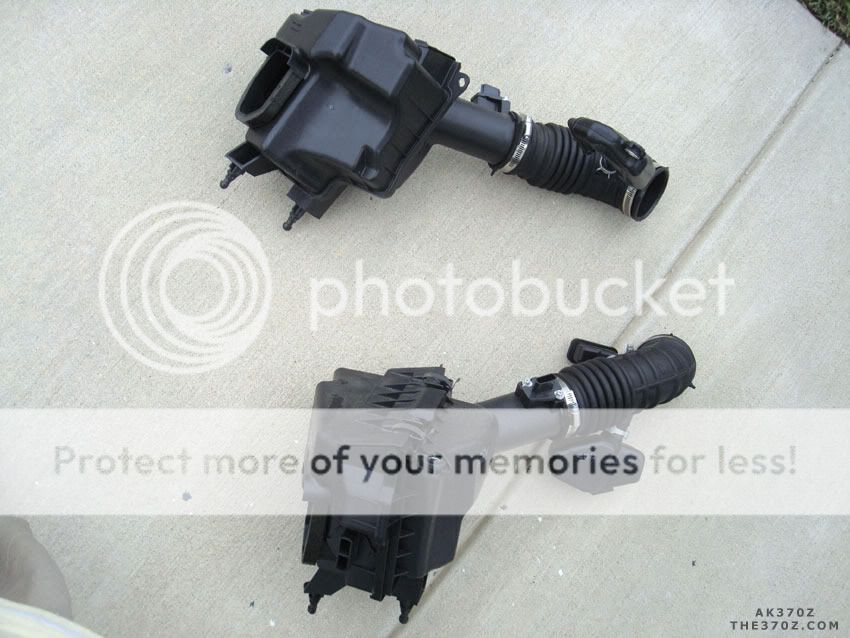 Stock boxes 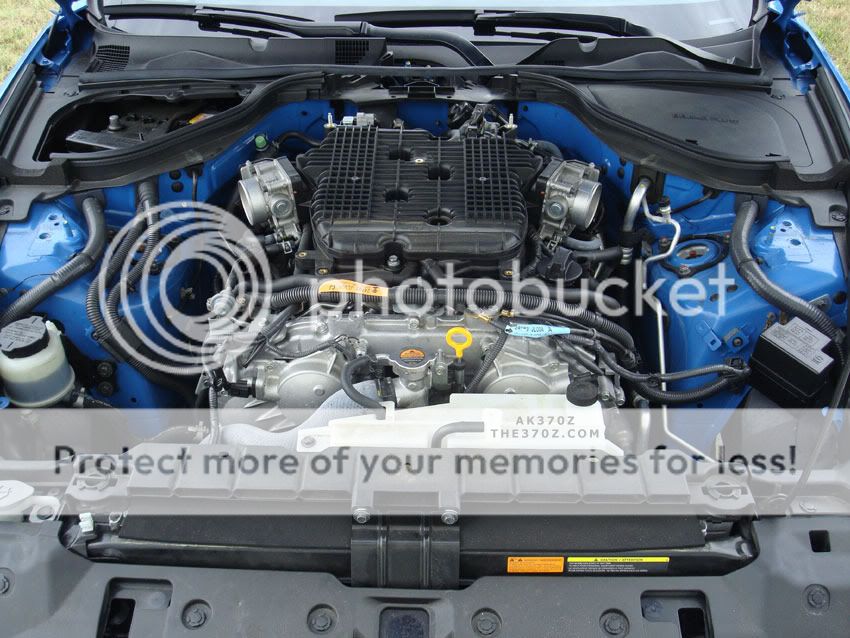 Stock boxes are off! Then, take the bumper off. Follow DIGI's DIY here  Front bumper off.  I should mention here that for 2013 models and up, there are electrical wiring that's attached to front bumper since daytime led DRL are standard. Please use extreme caution when you take it off. Here are some pictures of 2013+ front bumper led wiring: Huge thanks to xTETOVABOYx for providing me with the pics. Thank you  Passenger Side Connection On picture #1  Passenger Side LED picture #2 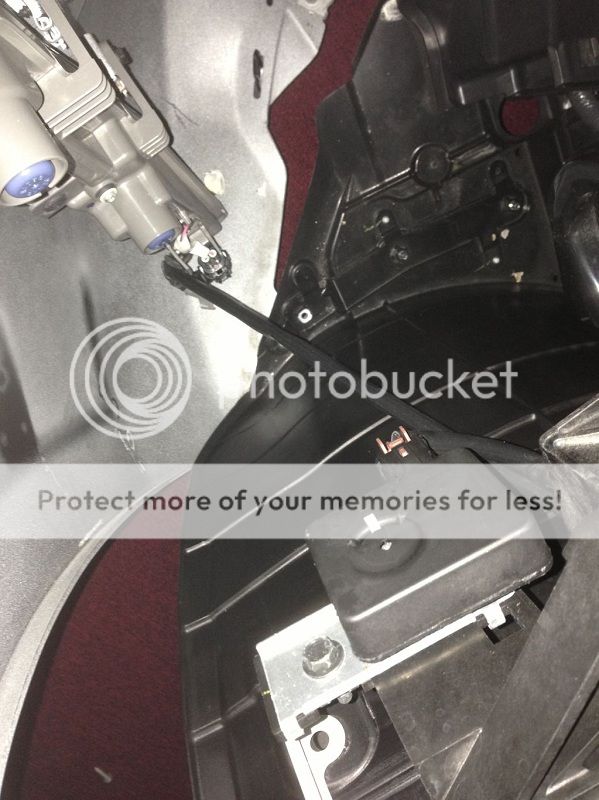 LED on Driver Side , Shows how long wire is picture #3  Actual led of the driver side picture #4  Unbolt these 3 bolts and let the metal brace hang.  Now, take these pins off the metal bar so that it DOESN'T have any wires attached. Okay, now here's a small confusion that costs me some time and bruised my hands!  Instructions said that I can just squeeze out two plastic clips. This is wrong info as there is ONLY 1 clip in 370Z ( the instruction pics maybe from G37). There is BOLT instead of clip! Take a look: 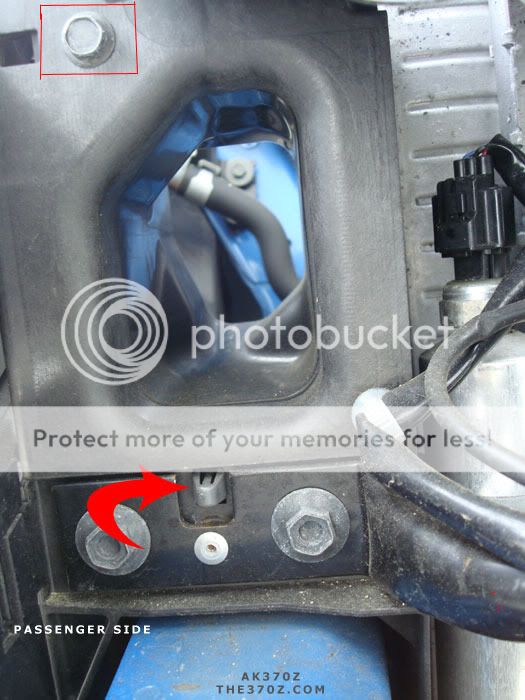 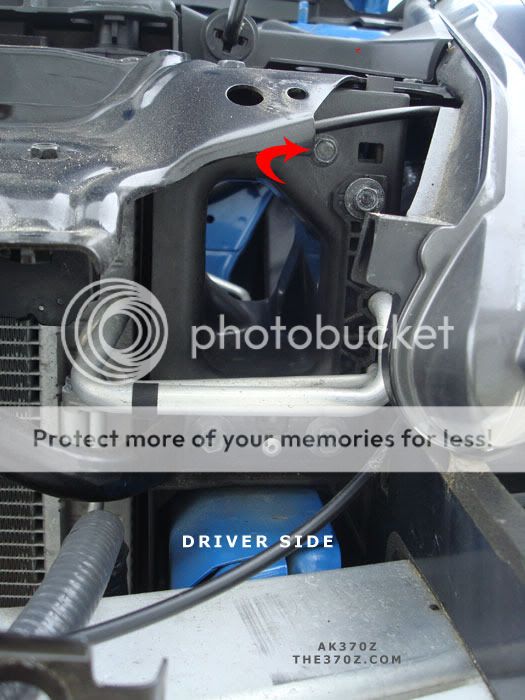  Josh, if you want to make changes to the DIY instruction, feel free. Not a big deal but I wasted like 10 minutes!  I know JOSH suggested me to get the Dremel (or something similar) but Harbor Parts had this one on sale for $20. I was  My happy dance My happy dance  turned into this --> turned into this --> as I kept breaking flimsy blades it came with . The power tool is GREAT but the accessories sucks! So I had to actually cut the hole by hand (with a hacksaw blade/saw). Lets just say my arms were numb after I did the driver side! as I kept breaking flimsy blades it came with . The power tool is GREAT but the accessories sucks! So I had to actually cut the hole by hand (with a hacksaw blade/saw). Lets just say my arms were numb after I did the driver side!  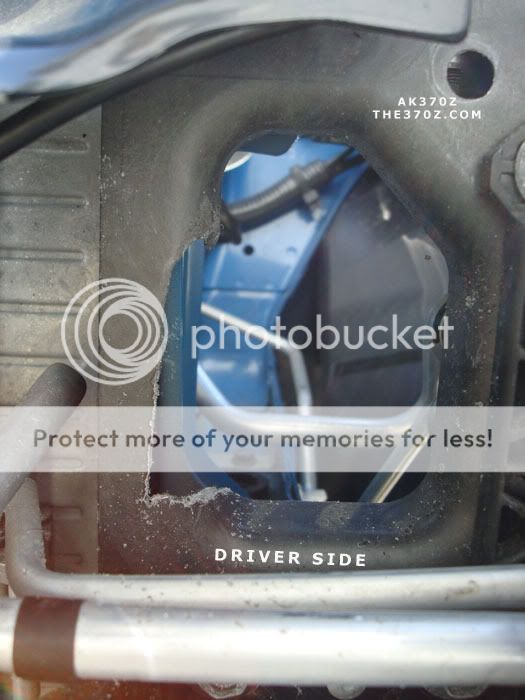 Not the prettiest hole (oh boy, I hope frost doesn't see this  ) but worked out pretty good. In the beginning, I kinda made the cut a little higher hoping to avoid the A/C lines but the intakes didn't sit properly (and I couldn't bolt the metal bar). So I had to cut it again. ) but worked out pretty good. In the beginning, I kinda made the cut a little higher hoping to avoid the A/C lines but the intakes didn't sit properly (and I couldn't bolt the metal bar). So I had to cut it again.Now we all know the dreaded A/C line stories. Some members had their A/C lines rubbed and caused some issues. Well, I came out with a quick plan. The STILLEN Kit give you two silicone hoses. You ONLY need to use one as it's pretty long. You can cut it in half and use it for both vacuum lines. What did I do with the other hose?  I cut it in half.  Put some 3M VHB Double sided tape (the most powerful 3M double sided tapes around)    Put it above the A/C lines! I think it'll def outlast the car. (let me know what you think)  Test fitting. Making any final adjustments. 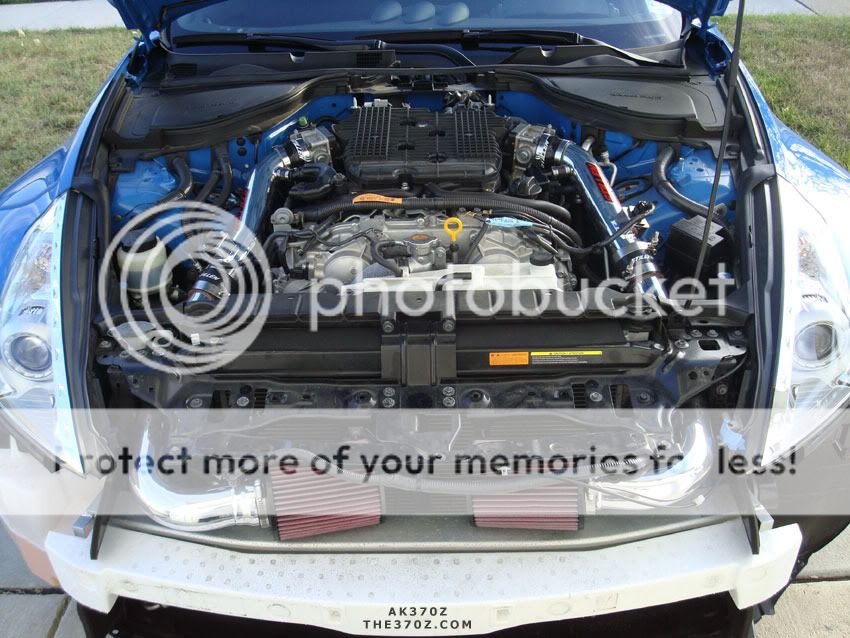 Installed. At this point, I just swapped MAF sensors from the OEM box.   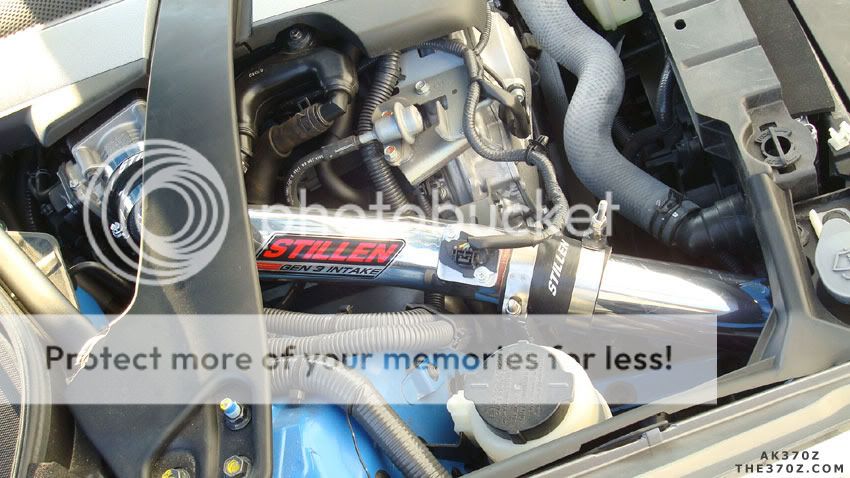  Engine cover, Strut brace back on. I really didn't had any chance to drive the car. So I'll post later my impression. I only drove it around the block. It sounded pretty aggressive . I'll post HD videos later but here's quick video with my point and shoot camereIt was a great install. I have learned a lot from the install. I now know how to take off the bumper . The intake build quality was GREAT. Even the slots that MAF goes in, was perfect size (no gap). I'll post later how I like the intake in a few days!
__________________
The370Z Signature Pictures ll Want to rock our forum decals on your car? Then click here! ll How to Embed YouTube Videos In a Post STOP! (Hammertime) ll Become a Premium Member Click HERE ll F.A.Q. Are You a Nissan Dealer? Click Here to Become A "Supporting Dealer" and Start Listing Your 370Zs In Our Inventory Section My Monterey Blue Z ll My Exhaust -->  My Intake --> My Intake -->  G3 G3 Nissan's Official Response Regarding Oil Temp Issue: CLICK HERE Need a Set of Cheap Winter wheels /Tires? Then Visit The Banner Link Below and Place Your Order. You'll Help Keep The370Z Alive.  |

|

|
| Bookmarks |
|
|
 Similar Threads
|
||||
| Thread | Thread Starter | Forum | Replies | Last Post |
| Fujimura cf Rear diffuser installed! (with pics)( AK370Z) | AK370Z | Exterior & Interior | 73 | 04-24-2016 04:47 PM |
| Finally Got my exhaust! HKS Hi-Power Ti Exhaust (many Pics, Video inside AK370Z) | AK370Z | Intake/Exhaust | 102 | 05-11-2013 01:32 PM |
| Finally Fully Detailed My 370Z with Porter Cable (AK370Z) 90+ pics inside | AK370Z | Detailing / Washing / Waxing / Cosmetic Maintenance and Repair | 24 | 06-11-2011 08:48 PM |
| finally amuse stti extra exhaust arrived + lots of pics | zuperman 370 | Intake/Exhaust | 22 | 03-16-2011 12:25 AM |
| Installed my Stillen G3s. lots of pics and a short review | ssqpolo | Nissan 370Z Photos / Spyshots / Video / Media Gallery | 45 | 09-23-2009 03:20 PM |


 39Likes


 Threaded Mode

