Nissan 370Z Forum  

DIY: STILLEN 370Z Front Splitter Install

Picked up a STILLEN front splitter and installed it! HUGE thanks to Josh@STILLEN! Here it is! Needed Tools: Jack & Jack stands Screw Driver Wax and Grease remover Denatured Alcohol

Go Back   Nissan 370Z Forum > Nissan 370Z Tech Area > DIY Section (Do-It-Yourself)


Like Tree5Likes

Reply
 
LinkBack Thread Tools Display Modes
Old 11-20-2010, 02:09 PM   #1 (permalink)
A True Z Fanatic
 
TypeOne's Avatar
 
Join Date: Jul 2010
Location: Baton Rouge, LA
Posts: 2,682
Drives: BSM 370
Rep Power: 1850
TypeOne has a reputation beyond reputeTypeOne has a reputation beyond reputeTypeOne has a reputation beyond reputeTypeOne has a reputation beyond reputeTypeOne has a reputation beyond reputeTypeOne has a reputation beyond reputeTypeOne has a reputation beyond reputeTypeOne has a reputation beyond reputeTypeOne has a reputation beyond reputeTypeOne has a reputation beyond reputeTypeOne has a reputation beyond repute
Send a message via AIM to TypeOne
Default DIY: STILLEN 370Z Front Splitter Install

Picked up a STILLEN front splitter and installed it!

HUGE thanks to Josh@STILLEN!

Here it is!

Needed Tools:
Jack & Jack stands
Screw Driver
Wax and Grease remover

Denatured Alcohol
Shop towels

Recommended Tools:
Lift
Power Drill
A second set of hands to help hold the lip in place


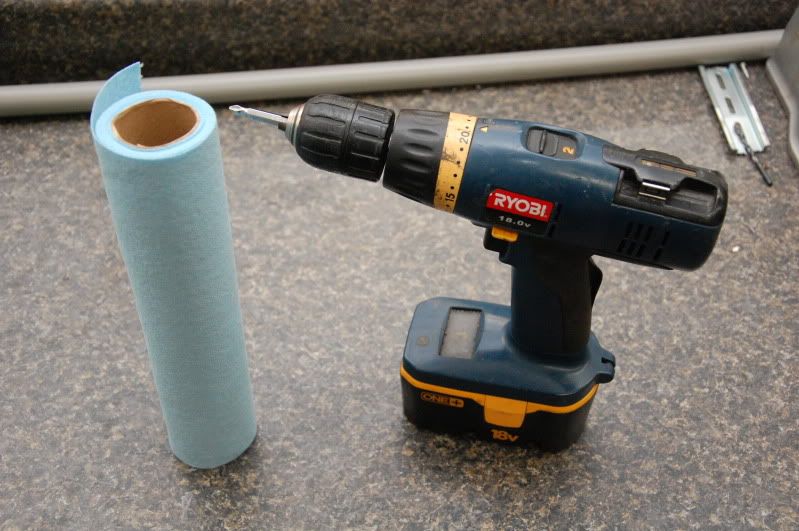
Install time: 30 mins (with jack and stands 45mins)
Install Difficulty: .5 out of 10

The lips was very well packaged and shipping was super fast!

BEFORE PICS: (please excuse my dirty shop )


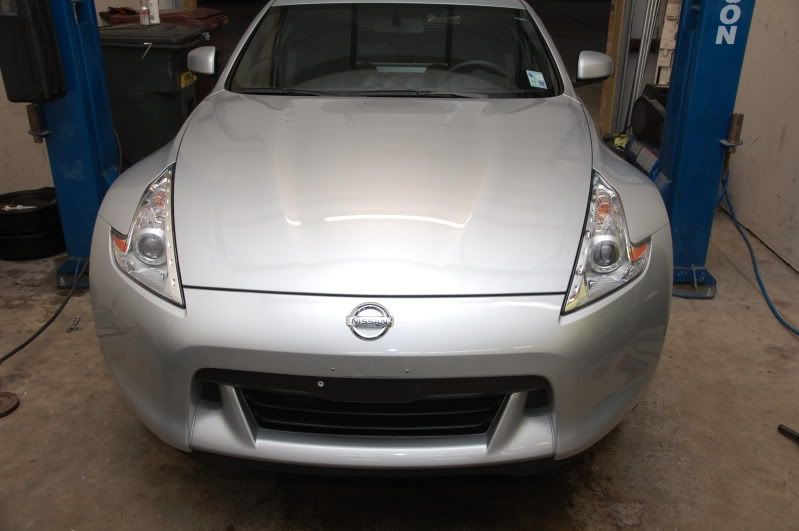
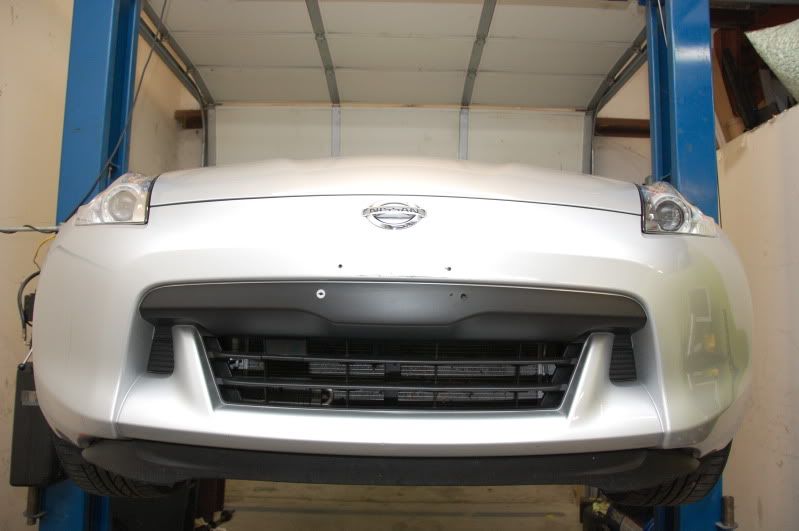
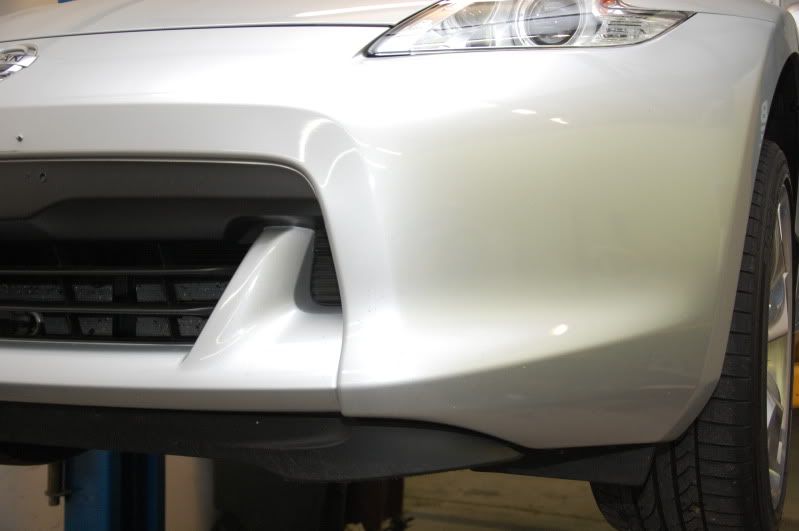
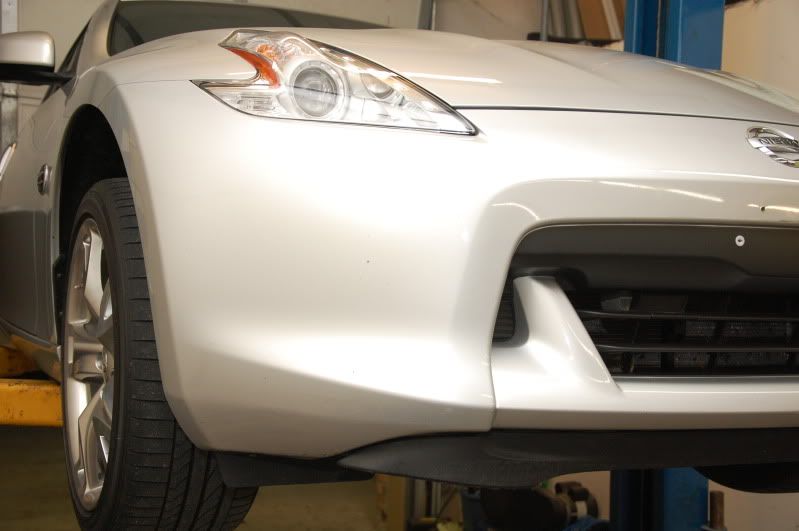
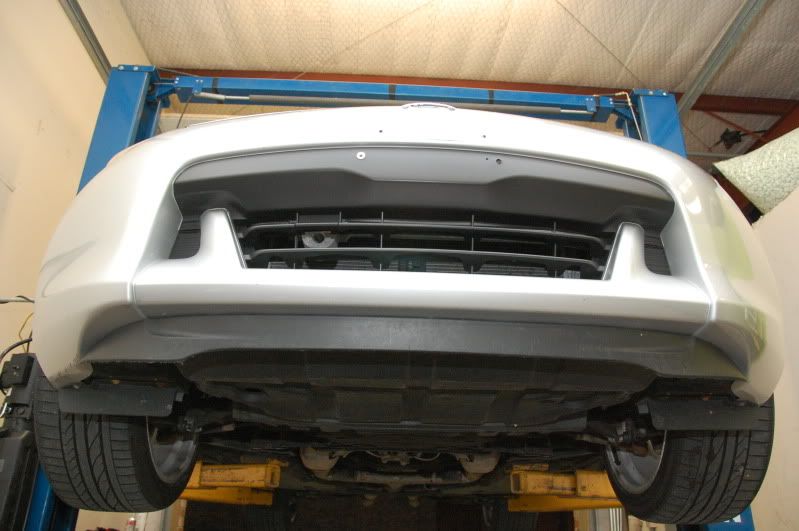
Step 1.
Jack the front of your car up, or use a car lift (as pictured)


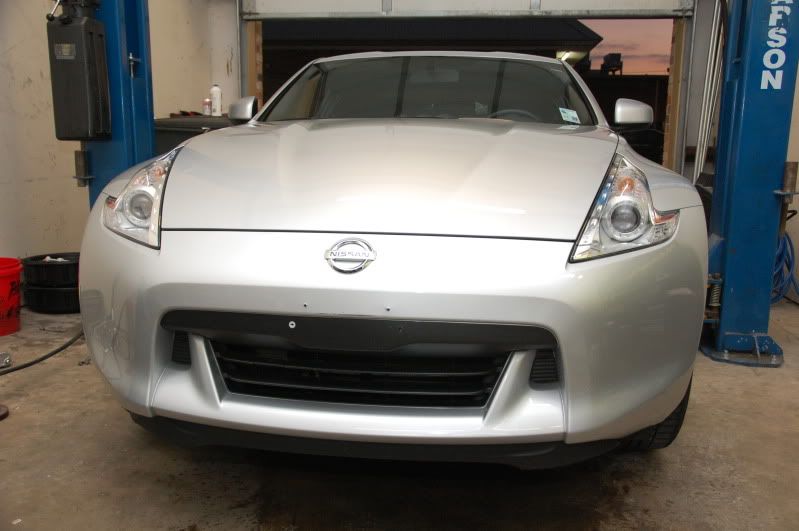
Step 2.
Remove the lip from the package (if you haven't already! )


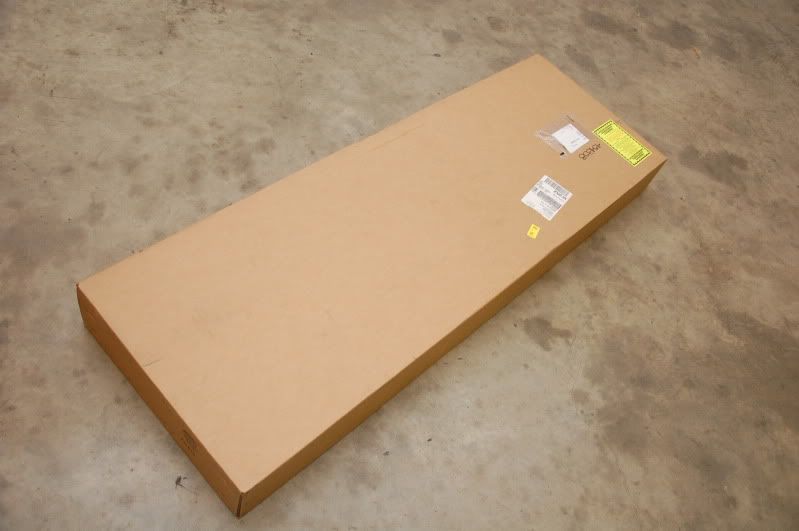
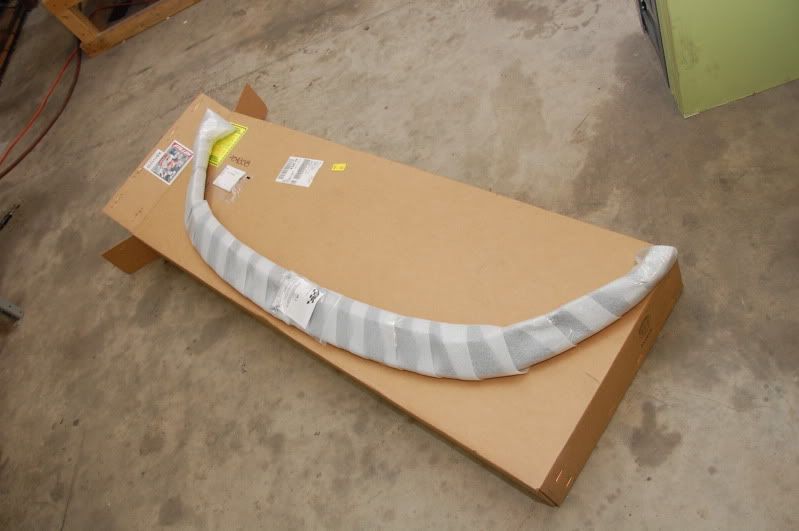
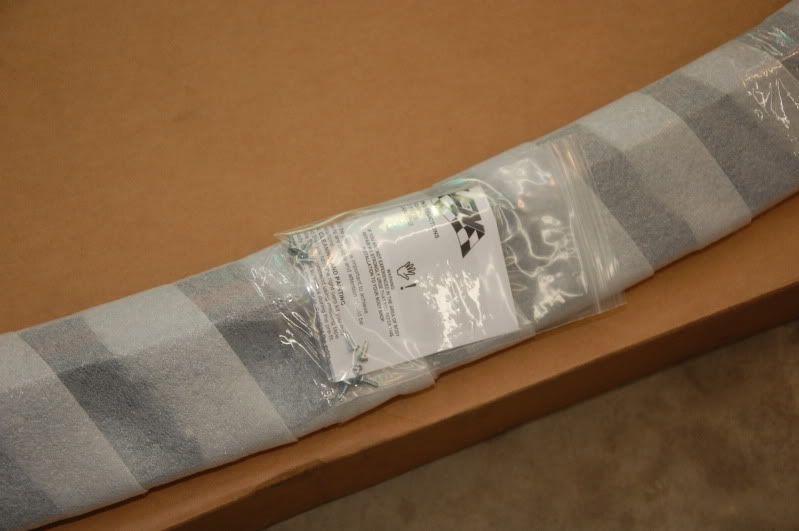
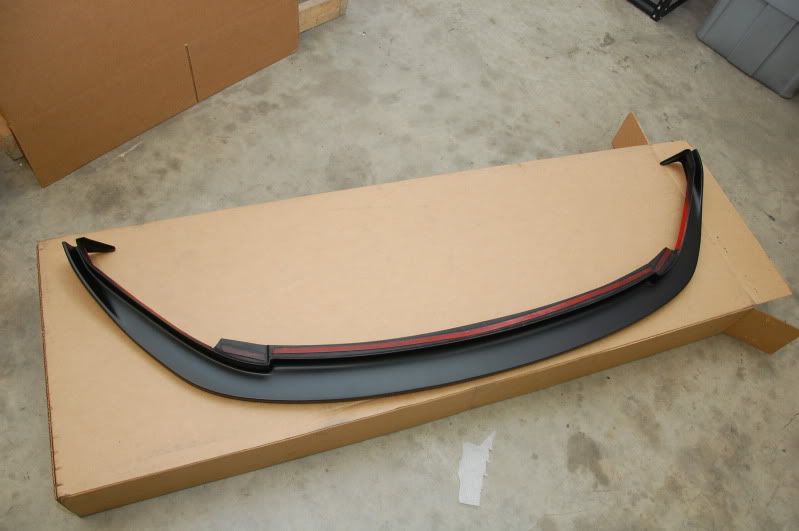
Step 3.
Hold the lip up to the bumper and check for fitment issues. (Mine had zero issues so this was pretty easy)


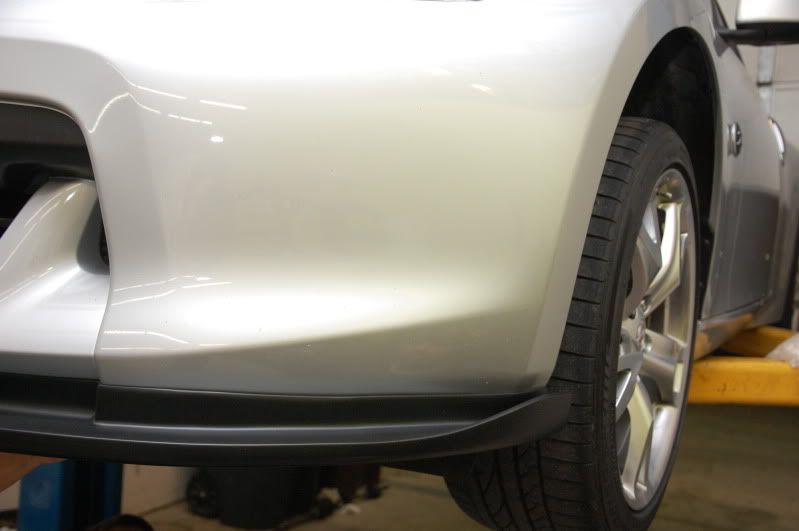
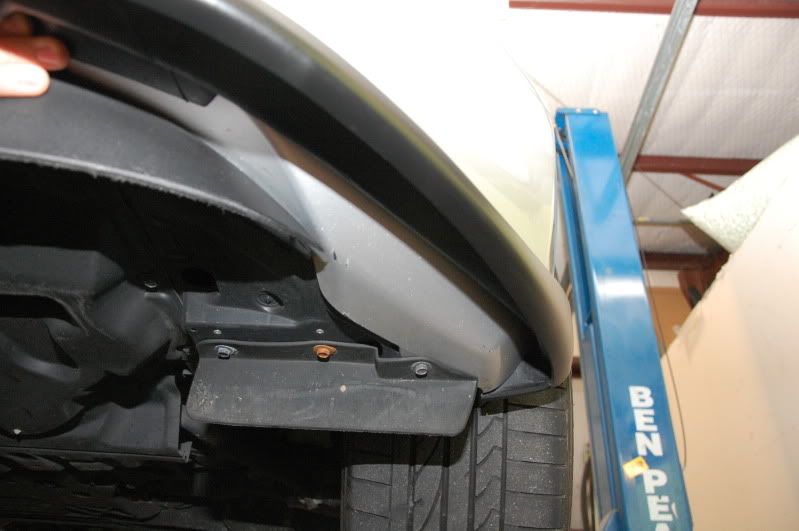
Step 4.
Take some shop towels and grease remover and wipe down the lower section of the bumper.
**This is very important as the lip has double sided 3M tape. If grease, oil or any other type of surface containment can compromise the tape from sticking.**


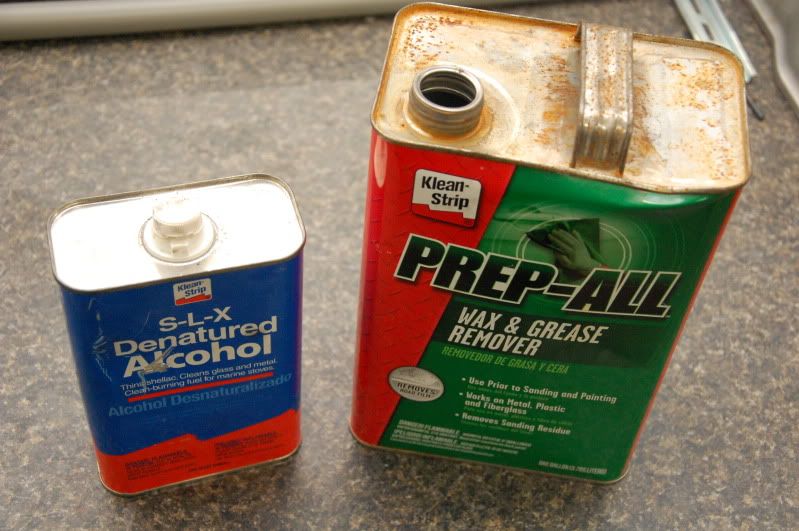
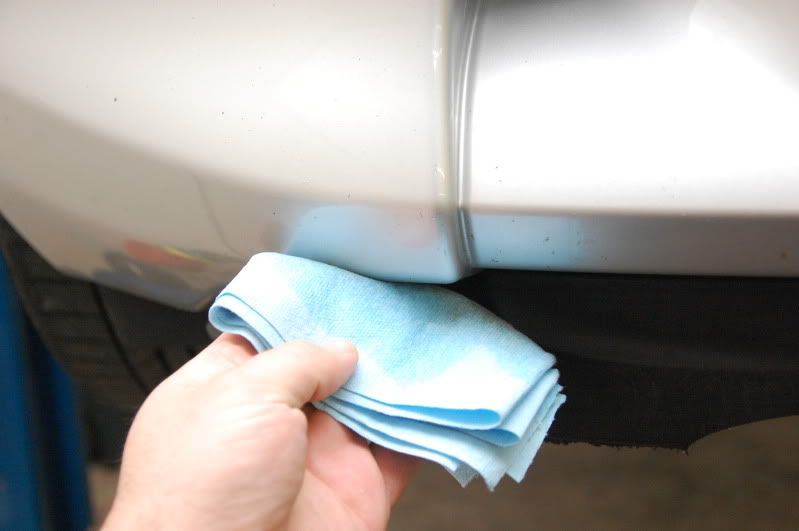
Step 5.
Once you've finished cleaning the lip with grease remover, take more shop towels and clean it again with denatured alcohol. This will remove whatever the grease remover left behind, leaving the surface even cleaner.


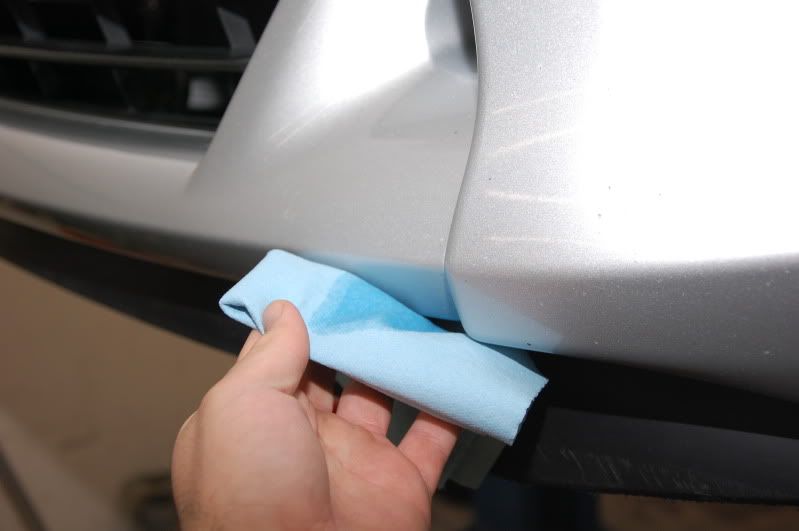
Step 6.
Wipe down the lip and remove and dust or dirt. Then remove the red backing cover off the 3M tape.


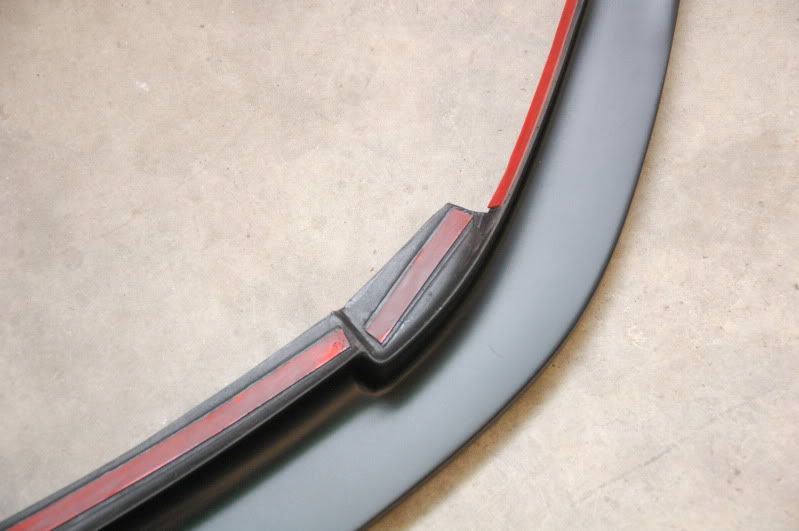
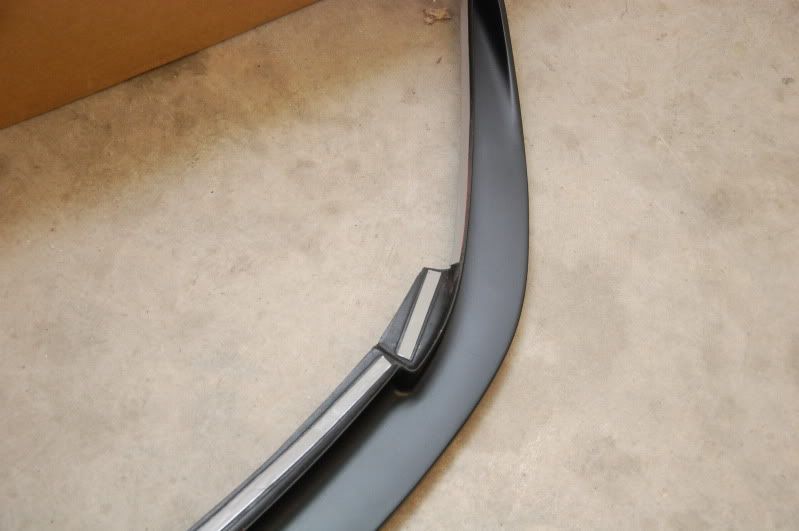
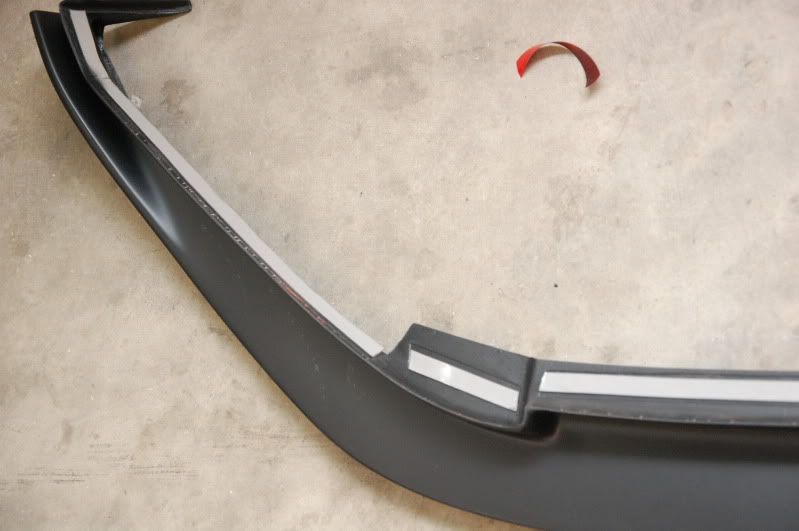
Step 7.
Since the tape is really a one time use thing, you've got to be careful when holding it up. My advice is to hold the lip up to the bumper in the middle and push it as far back as it can go.


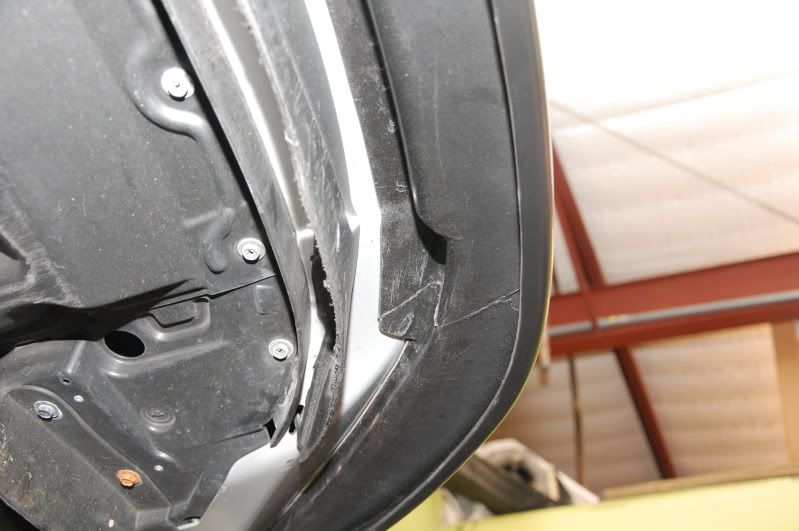
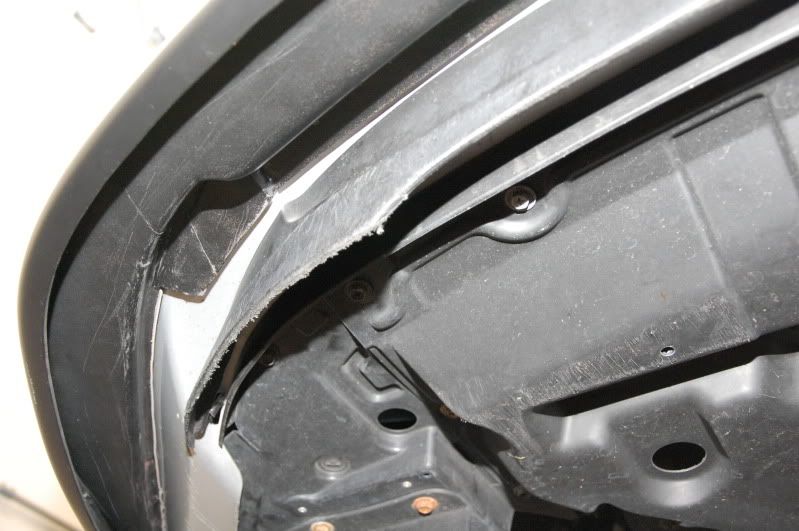
Then snap the sides of the lip over the bottom edge of the bumper fascia.


Step 8.
Once the lip is secured to the bumper with tape, it's time to use the supplied self taping screws to the underside for added strength. I put 2 in the sides, and the rest evenly throughout the front.


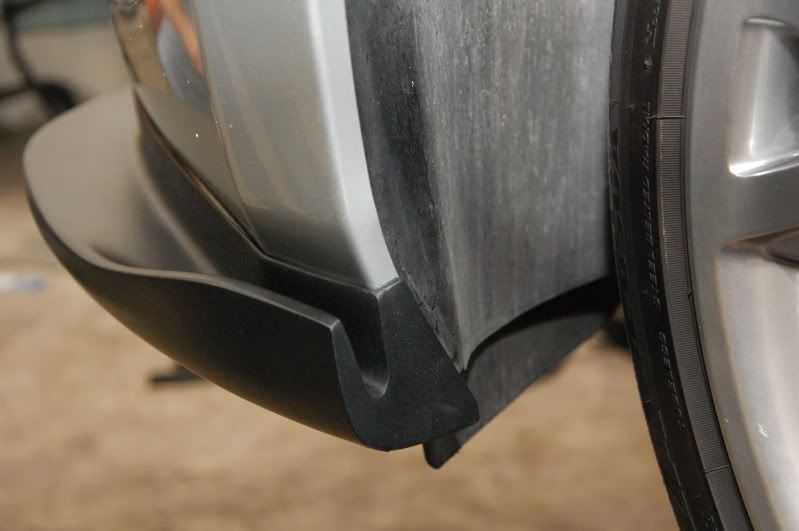
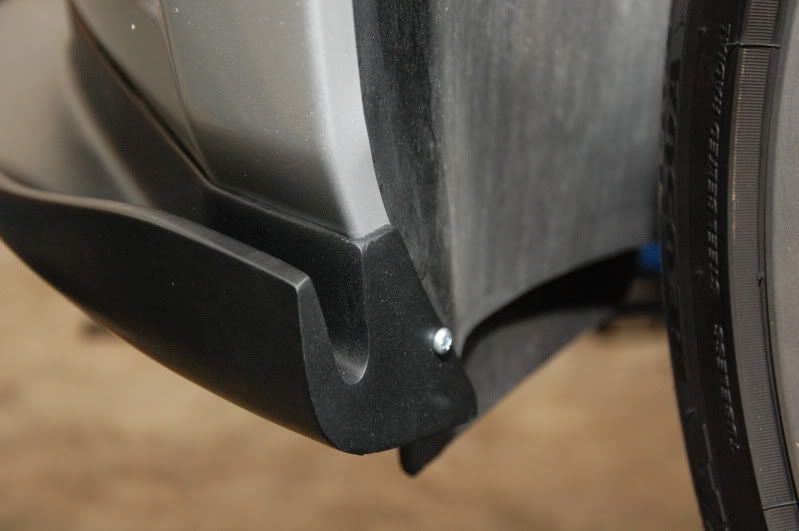
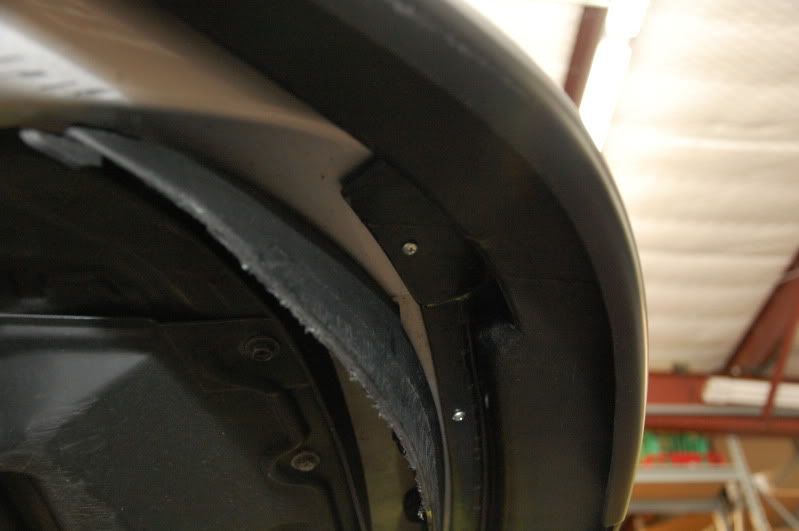
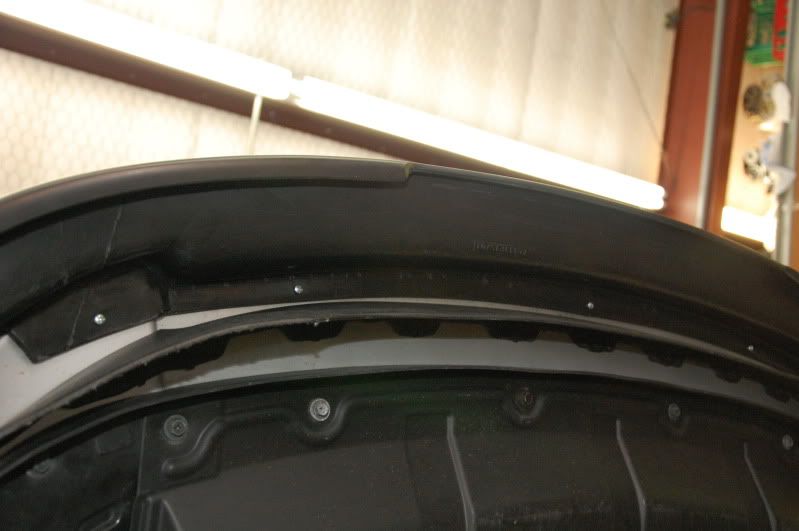
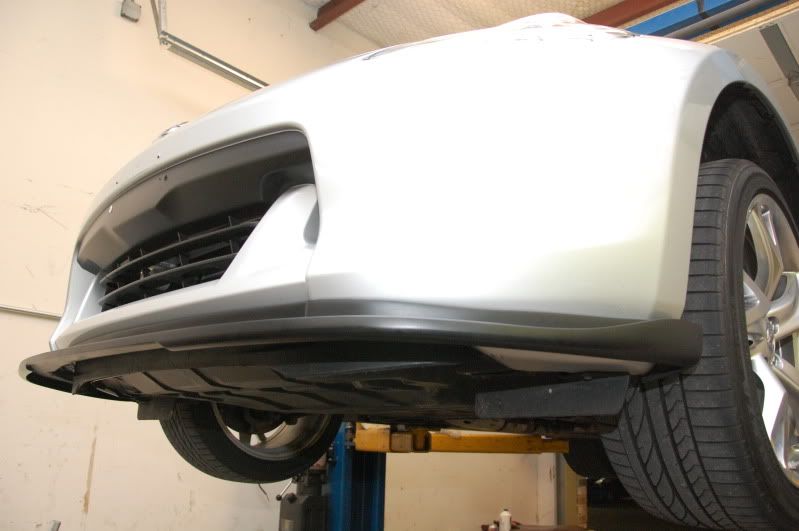
Step 9.
Lower the car and wipe off any dirt or hand prints and enjoy!


After pictures:
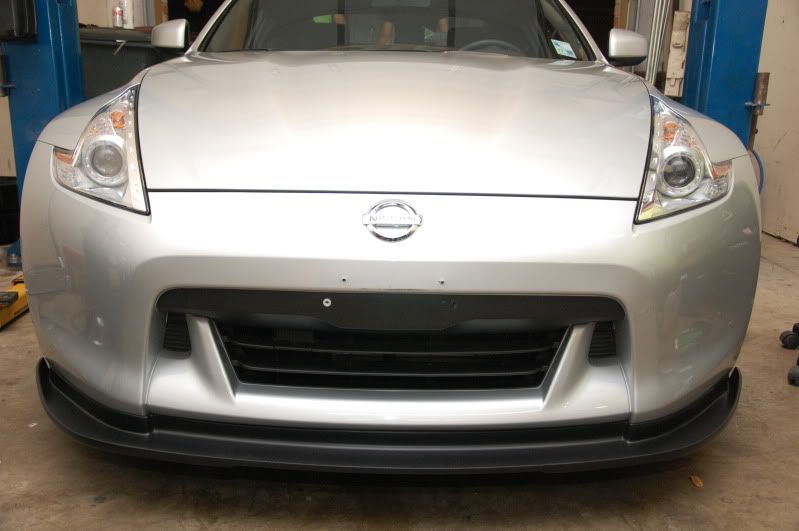
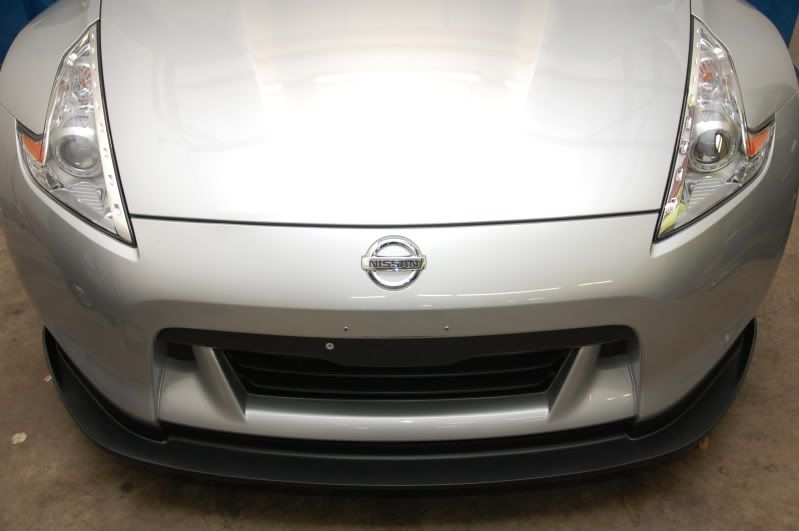
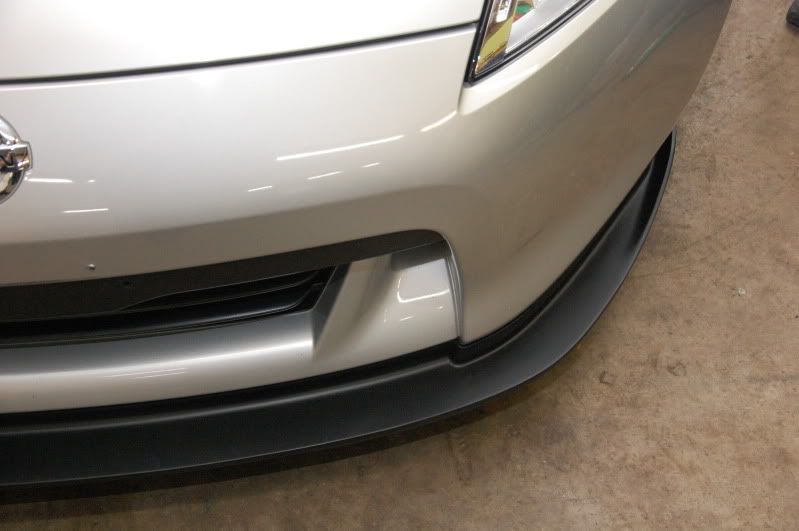
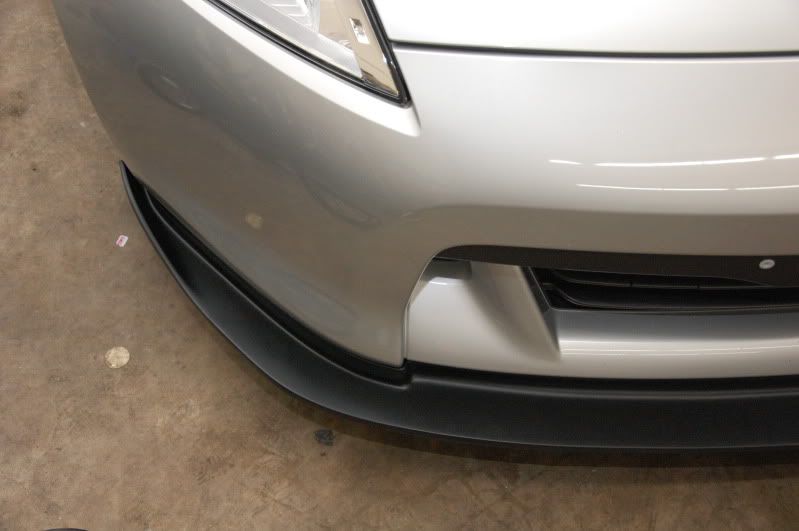
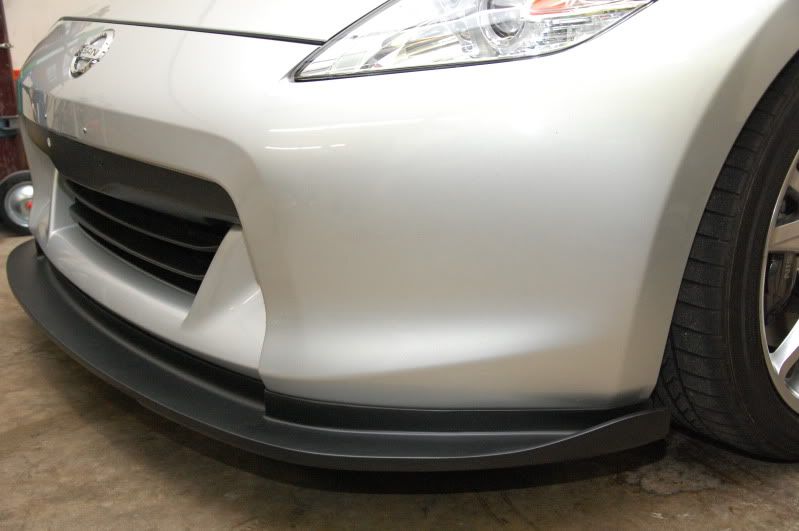


Daylight pictures:


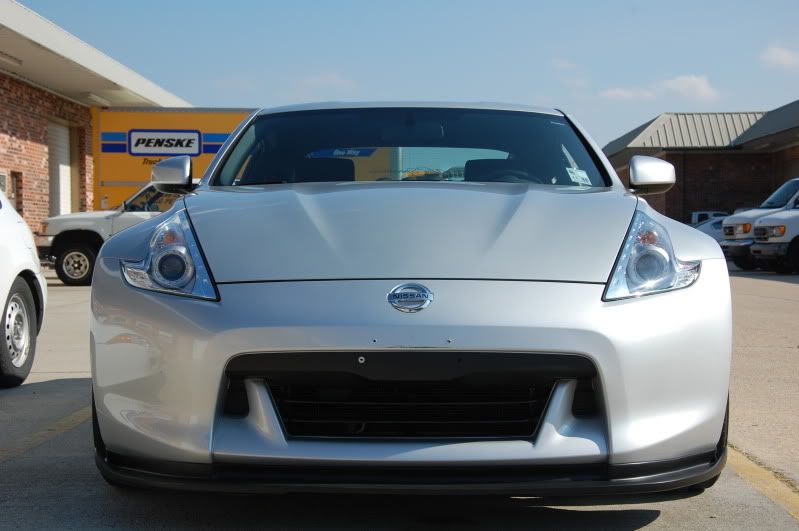
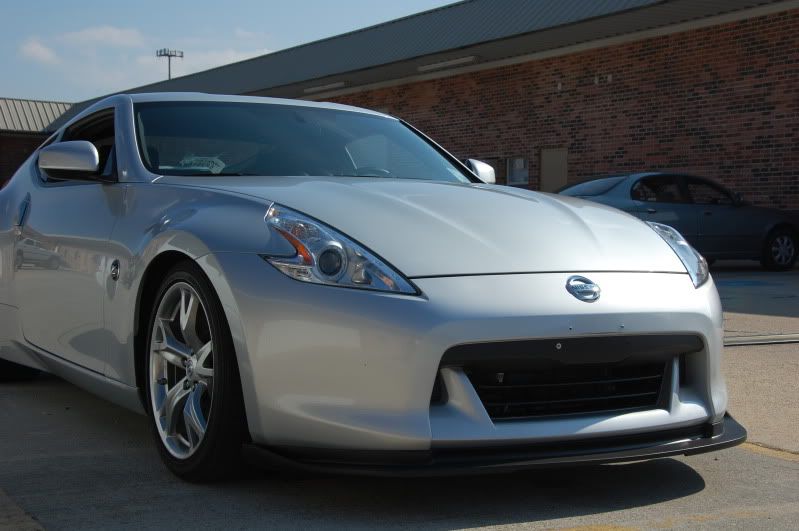
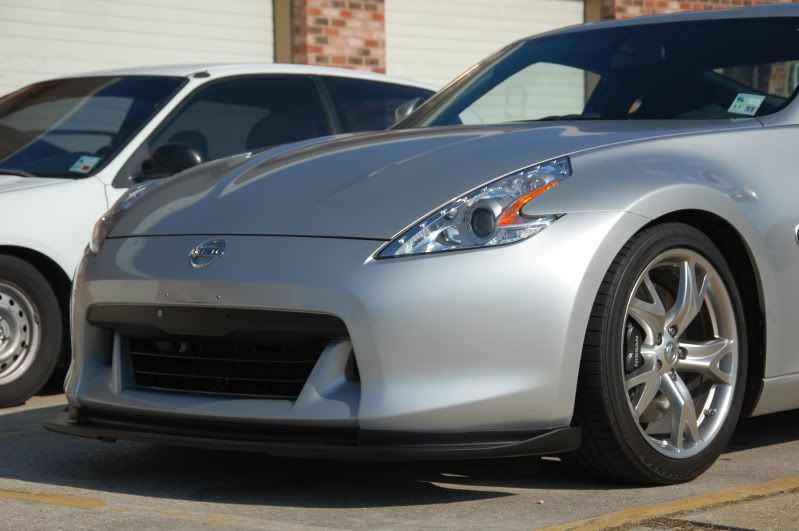
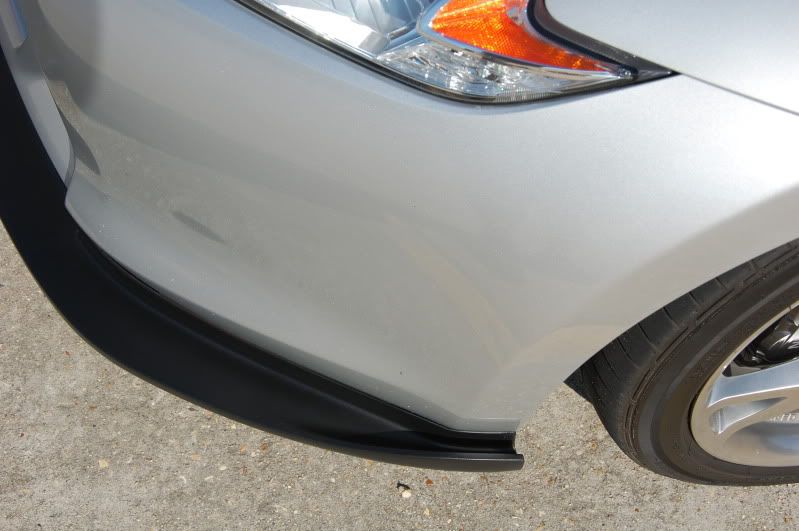
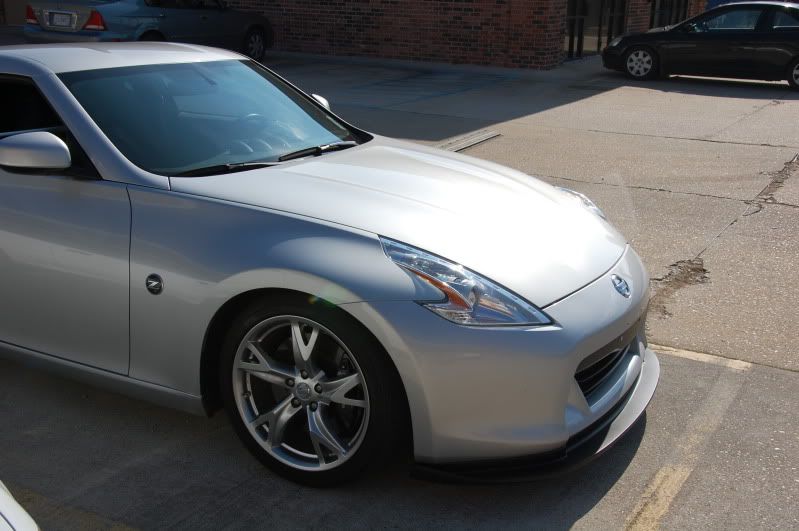
Conclusions:
I love this lip. I've been looking for lips for a long time and I really haven't found any that I really liked. I stumbled across the STILLEN lip on their site and had to have it, and I'm SUPER impressed with how well it fits. It's near OEM quality. For the price and quality, you can't beat it!

Check out STILLEN page for ordering and pricing info!

Thanks for checking this out, and if you've found it helpful, give me rep!


-David

**EDIT** 10/2/11

Updated picture of the lip color matched
370Zsteve, bombdefuzer and jberry like this.

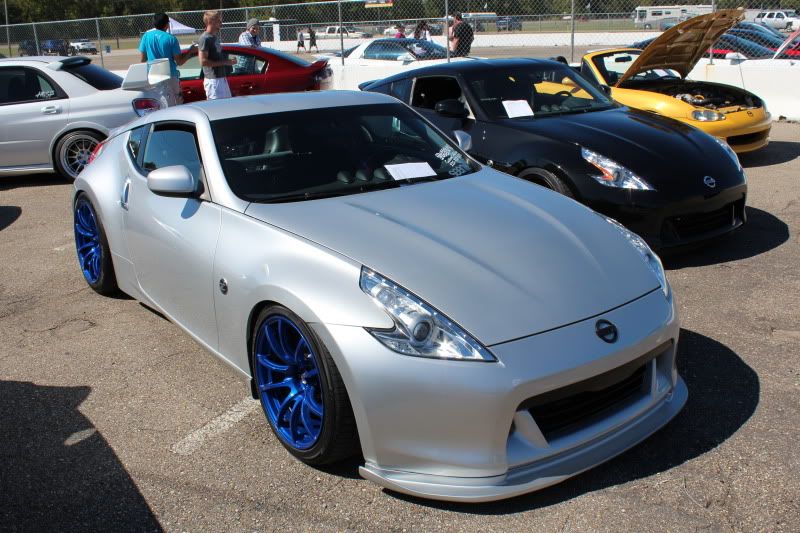
Last edited by TypeOne; 10-03-2011 at 02:02 PM.
TypeOne is offline   Reply With Quote
Old 11-20-2010, 03:15 PM   #2 (permalink)
Enthusiast Member
 
Paul_S's Avatar
 
Join Date: Sep 2009
Location: England
Posts: 257
Drives: UK Yellow 370Z
Rep Power: 15
Paul_S is on a distinguished road
Default

Nice guide

Did you drill a pilot hole for the screws or just wind them in?

I think the only thing I might change is to use some black screws or different fixings where you can see them in the wheel arch.

I'd like to see one on a yellow 370
__________________
In the UK? Check out nissansportz.com - 350Z, GT-R, 370Z and more...


2004 Sunset 350Z to 2009 Limited Edition Ultimate Yellow 370Z
Paul_S is offline   Reply With Quote
Old 11-20-2010, 03:21 PM   #3 (permalink)
A True Z Fanatic
 
TypeOne's Avatar
 
Join Date: Jul 2010
Location: Baton Rouge, LA
Posts: 2,682
Drives: BSM 370
Rep Power: 1850
TypeOne has a reputation beyond reputeTypeOne has a reputation beyond reputeTypeOne has a reputation beyond reputeTypeOne has a reputation beyond reputeTypeOne has a reputation beyond reputeTypeOne has a reputation beyond reputeTypeOne has a reputation beyond reputeTypeOne has a reputation beyond reputeTypeOne has a reputation beyond reputeTypeOne has a reputation beyond reputeTypeOne has a reputation beyond repute
Send a message via AIM to TypeOne
Default

Quote:
Originally Posted by Paul_S View Post
Nice guide

Did you drill a pilot hole for the screws or just wind them in?

I think the only thing I might change is to use some black screws or different fixings where you can see them in the wheel arch.

I'd like to see one on a yellow 370
They are self tapping, so you don't need to drill a pilot hole.

I used a blotch of black touch up paint and dabbed the side screws with it so they are less noticeable. Alternatively, you could use a standard automotive clip, one you'd find in the misc hardware section of your local auto parts store.

For those, you would need to drill a pilot hole.

TypeOne is offline   Reply With Quote
Old 11-20-2010, 03:33 PM   #4 (permalink)
Enthusiast Member
 
Paul_S's Avatar
 
Join Date: Sep 2009
Location: England
Posts: 257
Drives: UK Yellow 370Z
Rep Power: 15
Paul_S is on a distinguished road
Default

Good answers
__________________
In the UK? Check out nissansportz.com - 350Z, GT-R, 370Z and more...


2004 Sunset 350Z to 2009 Limited Edition Ultimate Yellow 370Z
Paul_S is offline   Reply With Quote
Old 11-20-2010, 03:48 PM   #5 (permalink)
Administrator
 
Trips's Avatar
 
Join Date: May 2009
Location: Disneyland, Ca
Posts: 8,728
Drives: 🔰
Rep Power: 10
Trips has a reputation beyond reputeTrips has a reputation beyond reputeTrips has a reputation beyond reputeTrips has a reputation beyond reputeTrips has a reputation beyond reputeTrips has a reputation beyond reputeTrips has a reputation beyond reputeTrips has a reputation beyond reputeTrips has a reputation beyond reputeTrips has a reputation beyond reputeTrips has a reputation beyond repute
Default

Great DiY again! Thanks for taking the time to do this. It came out really nice.
I wonder why you just didn't remove the original chin spoiler?
Nonetheless it came out nice.
A rep to you Sir
__________________


http://www.the370z.com/payments.php
Trips is offline   Reply With Quote
Old 11-20-2010, 05:08 PM   #6 (permalink)
The370Z.com Sponsor
 
Josh@STILLEN's Avatar
 
Join Date: Dec 2008
Location: Costa Mesa, CA
Posts: 1,197
Drives: 2004 G35 Coupe 6MT
Rep Power: 533
Josh@STILLEN has a reputation beyond reputeJosh@STILLEN has a reputation beyond reputeJosh@STILLEN has a reputation beyond reputeJosh@STILLEN has a reputation beyond reputeJosh@STILLEN has a reputation beyond reputeJosh@STILLEN has a reputation beyond reputeJosh@STILLEN has a reputation beyond reputeJosh@STILLEN has a reputation beyond reputeJosh@STILLEN has a reputation beyond reputeJosh@STILLEN has a reputation beyond reputeJosh@STILLEN has a reputation beyond repute
Default

Superb! Thanks so much for the DIY!

Only thing I would recommend is instead of removing all of the 3M backing in one shot.. just start each side with a couple of inches, letting the red backing come out the front, so as you place the part, you can just pull on the backing with the part attached.

Gives you some flexibility instead of the "omg i have one chance".. LOL

Looks fantastic!
370Zsteve and MEZZZER like this.
Josh@STILLEN is offline   Reply With Quote
Old 11-20-2010, 08:28 PM   #7 (permalink)
Track Member
 
weiboy718's Avatar
 
Join Date: May 2010
Location: Bay Area
Posts: 923
Drives: Infiniti G37
Rep Power: 15
weiboy718 will become famous soon enoughweiboy718 will become famous soon enough
Send a message via AIM to weiboy718
Default

Quote:
Originally Posted by Josh@STILLEN View Post
Superb! Thanks so much for the DIY!

Only thing I would recommend is instead of removing all of the 3M backing in one shot.. just start each side with a couple of inches, letting the red backing come out the front, so as you place the part, you can just pull on the backing with the part attached.

Gives you some flexibility instead of the "omg i have one chance".. LOL

Looks fantastic!
hey, i thought you weren't an installer or engineer hahahhaha. how do you know that stuff.
weiboy718 is offline   Reply With Quote
Old 11-20-2010, 10:45 PM   #8 (permalink)
A True Z Fanatic
 
TypeOne's Avatar
 
Join Date: Jul 2010
Location: Baton Rouge, LA
Posts: 2,682
Drives: BSM 370
Rep Power: 1850
TypeOne has a reputation beyond reputeTypeOne has a reputation beyond reputeTypeOne has a reputation beyond reputeTypeOne has a reputation beyond reputeTypeOne has a reputation beyond reputeTypeOne has a reputation beyond reputeTypeOne has a reputation beyond reputeTypeOne has a reputation beyond reputeTypeOne has a reputation beyond reputeTypeOne has a reputation beyond reputeTypeOne has a reputation beyond repute
Send a message via AIM to TypeOne
Default

Good call Josh, that's great advice. I was lucky enough to put it one right with the first time. haha
TypeOne is offline   Reply With Quote
Old 11-21-2010, 05:49 PM   #9 (permalink)
A True Z Fanatic
 
christian370z's Avatar
 
Join Date: Jul 2010
Location: Newport Beach
Posts: 3,900
Drives: 2010 370Z/Saab 900se
Rep Power: 431
christian370z has a reputation beyond reputechristian370z has a reputation beyond reputechristian370z has a reputation beyond reputechristian370z has a reputation beyond reputechristian370z has a reputation beyond reputechristian370z has a reputation beyond reputechristian370z has a reputation beyond reputechristian370z has a reputation beyond reputechristian370z has a reputation beyond reputechristian370z has a reputation beyond reputechristian370z has a reputation beyond repute
Default

Great job snapping so many pictures at all the important angles, very simple and straightforward DIY.

Josh: is it possible to swing by your office and see what it looks like in person before deciding?
__________________
-320whp / 259wftlbs-
SP Rays -- RE-11s -- SpecialtyZ Tune -- Swift Springs -- Stillen 25R Oil Cooler -- Stillen G3 Intakes -- Berk HFCs -- F.I. 12" CBE -- Stillen Sway Bars -- Es14 Spring -- INGS+1 lip -- CF Spoiler -- GTR Start Button -- VLED Parking Lights -- PWJDM V2 shift knob
christian370z is offline   Reply With Quote
Old 11-21-2010, 06:30 PM   #10 (permalink)
The370Z.com Sponsor
 
Josh@STILLEN's Avatar
 
Join Date: Dec 2008
Location: Costa Mesa, CA
Posts: 1,197
Drives: 2004 G35 Coupe 6MT
Rep Power: 533
Josh@STILLEN has a reputation beyond reputeJosh@STILLEN has a reputation beyond reputeJosh@STILLEN has a reputation beyond reputeJosh@STILLEN has a reputation beyond reputeJosh@STILLEN has a reputation beyond reputeJosh@STILLEN has a reputation beyond reputeJosh@STILLEN has a reputation beyond reputeJosh@STILLEN has a reputation beyond reputeJosh@STILLEN has a reputation beyond reputeJosh@STILLEN has a reputation beyond reputeJosh@STILLEN has a reputation beyond repute
Default

Quote:
Originally Posted by christian370z View Post
Josh: is it possible to swing by your office and see what it looks like in person before deciding?
Sure! With the manufacturing setup we have with urethane parts we don't have to shelve a lot of stuff, since we can make them virtually on demand, so just let me know when and I'll make sure one is made and prepped.

Maybe you'll be tempted to just leave with it..
Josh@STILLEN is offline   Reply With Quote
Old 11-23-2010, 12:31 AM   #11 (permalink)
A True Z Fanatic
 
christian370z's Avatar
 
Join Date: Jul 2010
Location: Newport Beach
Posts: 3,900
Drives: 2010 370Z/Saab 900se
Rep Power: 431
christian370z has a reputation beyond reputechristian370z has a reputation beyond reputechristian370z has a reputation beyond reputechristian370z has a reputation beyond reputechristian370z has a reputation beyond reputechristian370z has a reputation beyond reputechristian370z has a reputation beyond reputechristian370z has a reputation beyond reputechristian370z has a reputation beyond reputechristian370z has a reputation beyond reputechristian370z has a reputation beyond repute
Default

Quote:
Originally Posted by Josh@STILLEN View Post
Sure! With the manufacturing setup we have with urethane parts we don't have to shelve a lot of stuff, since we can make them virtually on demand, so just let me know when and I'll make sure one is made and prepped.

Maybe you'll be tempted to just leave with it..
Haha, that is generally what happens in my case. I will definitely do that, probably over Christmas break perhaps.
__________________
-320whp / 259wftlbs-
SP Rays -- RE-11s -- SpecialtyZ Tune -- Swift Springs -- Stillen 25R Oil Cooler -- Stillen G3 Intakes -- Berk HFCs -- F.I. 12" CBE -- Stillen Sway Bars -- Es14 Spring -- INGS+1 lip -- CF Spoiler -- GTR Start Button -- VLED Parking Lights -- PWJDM V2 shift knob
christian370z is offline   Reply With Quote
Old 11-23-2010, 01:09 AM   #12 (permalink)
A True Z Fanatic
 
ThoriumHotdog's Avatar
 
Join Date: Sep 2010
Location: TX
Posts: 1,104
Drives: Turbo CRX si
Rep Power: 16
ThoriumHotdog is a jewel in the roughThoriumHotdog is a jewel in the roughThoriumHotdog is a jewel in the roughThoriumHotdog is a jewel in the rough
Default

Are the two screws in the wheel well required? I know you mentioned the possibility of using a clip but are they needed in that spot or did you just add them for extra strength?
ThoriumHotdog is offline   Reply With Quote
Old 11-23-2010, 01:11 AM   #13 (permalink)
Track Member
 
Join Date: Jan 2009
Location: league city, tx
Posts: 757
Drives: 09' Solid Red 370z
Rep Power: 17
iceman21_23 is on a distinguished road
Default

Only issue i had with my install was that the screws provided didn't quite grab enough... so i went ahead and just bought some longer/thicker ones and now no issues I love this lip Thanks Stillen!
iceman21_23 is offline   Reply With Quote
Old 11-23-2010, 02:19 AM   #14 (permalink)
A True Z Fanatic
 
Boost_lee's Avatar
 
Join Date: Feb 2009
Location: SATX
Posts: 2,813
Drives: 09 370Z TT 6MT
Rep Power: 29
Boost_lee has a reputation beyond reputeBoost_lee has a reputation beyond reputeBoost_lee has a reputation beyond reputeBoost_lee has a reputation beyond reputeBoost_lee has a reputation beyond reputeBoost_lee has a reputation beyond reputeBoost_lee has a reputation beyond reputeBoost_lee has a reputation beyond reputeBoost_lee has a reputation beyond reputeBoost_lee has a reputation beyond reputeBoost_lee has a reputation beyond repute
Default

Wow very nice. If I ever get tired of my current lip, this will def be my next choice
Boost_lee is offline   Reply With Quote
Old 11-24-2010, 11:31 AM   #15 (permalink)
A True Z Fanatic
 
TypeOne's Avatar
 
Join Date: Jul 2010
Location: Baton Rouge, LA
Posts: 2,682
Drives: BSM 370
Rep Power: 1850
TypeOne has a reputation beyond reputeTypeOne has a reputation beyond reputeTypeOne has a reputation beyond reputeTypeOne has a reputation beyond reputeTypeOne has a reputation beyond reputeTypeOne has a reputation beyond reputeTypeOne has a reputation beyond reputeTypeOne has a reputation beyond reputeTypeOne has a reputation beyond reputeTypeOne has a reputation beyond reputeTypeOne has a reputation beyond repute
Send a message via AIM to TypeOne
Default

Quote:
Originally Posted by ThoriumHotdog View Post
Are the two screws in the wheel well required? I know you mentioned the possibility of using a clip but are they needed in that spot or did you just add them for extra strength?
Honestly... I don't think they were necessary, but it helps the end sit flush. You could use a clip, or some double sided tape to help it... I used one of the screws that came with the packaging just to be safe.

It wasn't going anywhere before.. but if anything, the sides won't squirm around and scuff up my paint.

TypeOne is offline   Reply With Quote
Reply

Bookmarks


Posting Rules
You may not post new threads
You may not post replies
You may not post attachments
You may not edit your posts

BB code is On
Smilies are On
[IMG] code is On
HTML code is Off
Trackbacks are On
Pingbacks are On
Refbacks are On


Similar Threads
Thread Thread Starter Forum Replies Last Post
STILLEN 370Z front splitter!! TypeOne Exterior & Interior 55 06-15-2011 02:29 PM
WTB: Stillen front splitter... iceman21_23 Parts for sale (Private Classifieds) 0 10-24-2010 07:07 PM
stillen front canard and splitter chuckd05 Exterior & Interior 81 05-28-2010 03:26 PM
Altered Atmosphere: 370Z Stillen CAI, Berk HFC, Stillen Exhaust Install Jon@Altered Intake/Exhaust 18 07-03-2009 02:21 AM


All times are GMT -5. The time now is 03:39 AM.


Powered by vBulletin® Version 3.8.4
Copyright ©2000 - 2024, Jelsoft Enterprises Ltd.
Search Engine Optimization by vBSEO 3.6.0 PL2