
 |
I have a 2009 370z Sport and I do all my own work on it. I let some folks barrow my car and someone used a bad cleaner on my
|
|||||||
 25Likes
|
|
LinkBack | Thread Tools | Display Modes |
|
|
#1 (permalink) |
|
A True Z Fanatic
 Join Date: Dec 2011
Location: Pensacola Florida
Posts: 1,696
Drives: Awesome Car
Rep Power: 27            |
I have a 2009 370z Sport and I do all my own work on it. I let some folks barrow my car and someone used a bad cleaner on my dash and it has cracked all over. I searched around for a DIY and didn't find much. So I hope this helps.
There are only 5 mounting points for the dash pad: (2) 10mm bolts under the windshield L/R side under the senors (2) Phillips head screws; 1 on each side. They are under the speakers L/R side (1) 12mm bolt under the glove box. This bolts the air bag to the car. You will leave air bag attached to dash. So there are ton's of DIY's to remove everything thats not the dash: Steering wheel; this is what i used from Mr&Mrs: DIY: Steering Wheel Removal Stereo panel removal: [URL="http://www.the370z.com/diy-section-do-yourself/20361-diy-bose-touring-stereo-non-nav-ipod-interface-upgrade-isimple-media-gateway.html"] If you haven't done it already down load the 370z Manual. It will have exploded views of all the dash panels. Remember this is Dash removal, not cubby, glove box, gauge, turn signal removal. Image shows were the left side 10mm bolt and screw locations are. I already have the dash out. It's easier to show you there locations this way. Remove these to pull the dash. 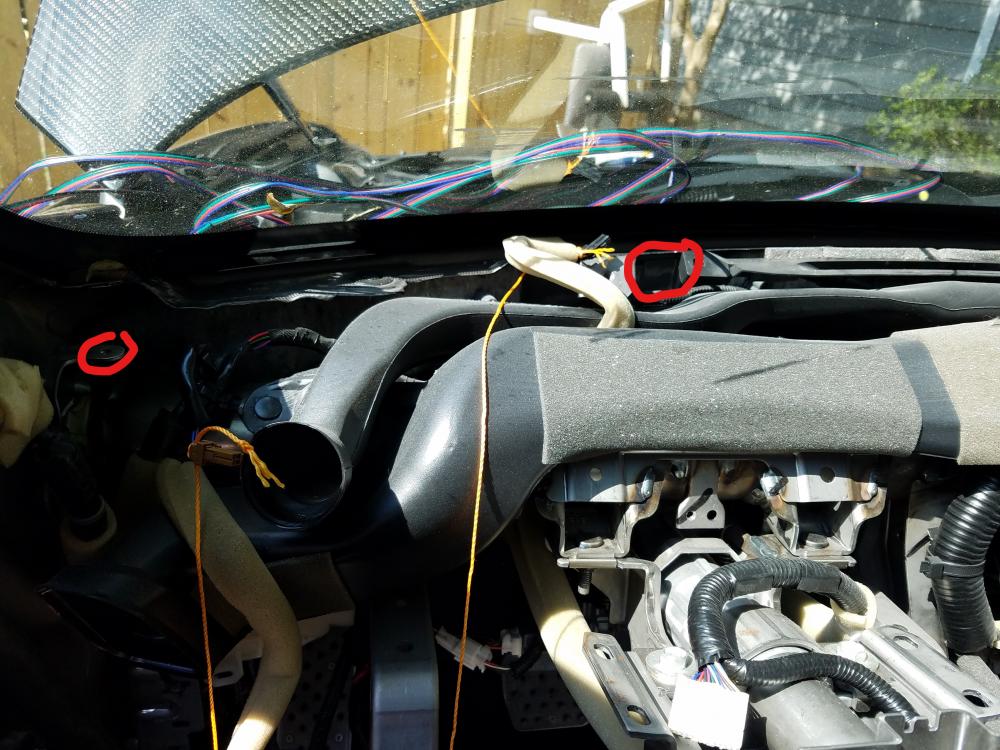 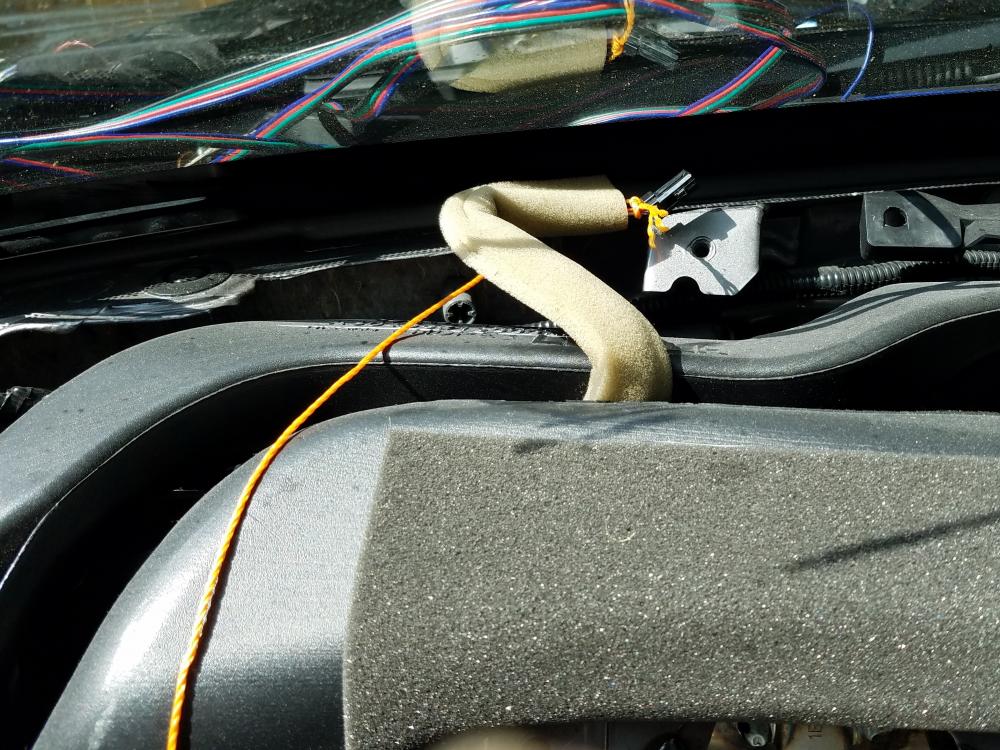 This image shows the right side 10mm bolt, screw under speaker and airbacg 12mm bolt in center of glove box area. Remove these to pull dash. 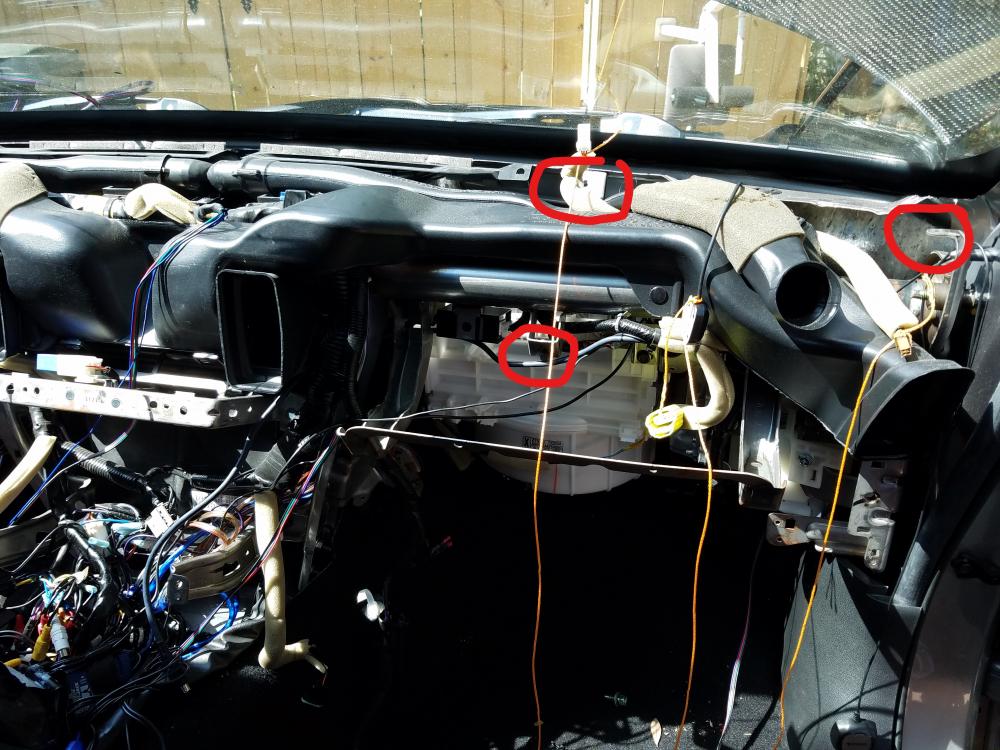 These are the 2 screws on the lower center dash. Most of the mounting was removed during the stereo removal and center console removal. 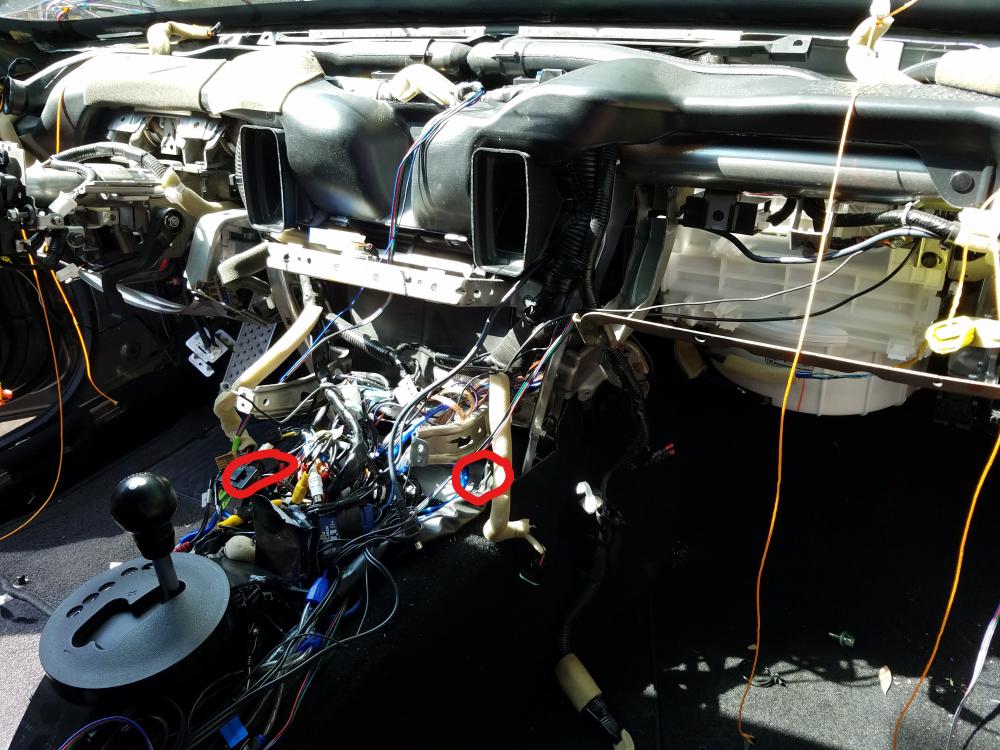 So that's it, easy right. The hard part is the 200 wire harness plugs you need to disconnect before pulling out the dash. Also go slow on removing covers and panels. I removed the drivers seat to get better access under the dash to squeeze clips to loosen the dash and panels up. Once the dash is out it is a good time to mod gauges, pull lighting mod wire, modify radio, install new steering wheel etc.. You have full access and use it to run wiring for future builds. New Dash Install: So i have string attached to all the wiring i need to access to to install sensor, speakers, GPS etc. It made it way easier to get the pad in quickly. 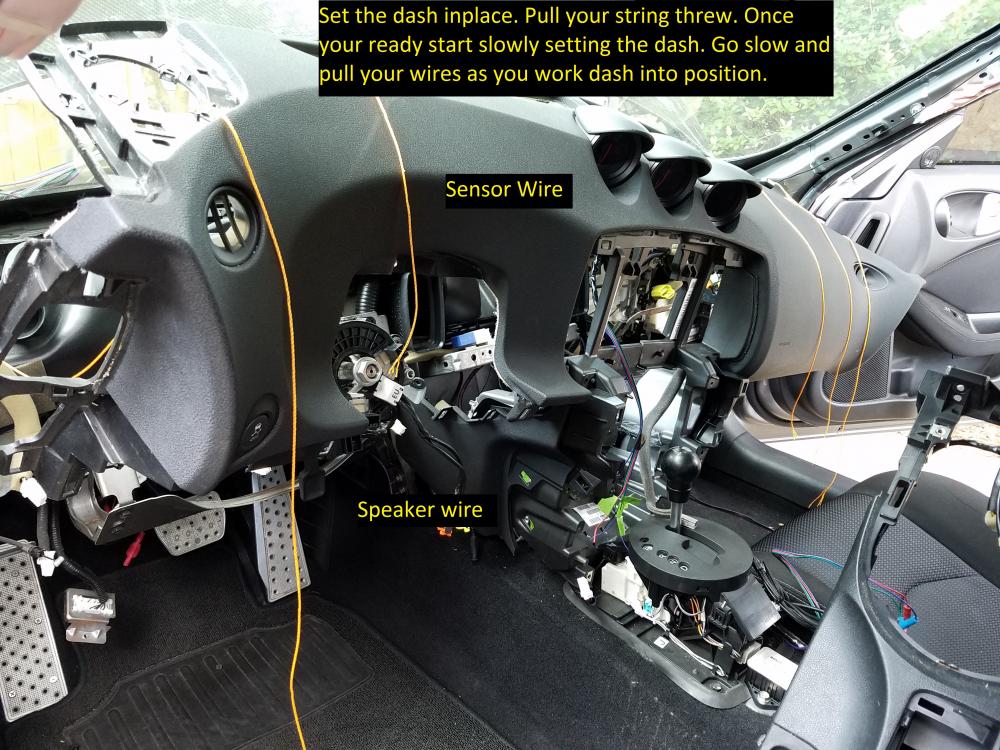 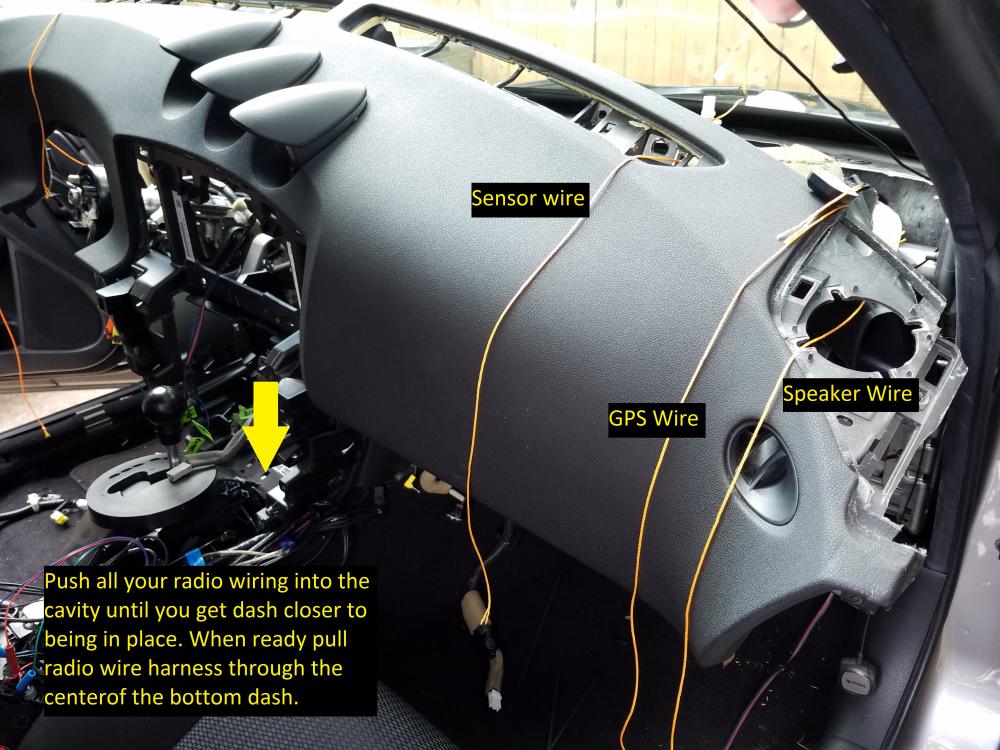 These 2 bolts under the glass i used elec tape and wrapped the head of the bolt; it held the bolt in the 10mm socket with out dropping it into the abyss of my dash. 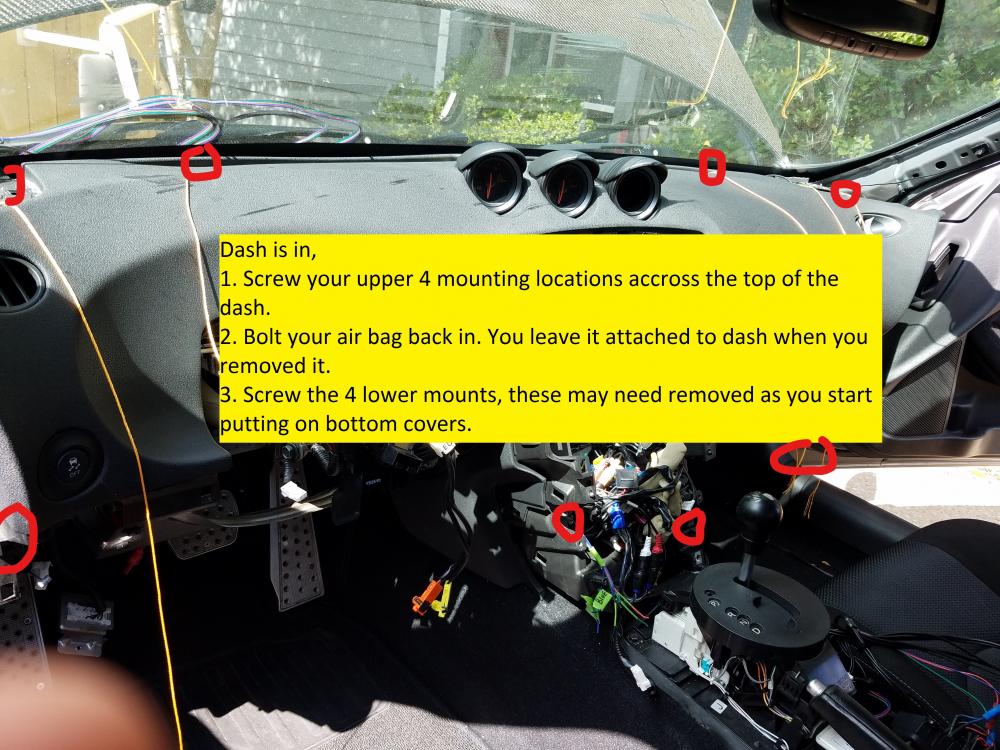 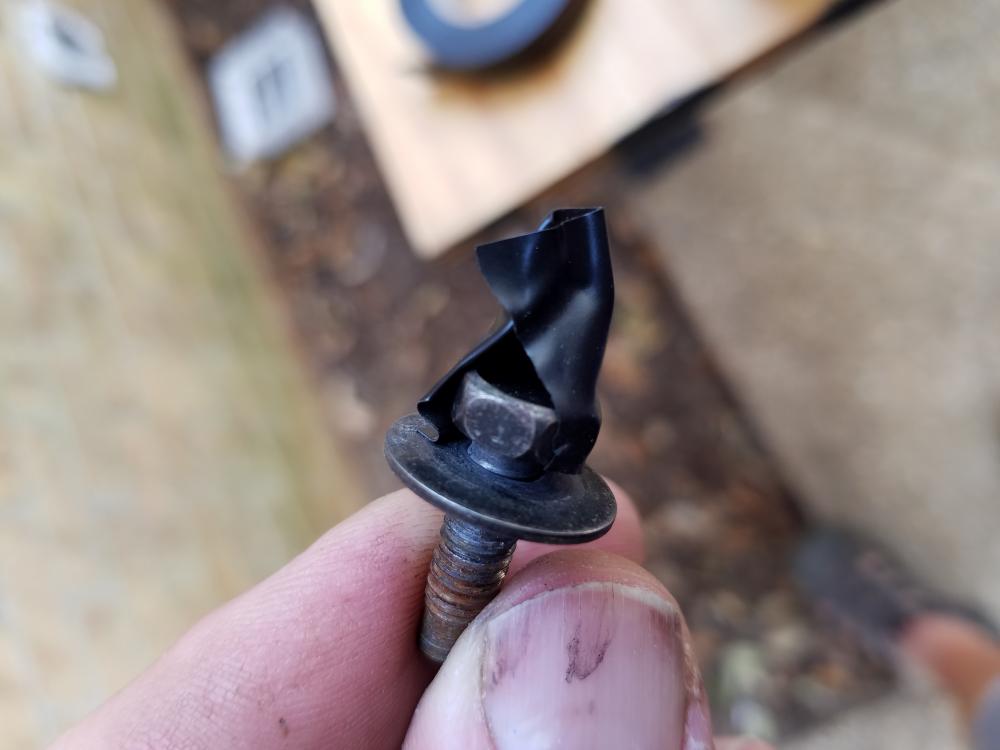 When you have the top bolts in and the screws under the left & right speakers in, don't forget about the air bag bolt 12mm and the 2 screws on the center dash. Left Side: Start installing your blinkers, paddle shiffter (for AT) then gauge cluster in that order. Next install your column wrap. You want this on before steering wheel and airbag. Next the lower panel, install VDC plug, Vent and plug, and the PITA Hood latch wire and OBD Plug. That wraps up the drivers side. I did my seat, A-Piller, kick plates last. Right Side: Plug in the Airbag Plug in & Mount speaker Plug in and mount dash vent and sensor Start mounting glove box, ensure you plug in the light and power to plug. I'm unfuc_ing my stereo right now but will update this after I'm done. Just install your stereo then cubby panels and plug in the GTR Start button. If your stereo reconnect is good and you have no extra plugs go ahead and install the battery. Put your wife in the drivers seat and tell here to close her eyes and start the car lol.. If you missed anything your gauges and OBD will tell you. Trace it down and plug it in. I know this isn't showing all areas of the dash but most of us wouldn't do this with out some understanding of interior panels and basic understanding of cars. Removal was 2 days for me (Bad Back). Install was 1 day after running lighting wires and switches for body and headlight mods. Good luck! Download the manual and take lots of pictures to remember types of screws and bolts that go in specific spots. 
__________________
Did new cool science stuff to the car !!!
http://www.the370z.com/mazoc/99606-z...y-14-17-a.html http://www.the370z.com/diy-section-d...-w-videos.html |
|
|

|
| Bookmarks |
|
|
 Similar Threads
|
||||
| Thread | Thread Starter | Forum | Replies | Last Post |
| Dash Removal | isayimandrew | Texas | 2 | 03-20-2013 08:05 AM |
| Request: Dash Removal | Sh0velMan | DIY Section (Do-It-Yourself) | 3 | 01-29-2013 09:31 AM |
| A/C Removal | Sh0velMan | Track / Autocross / Drifting / Dragstrip | 2 | 11-09-2012 11:09 AM |
| Dash/Interior Removal Thread | Jeffblue | Exterior & Interior | 15 | 11-02-2010 07:46 PM |
| help with gum removal | thispecialk | Nissan 370Z General Discussions | 7 | 08-05-2009 10:41 AM |