
|
By popular demand, here is my best attempt at a DYI for my first mod Before: After: There are some gaps, but this should be more than enough to get
|
|||||||
 |
|
|
LinkBack | Thread Tools | Display Modes |
 08-23-2009, 02:22 PM
|
#1 (permalink) |
|
Base Member
Join Date: Jul 2009
Location: Central FL
Posts: 199
Drives: 2009 370Z Sport
Rep Power: 17  |
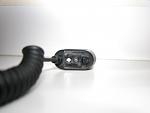
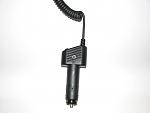
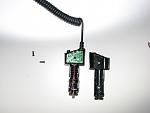
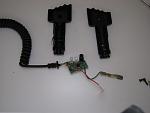
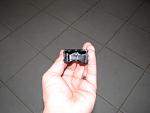
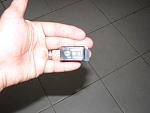
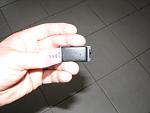
By popular demand, here is my best attempt at a DYI for my first mod
Before: 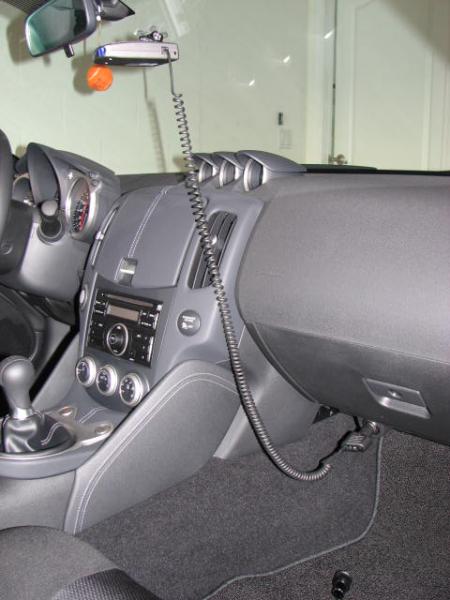 After: 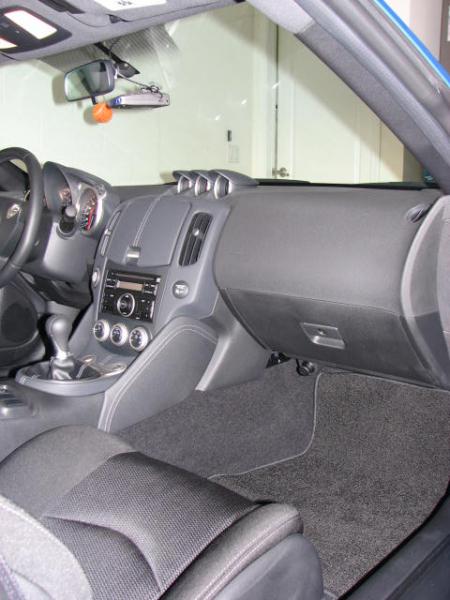  There are some gaps, but this should be more than enough to get you started. Note: For some of the pictures, I used a lighter plug assembly instead of the direct wire kit. The internals are identical - you should be able to connect the dots.
Last edited by Division; 08-26-2009 at 10:02 PM. |

|

|
|
12-09-2009, 05:38 PM
|
#2 (permalink) |
|
Administrator
Join Date: Sep 2008
Location: NJ
Posts: 9,931
Drives: 09 370Z MB Sports M6
Rep Power: 10  |
DIVISION,
Thank you for this DIY. I have asked Matt to do this on his spare time with the power cord of my Escort Passport. This is a cool DIY. thanks again AK
__________________
The370Z Signature Pictures ll Want to rock our forum decals on your car? Then click here! ll How to Embed YouTube Videos In a Post STOP! (Hammertime) ll Become a Premium Member Click HERE ll F.A.Q. Are You a Nissan Dealer? Click Here to Become A "Supporting Dealer" and Start Listing Your 370Zs In Our Inventory Section My Monterey Blue Z ll My Exhaust -->  My Intake --> My Intake -->  G3 G3 Nissan's Official Response Regarding Oil Temp Issue: CLICK HERE Need a Set of Cheap Winter wheels /Tires? Then Visit The Banner Link Below and Place Your Order. You'll Help Keep The370Z Alive.  |
|
|
|
|
12-09-2009, 06:27 PM
|
#3 (permalink) |
|
Enthusiast Member
Join Date: Mar 2009
Location: Austin, Tx
Posts: 391
Drives: 2012 VW GTI 6MT
Rep Power: 219 |
I love this DIY. I really need to get un-lazy and reroute my current setup.
__________________
Past - 2009 Silver 6MT Sport 370Z Current - 2012 VW GTI 6-Speed |
|
|
|
|
12-09-2009, 07:01 PM
|
#4 (permalink) |
|
Track Member
 Join Date: May 2009
Location: New York
Age: 66
Posts: 914
Drives: 370Z/Sport/Black/MT
Rep Power: 19 |
It's a great DIY and not hard at all. The best part is when I turn on the ignition I don't have to reach to silence the detector, it's all at my finger tips now.
Thanks again for the great write-up. 
|
|
|
|
|
12-09-2009, 07:13 PM
|
#5 (permalink) |
|
Enthusiast Member
Join Date: May 2009
Location: Dayton, Ohio
Posts: 281
Drives: 09 PG 370Z Sport 6MT
Rep Power: 18 |
Nice. ..I may do the same with my Passport
__________________
 2016 Cayman GTS 6MT / 2017 Q60 Sport / 2012 Acura TL SH-AWD / 2015 Lexus IS 350 AWD F-Sport (Sold) / 2009 PG 370Z Sport 6MT, (Sold) / 2003 SS 350Z Enthusiast 6MT (Sold) |
|
|
|
|
01-19-2010, 06:51 AM
|
#6 (permalink) |
|
A True Z Fanatic
Join Date: Sep 2009
Location: Gold Coast CT
Posts: 10,599
Drives: 2019 Corvette G.S.
Rep Power: 44 |
GREAT DIY, nice pics. Thanks!
__________________
SOLD MY Z MARCH 2018 - another Core OG moves on - new ride 2019 Z Corvette Grand Sport - no mods necessary but already have eyes on HFC and intakes LOL IT NEVER ENDS. |
|
|
|
|
03-03-2010, 11:45 PM
|
#8 (permalink) |
|
Base Member
Join Date: Jan 2010
Location: Baton Rouge
Posts: 91
Drives: 10 Nissan 370Z PW M6
Rep Power: 17 |
i just did my setup like yours but didnt have all the tools to complete the mute button but everything worked out great thanks for a great write up. so for now the mute button is just sitting under the cupholder.
|
|
|
|
|
06-11-2010, 02:01 AM
|
#10 (permalink) |
|
A True Z Fanatic
Join Date: Feb 2009
Location: SATX
Posts: 2,813
Drives: 09 370Z TT 6MT
Rep Power: 31 |
I'd like to bump this up, simply because I put this DIY to use today. Came out great and I love it.
I used the actual escort hardwire kit and it was about 12-18 inches short for me, but I just extended some wires and soldered them in. I routed the wires from the cup holder straight through the bottom of the center console. Crossed under the passenger carpet, and up the passenger A pillar. I opted for the cigarette lighter power. I unhooked the harness and left the console cig lighter unplugged. Then I just used the normal size female electrical connectors and they plug right into the other end of the harness. Very easy and 100% reversible wiring. Thanks again for the DIY |
|
|
|
|
01-06-2011, 12:04 PM
|
#13 (permalink) | |
|
A True Z Fanatic
Join Date: Apr 2010
Location: Naples, FL
Posts: 2,659
Drives: 40th
Rep Power: 23 |
Quote:
...perhaps I'll try your way
__________________
2010 40th Anniversary 370Z  |
|
|
|
|
|
01-06-2011, 03:35 PM
|
#14 (permalink) |
|
A True Z Fanatic
Join Date: Apr 2010
Location: Naples, FL
Posts: 2,659
Drives: 40th
Rep Power: 23 |
Thanks for the DIY. I ended up chopping up an old cell phone charger and used the wire to run power from the passenger side cigarette lighter(spliced in the back), to the mute button. Couldn't seem to get my hands to grab the one at the console. I used a Dremel tool and Loctite Ultra Gel for my install.
One thing I really didn't like about this outcome was the headliner. Trying to run that coiled up wire behind the headliner resulted in a non factory finish there but nobody will notice except myself. I'm also not too fond of going around the A pillar near the air bags  Made me nervous. Made me nervous.Everything else came out great. The wire was long enough to reach from the button, around the shifter, behind the glove comparment, and up the passenger side A pillar, right up to the mirror where it plugged into the Escort 9500ix.  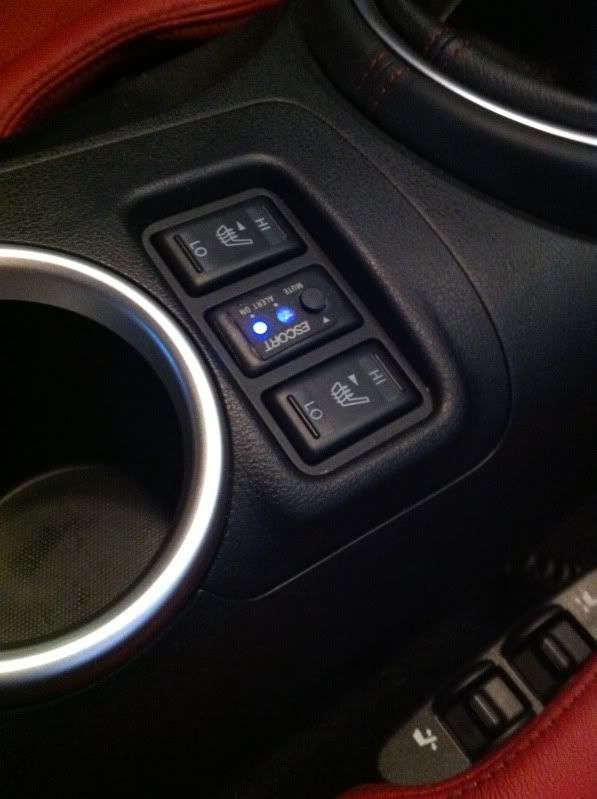 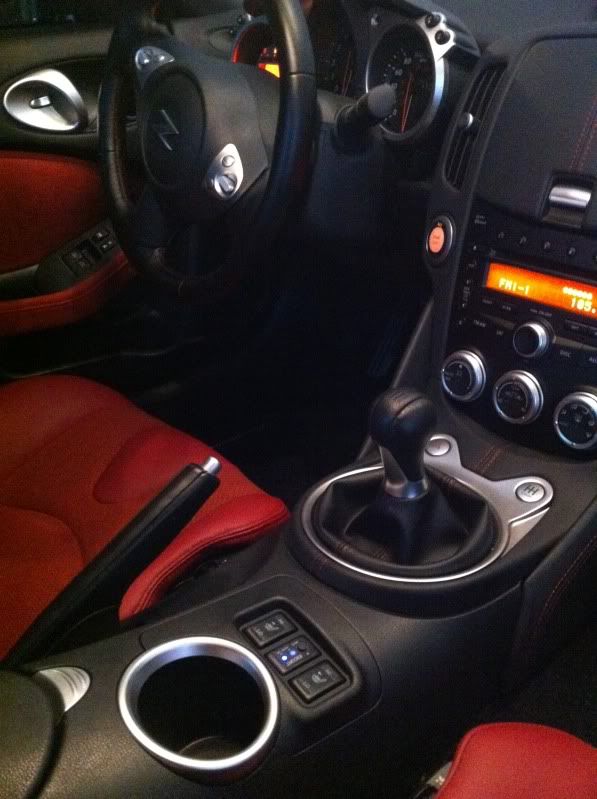
__________________
2010 40th Anniversary 370Z |
|
|
|
|
| Bookmarks |
|
|
 Similar Threads
|
||||
| Thread | Thread Starter | Forum | Replies | Last Post |
| Help: Removing center console | DinoJ | Exterior & Interior | 6 | 06-13-2017 10:49 AM |
| Where are you putting your radar detector? | LiquidZ | Nissan 370Z General Discussions | 37 | 03-14-2012 07:12 PM |
| Scratches on the center console | bpd138 | Exterior & Interior | 4 | 05-16-2009 07:36 PM |
| Radar Detector | Jungle Prop | Nissan 370Z General Discussions | 27 | 01-27-2009 11:53 PM |
| 2000 Contender 21ft Center Console | caj77 | Other Vehicle For sale | 1 | 01-27-2009 10:48 PM |


 8Likes
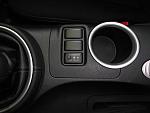


 Thanks for the diy.


 Linear Mode


