
|
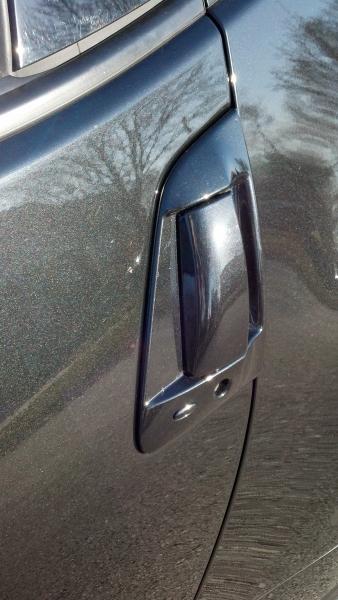
Fawk. I dropped the metal piece that holds the keyless button on the handle into the door frame. Anybody know if it is possible to purchase that bracket?
|
|||||||
 |
|
|
LinkBack | Thread Tools | Display Modes |
 03-25-2014, 03:41 PM
|
#77 (permalink) | |
|
Enthusiast Member
Join Date: Jul 2009
Location: Texas
Posts: 330
Drives: 370Z, MSP, R8, 335
Rep Power: 3372   |
Quote:
1st pic - masked off area 2nd - flat black plastidipped handles 3rd - close up of CF overlay from the rear angle which showed a lot of silver prior to painting 4 - distance shot after overlays installed |
|

|

|
|
03-26-2014, 12:52 PM
|
#78 (permalink) | |
|
Enthusiast Member
Join Date: Dec 2011
Location: Kansas City
Posts: 333
Drives: 11 GM 370z T/S 6MT
Rep Power: 15 |
Quote:
As an example, here is something similar to what I used: http://www.harborfreight.com/18-inch...l#.UzMUEFcVfxg
__________________
 2011 6MT 370Z Gun Metallic :: Stillen G3 CAI :: Swift Springs :: EvoR :: JWM LEDs :: TommyKaira :: Forgestar F14 :: Motordyne Shockwave))) E370 :: CS Spec-Me Lip :: AeroJacket |
|
|
|
|
|
03-26-2014, 01:14 PM
|
#79 (permalink) |
|
Track Member
Join Date: Feb 2013
Location: Kansas City
Posts: 656
Drives: RCF
Rep Power: 15 |
I got it out eventually. I had the telescoping magnet but the piece somehow wedged itself at the very bottom and I had to use a makeshift metal hanger to somewhat pry it out.
__________________
---Get your door handles painted--- |
|
|
|
|
03-26-2014, 01:37 PM
|
#80 (permalink) | |
|
Enthusiast Member
Join Date: Dec 2011
Location: Kansas City
Posts: 333
Drives: 11 GM 370z T/S 6MT
Rep Power: 15 |
Quote:
__________________
2011 6MT 370Z Gun Metallic :: Stillen G3 CAI :: Swift Springs :: EvoR :: JWM LEDs :: TommyKaira :: Forgestar F14 :: Motordyne Shockwave))) E370 :: CS Spec-Me Lip :: AeroJacket |
|
|
|
|
|
08-13-2014, 07:41 AM
|
#83 (permalink) |
|
Base Member
Join Date: Mar 2014
Location: Hampton VA
Posts: 39
Drives: 370z
Rep Power: 13 |
Small Hint- On those tiny little screws that have the blue loctite on them that hold the brackets to the door handle. Use a heat gun at around 500 degree F for a short period of time (try 10 seconds first) if the screws still won't budge give it another 5-10 seconds. I did this for my door handles and the screws came out flawlessly. This will eliminate you having to remove the black cable from inside the door and will let you get the braided cable's bracket off easy.
!!! WARNING !!!- Do not overheat the door handles...you will melt stuff. Some of that plastic melts if u leave the gun on there too long. Try the 10 seconds @500 first and see if the screws budge -!!! WARNING !!! |
|
|
|
|
12-16-2014, 05:43 PM
|
#84 (permalink) |
|
A True Z Fanatic
Join Date: Jul 2014
Location: Mississippi
Posts: 1,117
Drives: Nismo& Sport/Touring
Rep Power: 18 |
When the door handles are off do you guys just leave your car door open and roll down the windows? Do you guys disconnect your battery?
__________________
Build in Progress |
|
|
|
|
12-16-2014, 05:53 PM
|
#85 (permalink) |
|
A True Z Fanatic
Join Date: May 2010
Location: Calgary
Posts: 1,861
Drives: 90 and 15 GMC Sierra
Rep Power: 423 |
I would just keep the windows down, even if you take the handles off the door will still latch, but you need to be able to get to the interior handle to open the door again.
|
|
|
|
|
12-16-2014, 05:55 PM
|
#86 (permalink) | |
|
A True Z Fanatic
Join Date: Jul 2014
Location: Mississippi
Posts: 1,117
Drives: Nismo& Sport/Touring
Rep Power: 18 |
Quote:
Thanks for the help 90st! Sent from my iPhone using Tapatalk
__________________
Build in Progress |
|
|
|
|
|
05-29-2015, 07:52 AM
|
#88 (permalink) | |
|
Base Member
Join Date: Apr 2014
Location: Florida
Posts: 128
Drives: 09 Nissan 370Z BK M6
Rep Power: 13 |
Quote:
I really want to do this but I've never painted so if you could tell me in a "painting for dummies" style.. I would really appreciate it. |
|
|
|
|
|
06-13-2015, 01:50 PM
|
#89 (permalink) | |
|
Base Member
Join Date: Nov 2014
Location: Chula Vista, CA
Posts: 85
Drives: 11 370z MB AT
Rep Power: 12 |
Quote:

__________________
 2011 MB 370z Touring w/Sport 2011 MB 370z Touring w/SportF.I. TDX Cat Back 18" res. Exhaust // F.I. Long Tube Headers // K&N Drop-in // Z1 Silicone Post-MAF Intake Hose |
|
|
|
|
|
06-24-2015, 08:27 PM
|
#90 (permalink) |
|
Track Member
Join Date: May 2012
Location: Unknown
Posts: 538
Drives: PG 09 Nissan 370z
Rep Power: 16 |
first things first, paint a block of wood or something first haha. get the style down. Sweeping, 6 inches, etc... after that, its simple. Just tape off the area, lightly sand the handle with fine grit sand paper. wash the handle. Then just paint. super easy my freinds.
The handle won't stick. Its paint not epoxy haha. just spray and keep the coats light. thats really the key to spray painting any way. multiple light even coats. Dont worry, the handle is far to vigorously used for simple spray paint to seal it. Its all good  You will, however, eventually have peeling that you will have to touch up with a paint pen or something. Comes with the teritory though. You will, however, eventually have peeling that you will have to touch up with a paint pen or something. Comes with the teritory though.
__________________
очень быстро ...
Stillen Gen 3 CAI// Stillen CBE// B&M SS with PWJDM Shift Knob// Custom OCC// Drilled/Slotted Rotors//Halo/painted Headlights// Under-hood dress up Last edited by Vichtz; 06-24-2015 at 08:29 PM. |
|
|
|
|
| Bookmarks |
|
|
 Similar Threads
|
||||
| Thread | Thread Starter | Forum | Replies | Last Post |
| DIY: Door Panel Removal & Door Speaker Size | jikhead | DIY Section (Do-It-Yourself) | 46 | 07-16-2016 10:04 PM |
| Door handle rattles from outside...anyone? | zaust | Exterior & Interior | 1 | 02-27-2012 03:21 PM |
| 370z door handle swap? | ThoriumHotdog | Exterior & Interior | 11 | 11-03-2010 10:44 PM |
| EVO-R door handle review by SIMOTA1 | simota1 | Exterior & Interior | 12 | 09-09-2010 09:56 PM |
| tried to remove door handle...Fail | Soon | DIY Section (Do-It-Yourself) | 4 | 08-02-2010 04:03 PM |


 27Likes


 Linear Mode


