
|
UPDATE: PLEASE STOP PM'ING ME ABOUT THE SPRING. Guys I posted this nearly 3 years ago, I do not have any more springs. If you want to find some, you
|
|||||||
|
|
LinkBack | Thread Tools | Display Modes |
 05-07-2011, 12:55 PM
|
#1 (permalink) |
|
A True Z Fanatic
Join Date: Mar 2010
Location: LI, NY
Posts: 1,375
Drives: 40th TT
Rep Power: 20    |
UPDATE: PLEASE STOP PM'ING ME ABOUT THE SPRING.
Guys I posted this nearly 3 years ago, I do not have any more springs. If you want to find some, you will need to read through the thread for sources to other springs, if someone has a reliable source I will gladly update this first post with a link to them. ---------------------- If this is a repost I apologize, but I have never seen anyone on the Z forums talking about this. Also I can't take any credit for it, weiboy just told me about it after seeing it on the G37 forums here posted by inTgr8r. 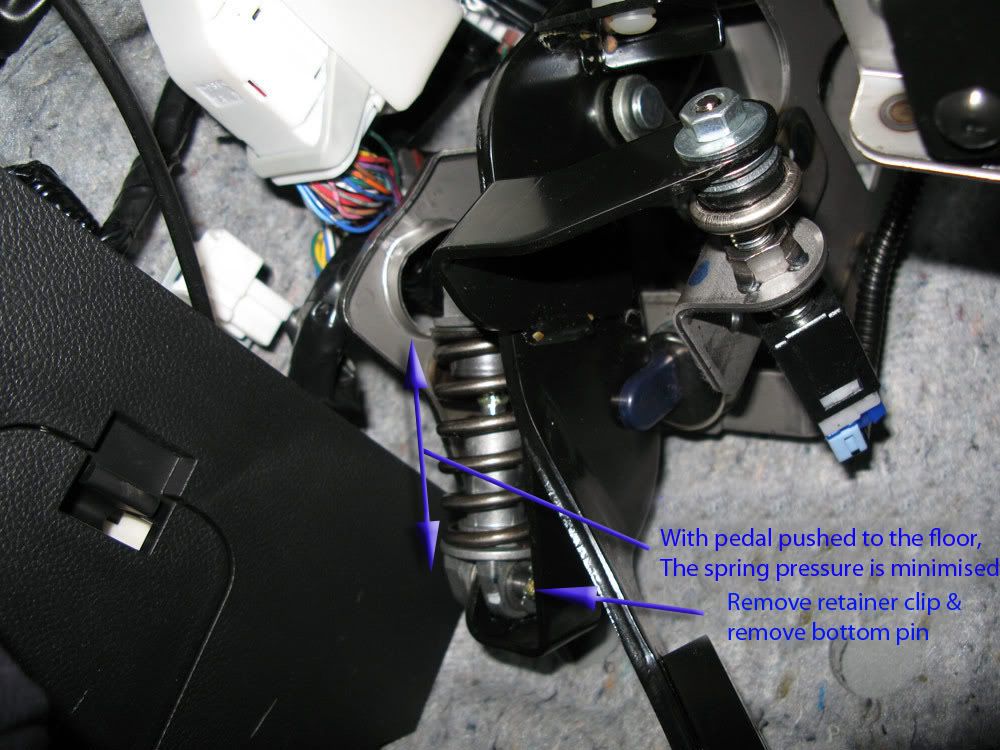  It's basically a spring that "helps" the pedal feel linear and easy to depress, unfortunately it has the side affect of losing all pressure plate feel and making manual transmission drivers everywhere feel like they have never operated a clutch before. I have suffered with this for over a year and mostly gotten used to driving this way, but it took all of 10 seconds to remember what I was missing, a normal clutch feel! The clutch will be stiffer and harder to depress, but not by much, IMO this is how the clutch should feel. It takes about 2 minutes to remove this with a flathead/needle nose pliers, depress the clutch pedal with one hand to unload the spring, use a flat head to pop off the C clips and the spring will come out. You can always re-install it if you don't like how the clutch feels, but you would be crazy to. After you remove the spring there will be a few mm of soft pedal at the top, and there is a bit of vibration in the clutch pedal now that the spring was helping to absorb but its barely noticeable. Enjoy your normal clutch pedal! UPDATE: Group buy thread for softer replacement spring here: Clutch Helper Spring Last edited by esfourteen; 01-04-2014 at 01:19 PM. |

|

|
| Bookmarks |
|
|
 Similar Threads
|
||||
| Thread | Thread Starter | Forum | Replies | Last Post |
| light clutch pedal? | boosted180 | Engine & Drivetrain | 21 | 06-07-2014 01:53 PM |
| clutch pedal issues? | xgrudgex | Engine & Drivetrain | 17 | 01-31-2011 08:44 PM |
| How does your OEM clutch feel? | AlphaSnacks | Engine & Drivetrain | 78 | 12-20-2010 11:04 AM |
| Knock from the clutch pedal | Oscar135 | Engine & Drivetrain | 34 | 07-27-2010 12:10 PM |


 45Likes


 Threaded Mode

