Nissan 370Z Forum  

DIY: Wrap b-pillars and mirrors in 3M 1080 carbon textured vinyl

1st of all, I need to apologize about some of the pics being blurry (iPhone5). 2nd of all, the 3M product is not a replacement for true carbon fiber. It

Go Back   Nissan 370Z Forum > Nissan 370Z Tech Area > DIY Section (Do-It-Yourself)


Like Tree15Likes


LinkBack Thread Tools Display Modes
Prev Previous Post   Next Post Next
Old 01-13-2013, 01:51 PM   #1 (permalink)
Track Member
 
CDepp's Avatar
 
Join Date: Nov 2012
Location: Charlotte, NC
Posts: 837
Drives: sideways
Rep Power: 13
CDepp is a splendid one to beholdCDepp is a splendid one to beholdCDepp is a splendid one to beholdCDepp is a splendid one to beholdCDepp is a splendid one to beholdCDepp is a splendid one to beholdCDepp is a splendid one to behold
Default DIY: Wrap b-pillars and mirrors in 3M 1080 carbon textured vinyl

1st of all, I need to apologize about some of the pics being blurry (iPhone5).
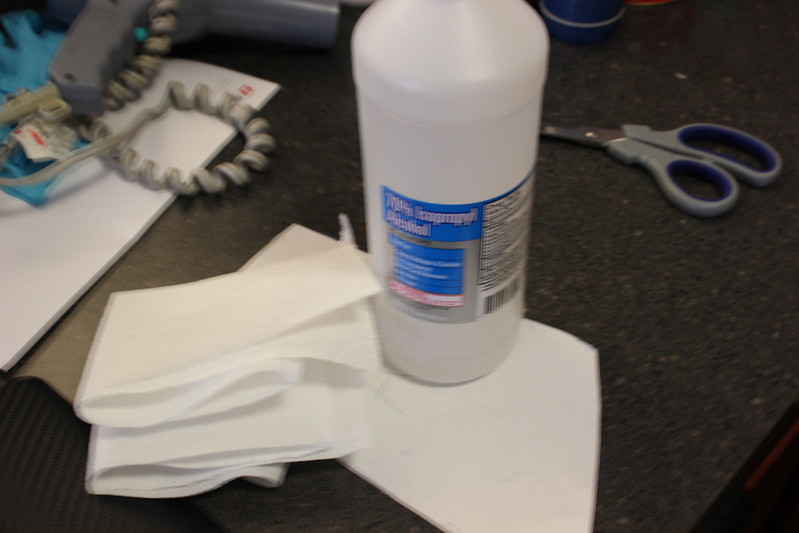
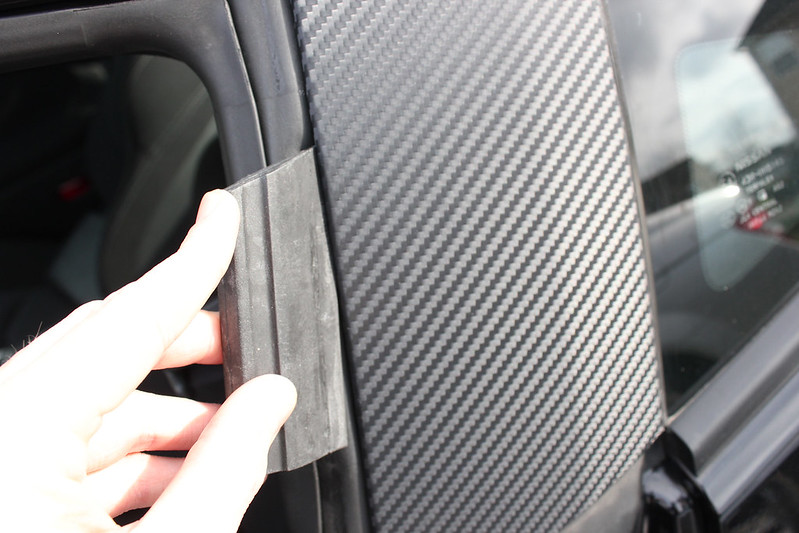
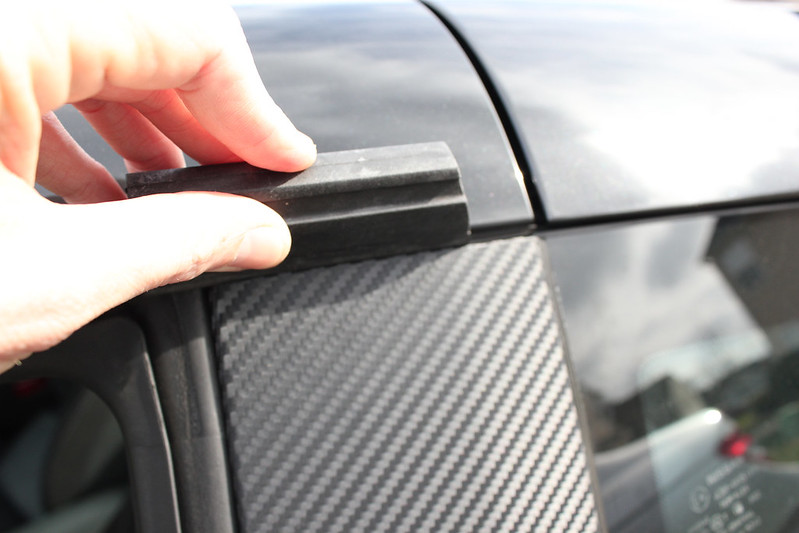
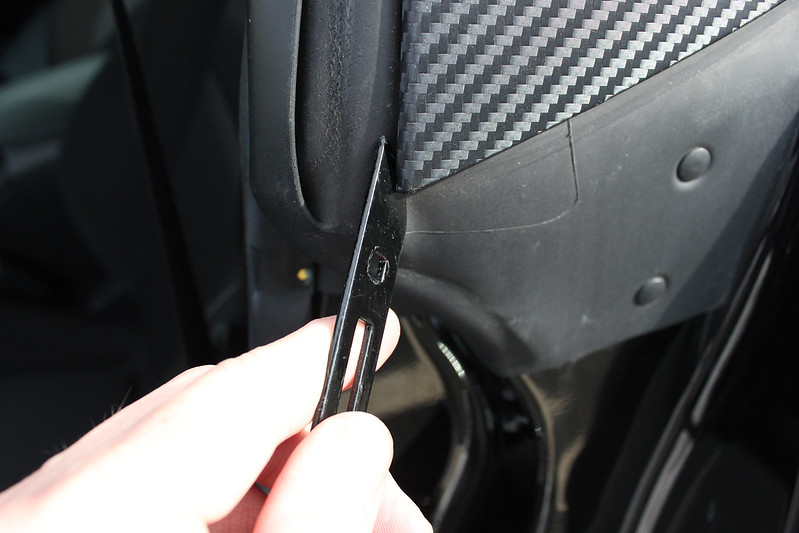
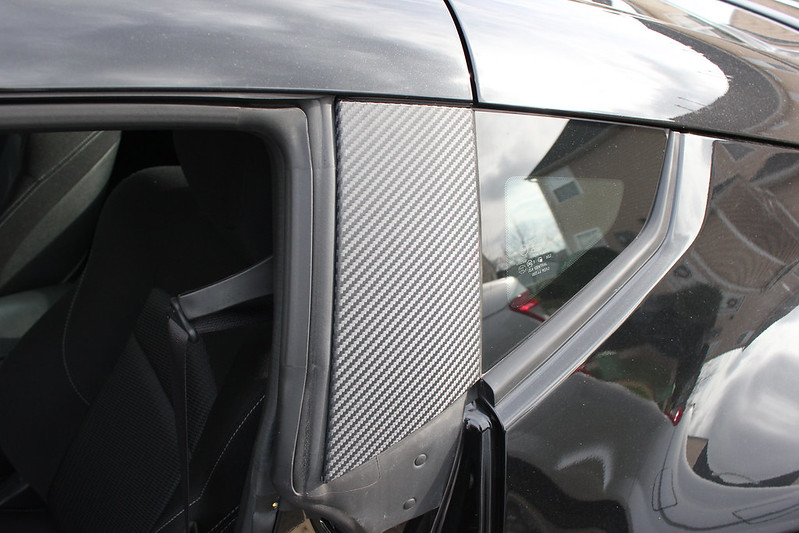
2nd of all, the 3M product is not a replacement for true carbon fiber. It does not look the same as good carbon fiber, and if you don't prime and prep your surfaces, it will come up and off in hot/humid temperatures.

Materials/Tools:
3M Di-Noc Matte Black Carbon Textured Vinyl (24"x48"): Link
Squeegee: Link(preferred squeegee I like) Squeegee in DIY wsa from an old kit I had in the attic (BlackMagic tint kit with squeegee)
Watch tool used for various applications (VERY useful): Link1 Link2
Alcohol (not the drinking type - unless you are from Alabama/Tenn/Georgia/Virginia)

Start with the b-pillars, as they are the flattest and require the least amount of manipulation of the vinyl:


B-PILLARS:
  1. Trace the outline of your b-pillar exactly, not the sides or where the marking utensil meets the molding or glass.
  2. Cut out the tracing and use as a stencil for the back of your 3M product. (I put an "A" on one side of the stencil and a "B" on the other to assist)
  3. Mark the back of the 3M material with an A and B as well.
  4. Cut the product 1/4" larger than your stencil.

  5. Get the rest of your tools prepared. -3M "94" primer, utility knife or equivalent, 3M squeegee or equivalent, alcohol, cloths, hair dryer or heat gun. (iPhone blurry pics - sorry)

  6. Prepare the surface by lightly rubbing a alcohol-damp cloth over the b-pillar to remove dust, excess wax/sealer.
  7. Open your door for the rest of the installation.
  8. Get another cloth and fold to get a clean corner and dip into primer. Spread onto b-pillar at the top only and then grab your cutout for the side you are working on.
  9. Line up the cutout and peel back the top half of the 3M backing. Tack down the top of the cutout.
  10. Lift the cutout up, not too much as to pull it off the b-pillar, and begin applying the primer (using a clean corner each time a dip is required) and carefully lay down the product - chasing any bubbles as you go.
  11. Once laid, run the squeegee over the vinyl, starting from the center and going to each edge/corner.
  12. You now have a sticker that's planted flat on your b-pillar, extending 1/4" over in each direction.
  13. Use the squeegee and run the edge back behind the b-pillar. I used the heat gun here to assist in activating the tacking agent on the vinyl.
  14. Perform the exact same actions for the top and bottom overlays.


    NOTE: I used heat at the corners to activate the tacking agent on the vinyl and make it malleable to wrap around the backside.
  15. Stand back and admire the b-pillar!

Mirrors:
  1. Cut out 2 pieces of the 3M 1080 product: 14"x10"
  2. Prepare the mirrors as you did with the b-pillars except for the primer.
  3. Pull the outside half of the backing off (furthest from the window) the vinyl and tack the center of the vinyl to the mirror.
  4. Start laying the vinyl 1"-2" towards the top of the mirror, using the heat gun/hair dryer to ensure no creases start forming.
  5. Switch to the bottom, laying to the bottom of the mirror using the primer under it this time.
  6. Switch to the side, only laying 1"-2" of the material using heat and ensuring no creases begin. (Pull back the vinyl and use heat to make the product go back to form if necessary).
  7. Each time you get to the edge of the mirror, apply some primer.
  8. Go back to the top again and repeat until the product covers all of the outside cover.
  9. Pull off the remaining 3M backing and repeat the process on the inside hlaf of the vinyl until the mirror is covered.

  10. Using the heat gun/hair dryer, use a good amount of heat around the edging of the mirror for 2 purposes: to activate the tacking adhesion, and while it's very warm, press hard with a squeegee or your fingernail so you can see the edge of the mirror.
  11. VERY CAREFULLY trim the product to the mirror using your utility or exact-o knife.

Admire your work:


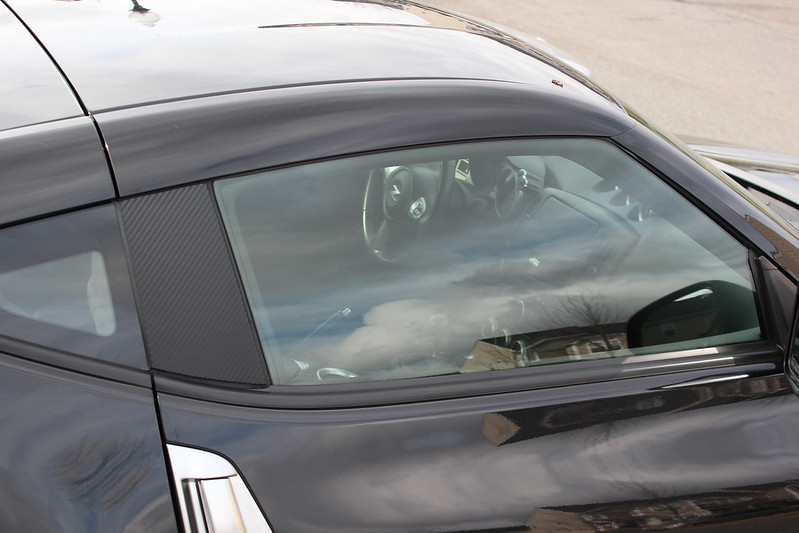
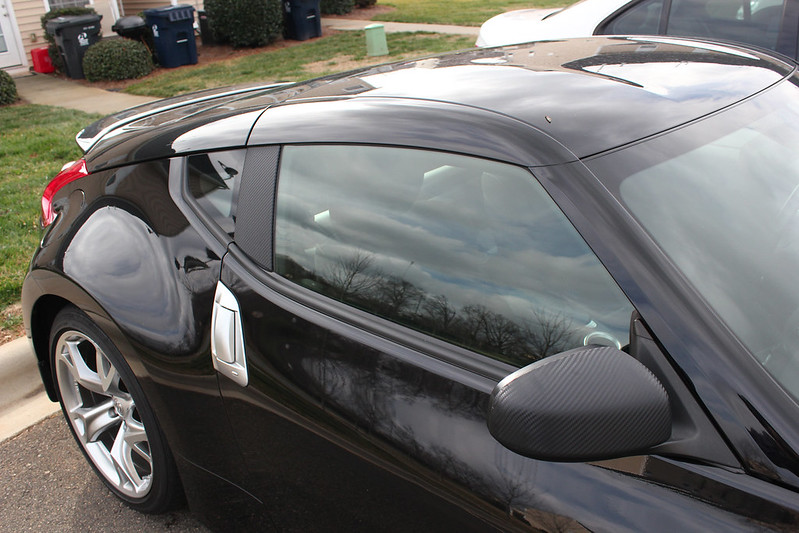
If this doesn't get me Rep points, then I may have to resort to selling myself on the corner for them.
GaleForce, Z11, arnoldas and 6 others like this.
__________________
-CDepp-
2011 MB Base+S M6 | Invidia Exhaust | TommyKairaHebiBeibi | H&R Spacers 15/20 | GTR Start | 305hp/240tq

Last edited by CDepp; 01-08-2016 at 11:46 AM.
CDepp is offline   Reply With Quote
 

Bookmarks


Posting Rules
You may not post new threads
You may not post replies
You may not post attachments
You may not edit your posts

BB code is On
Smilies are On
[IMG] code is On
HTML code is Off
Trackbacks are On
Pingbacks are On
Refbacks are On


Similar Threads
Thread Thread Starter Forum Replies Last Post
Fun with 3M 1080 CF vinyl owi1kenobi Nissan 370Z General Discussions 18 07-01-2012 11:53 PM
[WTB] carbon fiber mirrors and pillars afgiussppe Parts for sale (Private Classifieds) 3 04-28-2012 06:11 PM
Bat's Hexis 3d Textured Cabon Fiber Vinyl (PICS) Bluebatmobile Exterior & Interior 20 03-28-2011 04:16 PM
Carbon Fiber Front Fang, B Pillars, Side Mirrors (stage 1) installed! (AK370Z) AK370Z Exterior & Interior 60 10-25-2010 10:25 AM
3M DINOC Carbon Vinyl Wrap spearfish25 Exterior & Interior 10 12-12-2009 09:50 PM


All times are GMT -5. The time now is 08:03 PM.


Powered by vBulletin® Version 3.8.4
Copyright ©2000 - 2024, Jelsoft Enterprises Ltd.
Search Engine Optimization by vBSEO 3.6.0 PL2