
|
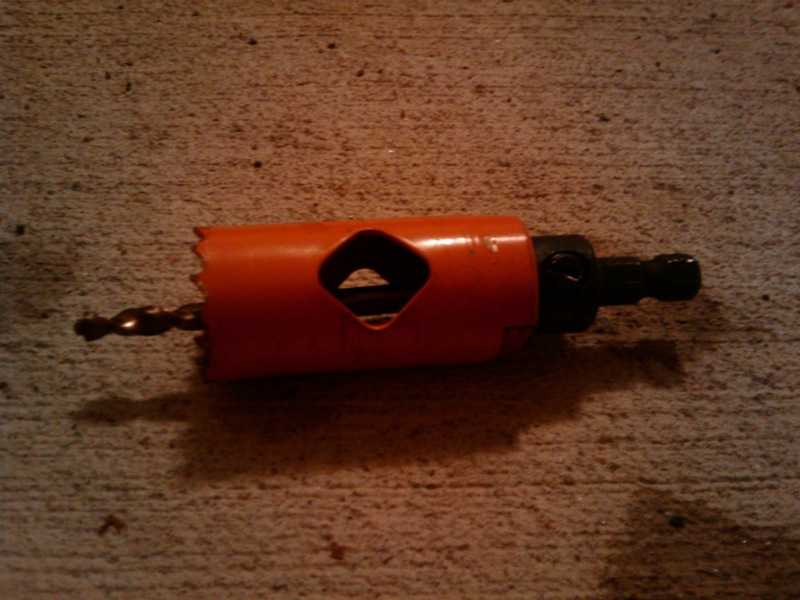
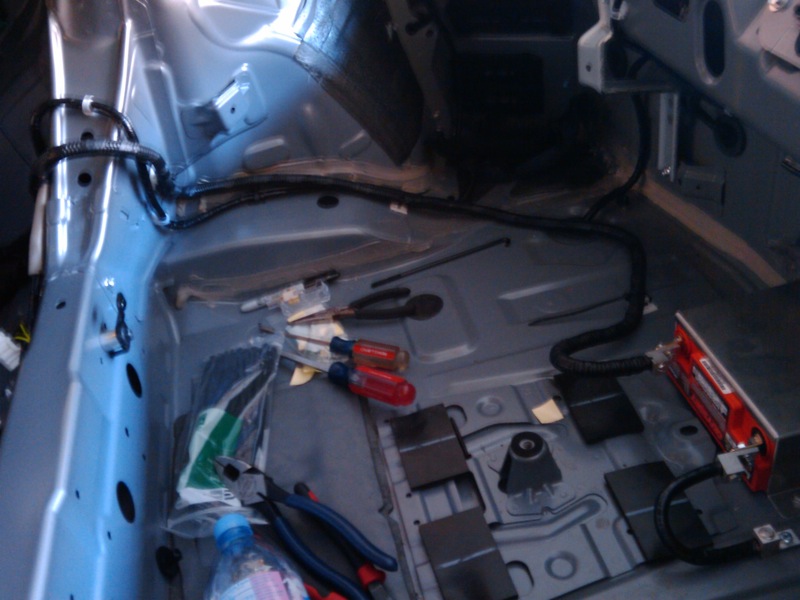
Any chance you could take a picture of exactly where you drilled the 1" hole? I am pondering doing this and wanted a good reference point before drilling takes place.
|
|||||||
 |
|
|
LinkBack | Thread Tools | Display Modes |
 10-22-2013, 12:20 PM
|
#46 (permalink) | |
|
Base Member
Join Date: Oct 2012
Location: Little Elm, TX
Posts: 66
Drives: 2010 370Z Red, auto
Rep Power: 14  |
Any chance you could take a picture of exactly where you drilled the 1" hole? I am pondering doing this and wanted a good reference point before drilling takes place.
 Quote:
__________________
Beluga catback exhaust and Y-Pipe. Sport brakes upgrade. 24 row oil cooler. Battery relocated to the trunk. |
|

|

|
|
10-22-2013, 02:11 PM
|
#47 (permalink) |
|
A True Z Fanatic
 Join Date: Mar 2009
Location: Houston, TX
Posts: 4,024
Drives: too slow
Rep Power: 3596  |
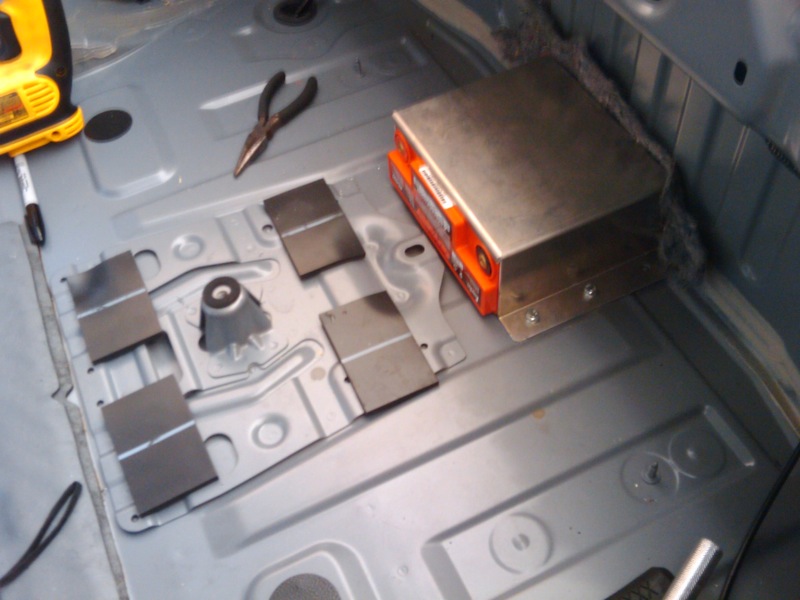
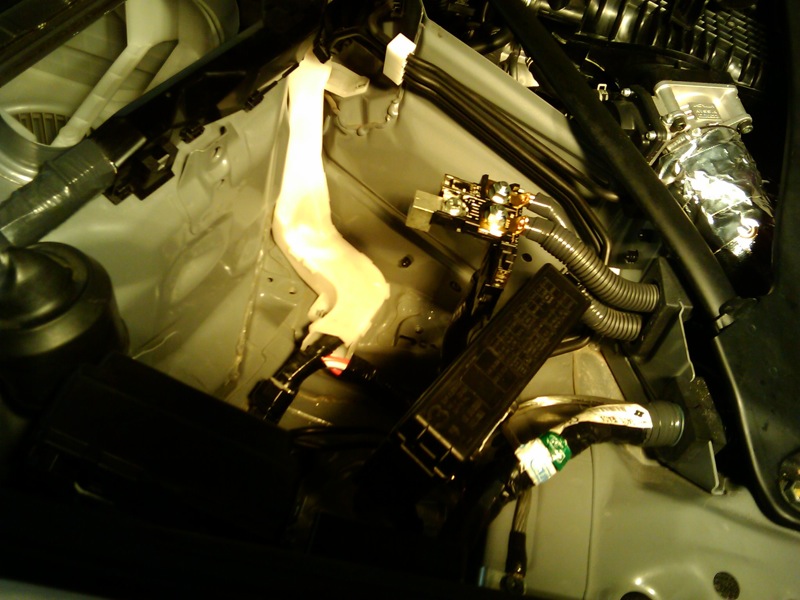
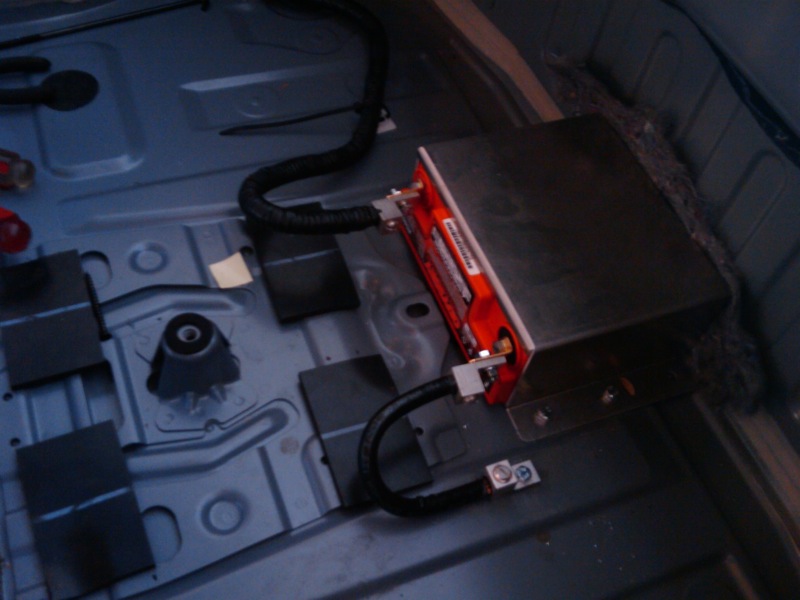
The car is off at the cage builder right now, so I can't snap pics. TBH, you don't really need to drill that hole anyways, it's just what I did because it was expedient at the time to stop thinking and just do something
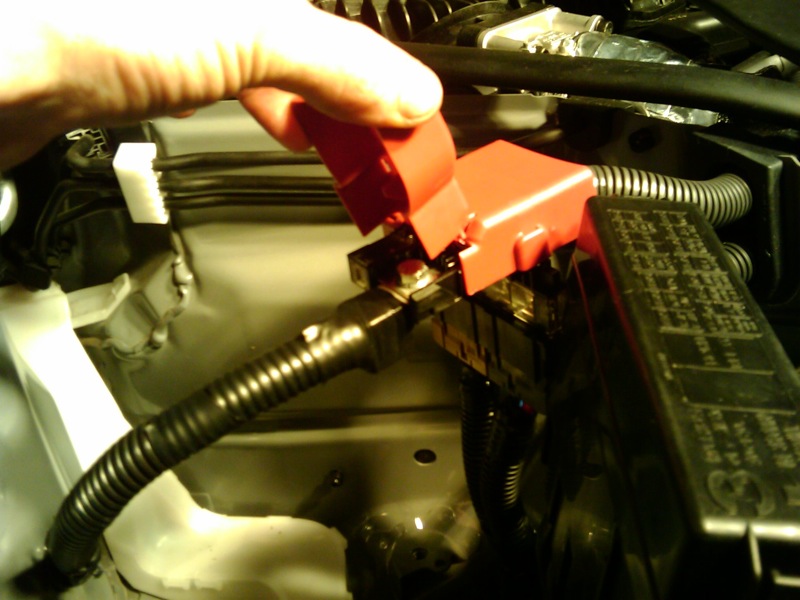
 You can always run the cable the way travis did, up through the rubber grommet that carries a bunch of ECU wiring through the upper corner there near the battery tray / AC blower. Or if you're doing an all-out race car conversion and killing the AC anyways, there are multiple leftover AC-related holes to reuse. You can always run the cable the way travis did, up through the rubber grommet that carries a bunch of ECU wiring through the upper corner there near the battery tray / AC blower. Or if you're doing an all-out race car conversion and killing the AC anyways, there are multiple leftover AC-related holes to reuse.I ended up unrelocating my battery at the end of the day. What's far simpler than relocating any battery is to put a ultra-super-light battery in the stock location. This 3.5lb battery works fine on our car: Batteries - Ballistic Performance Components , and you can buy them from several places if you google around. The downside is ~$200+, and it's very risky to drain them (basically, you risk ruining the expensive battery permanently if you let residual drain take it below 8V, which isn't hard to do if anything's running without the engine). But honestly, that's worth not doing the battery relocate work, and this battery weighs about as much as the wiring and circuit protection for a relocate job, much less the (larger) relocated battery itself. Another interesting option is this thing: https://www.pegasusautoracing.com/pr...sp?RecID=10410 It's 8.4 lbs, same internals as my tiny battery (but even more capacity than mine, and mine starts the engine fine), and they've built the battery manager into the unit so that it can't be killed by draining and always charges optimally. If you're more concerned about draining and battery ruin, it might be worth the 5lbs extra weight and $600 more to have a battery that will really last and doesn't have to be babied, but is still light enough that it makes sense to retain the stock location. |
|
|
|
|
10-25-2013, 05:50 PM
|
#48 (permalink) |
|
Base Member
Join Date: Oct 2012
Location: Little Elm, TX
Posts: 66
Drives: 2010 370Z Red, auto
Rep Power: 14 |
Cool,
Thank you for the information. What are your thoughts about the Odyssey batter?
__________________
Beluga catback exhaust and Y-Pipe. Sport brakes upgrade. 24 row oil cooler. Battery relocated to the trunk. |
|
|
|
|
10-25-2013, 09:05 PM
|
#49 (permalink) |
|
A True Z Fanatic
Join Date: Mar 2009
Location: Houston, TX
Posts: 4,024
Drives: too slow
Rep Power: 3596 |
I had a couple of Odyssey's PC680's in the car (meaning one eventually went bad after a long time, then I put in another) before I switched to the little Evo2. They work great in this car, and they're considerably lighter than stock no matter where you put them. TBH, you're getting most of the benefit just putting a PC680 in the stock location. Everything beyond that (relocation and/or smaller and more-expensive battery) is just hyper-optimizing for smaller gains. I mean, I do it, but that doesn't mean sane people should do it
|
|
|
|
|
10-27-2013, 12:10 PM
|
#50 (permalink) |
|
Base Member
Join Date: Oct 2012
Location: Little Elm, TX
Posts: 66
Drives: 2010 370Z Red, auto
Rep Power: 14 |
I am going to go with the PC680 trunk mount. I have the cables (free) and battery mount (also free). I will only need to purchase the battery so why not. Thanks for all the tips and advice.
__________________
Beluga catback exhaust and Y-Pipe. Sport brakes upgrade. 24 row oil cooler. Battery relocated to the trunk. |
|
|
|
|
11-16-2013, 02:19 PM
|
#52 (permalink) |
|
A True Z Fanatic
Join Date: Mar 2009
Location: Houston, TX
Posts: 4,024
Drives: too slow
Rep Power: 3596 |
It's hard to directly compare on the numbers, the numbers all mean different things for different battery technologies. The PC680 is pretty much universally fine on this car, though, assuming you're don't have a huge stereo and/or leave anything electrical on with the engine off for extended periods. The little LiFePo4 ones, though, are pretty marginal - fine for a racecar, but probably not a reliable DD option. They struggle in the cold (it does warm itself with each start attempt though, so it usually catches by the 2nd or 3rd try even in near-freezing temps) - and it's easy to destroy them by over-draining them.
|
|
|
|
|
02-07-2017, 11:41 PM
|
#53 (permalink) |
|
Base Member
Join Date: Jul 2013
Location: Texas
Posts: 81
Drives: 2010 Nismo
Rep Power: 13 |
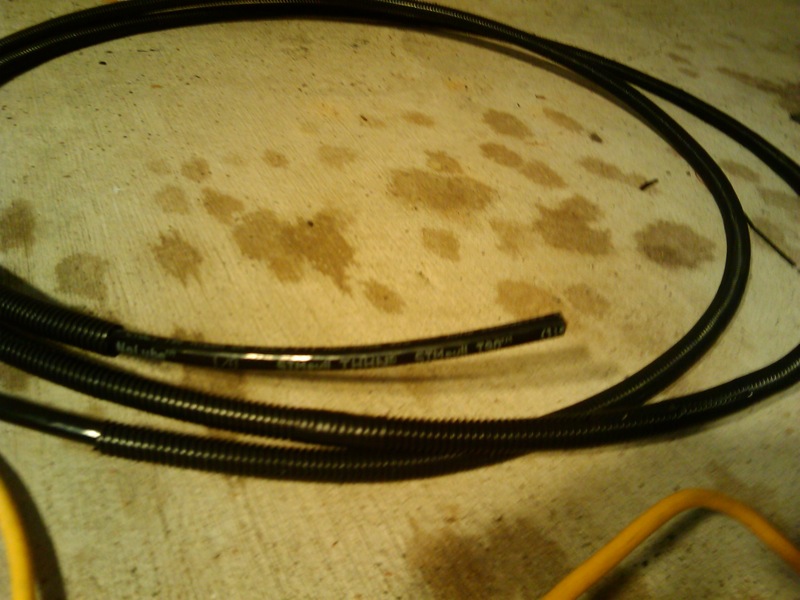
Would it be okay to use a 4 gauge wire instead of the 1/0? Also, am I able to use the same kind of wire people use to power amplifiers for sound systems or does it need to be a specific kind?
Sent from my iPhone using Tapatalk |
|
|
|
|
02-08-2017, 07:30 AM
|
#54 (permalink) | |
|
Premium Member
Join Date: Nov 2010
Location: South Arkansas
Posts: 8,435
Drives: 2014 Challenger
Rep Power: 324199 |
Quote:
The conductor material is not important but you will have to use a larger conductor if you use aluminum instead of copper. The total resistance of the wiring run is the critical factor - bigger wire has less resistance per foot. You can use "exotic" stereo wiring, but it's expensive and not cost-effective for the minuscule gains. The more strands in the conductor, the more flexible the wire will be (assuming the same insulation). 1/0 AWG with a solid conductor is VERY stiff and difficult to install; 1/0 AWG welding cable (~1000 strands) is down right limp.
__________________
Steering Lock Links - Search The370Z Bookmarklet - FSM @ NICOclub Mankind has progressed past the need for war but we haven't evolved that far. - NachoMahma |
|
|
|
|
|
02-08-2017, 07:49 AM
|
#55 (permalink) | |
|
Base Member
Join Date: Jul 2013
Location: Texas
Posts: 81
Drives: 2010 Nismo
Rep Power: 13 |
Quote:
Sent from my iPhone using Tapatalk |
|
|
|
|
|
02-09-2017, 10:33 AM
|
#56 (permalink) |
|
Base Member
Join Date: Jul 2013
Location: Texas
Posts: 81
Drives: 2010 Nismo
Rep Power: 13 |
https://m.lowes.com/pd/1-0-AWG-Stran...-Foot/50101588 would this work?
Sent from my iPhone using Tapatalk |
|
|
|
|
02-09-2017, 12:42 PM
|
#57 (permalink) |
|
Track Member
Join Date: Apr 2012
Location: Wapakoneta, Ohio
Posts: 506
Drives: 2011 BS Nismo 370z
Rep Power: 46 |
i would go more strands than that. thats like a commercial/industrial installation 1-0 check local electrical suppliers more so than lowes/home depot etc. they will be able to access a much more in depth selection of wiring for you. aside from this wire being extremely uncooperative to run through a car then you also have to deal with crimping lugs on, or sourcing a heavy duty lug to terminate the wire to the battery. To simply put this is overkill" for a car. like Ark said you can always check local stereo install shops for wiring. while this stuff is usually around the 12-20$/ft mark it is plenty stranded and tends to have a nice protective gel coating perfect for installations such as this.
Good luck with your hunting man!
__________________
Always under construction. . . 
|
|
|
|
|
02-09-2017, 12:45 PM
|
#58 (permalink) |
|
Base Member
Join Date: Jul 2013
Location: Texas
Posts: 81
Drives: 2010 Nismo
Rep Power: 13 |
Thanks man! I've called a few stereo shops and it seems that's it's something they don't carry in stock. It sure is a hunt! I'm also having trouble looking for a battery box so I'm thinking I'll have to make one.
Sent from my iPhone using Tapatalk |
|
|
|
|
02-09-2017, 01:20 PM
|
#59 (permalink) | |
|
Track Member
Join Date: Apr 2012
Location: Wapakoneta, Ohio
Posts: 506
Drives: 2011 BS Nismo 370z
Rep Power: 46 |
Quote:
__________________
Always under construction. . .
|
|
|
|
|
|
02-09-2017, 02:26 PM
|
#60 (permalink) |
|
Premium Member
Join Date: Nov 2010
Location: South Arkansas
Posts: 8,435
Drives: 2014 Challenger
Rep Power: 324199 |
Something similar to this: https://www.sonicelectronix.com/item...VX-XW0BK5.html
Or this: https://www.sonicelectronix.com/item...-PWB050-1.html
__________________
Steering Lock Links - Search The370Z Bookmarklet - FSM @ NICOclub Mankind has progressed past the need for war but we haven't evolved that far. - NachoMahma |
|
|
|
|
| Bookmarks |
|
|
 Similar Threads
|
||||
| Thread | Thread Starter | Forum | Replies | Last Post |
| Break in miles? Reset battery,computer? help | AceSpade77 | Nissan 370Z General Discussions | 2 | 04-26-2009 01:07 AM |


 8Likes


 Linear Mode


