
|
Anyone have a DIY for this? Might have to do one myself...
|
|||||||
 |
|
|
LinkBack | Thread Tools | Display Modes |
 04-14-2014, 01:53 PM
|
#4 (permalink) |
|
A True Z Fanatic
Join Date: Feb 2009
Location: Texas
Posts: 30,879
Drives: 370z
Rep Power: 4212   |
Found this: 350Z Valentine One Radar HomeLink Mirror Install
__________________
theDreamer's Z // Fast Intentions // Uprev // GTM // HKS // TEIN theDreamer's Silvia // URAS // GREDDY Houston Zs // Facebook // Twitter // Instagram |

|

|
|
04-20-2014, 09:25 AM
|
#8 (permalink) |
|
Enthusiast Member
Join Date: Aug 2012
Location: Canada
Posts: 259
Drives: '12 M6 Panty Peeler
Rep Power: 14 |
I am not one for taking pics, but I got a few so you can get the general idea.
Getting the mirror housing apart was the hardest part of the install. Using only the finest tools as well  I found a butterknife had the best prying options without marring the housing too much. I found a butterknife had the best prying options without marring the housing too much. After getting it apart it was an easy choice to choose where the display would go, the far right, in the middle of the mirror. Not ideal, but a good, easy place to see none the less. 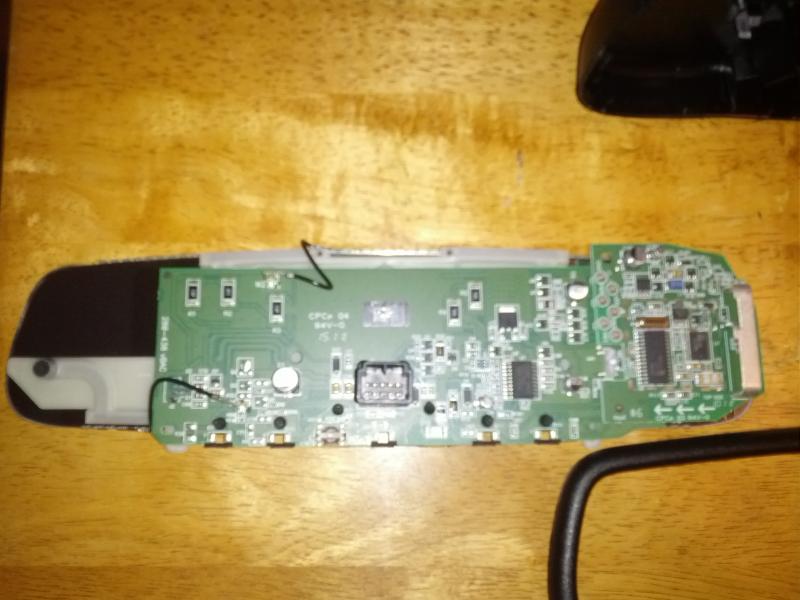 After placing the display on the mirror and checking clearance with the back, I noticed I might have to shave some parts on the back of the housing to make it fit. I checked the brightness of the display and noticed that it was a bit brighter when I took the protective lens off the display itself. I also noticed that it cleared the back of the housing very nicely. 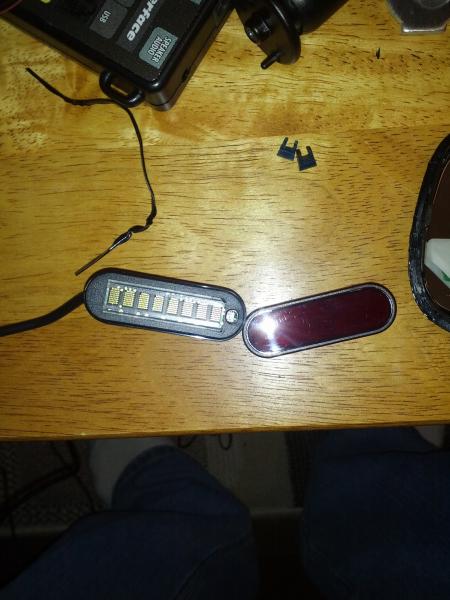 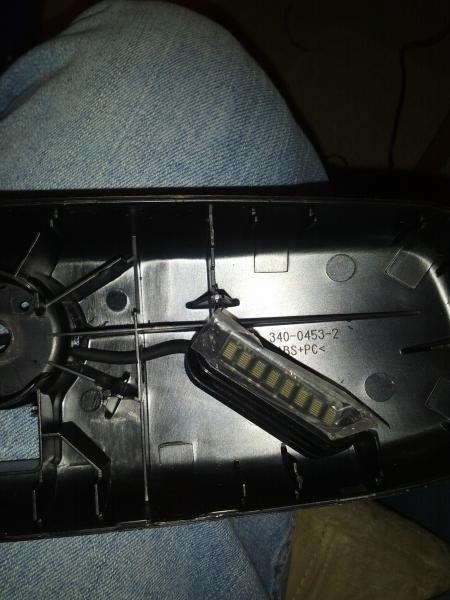 Next I had to find a way to route the cord. There was a lot of room to run it behind the circuit board, but nowhere aesthetically acceptable. I didn't want to have a hole in the back of the housing where everyone could see. I found a very nice solution... 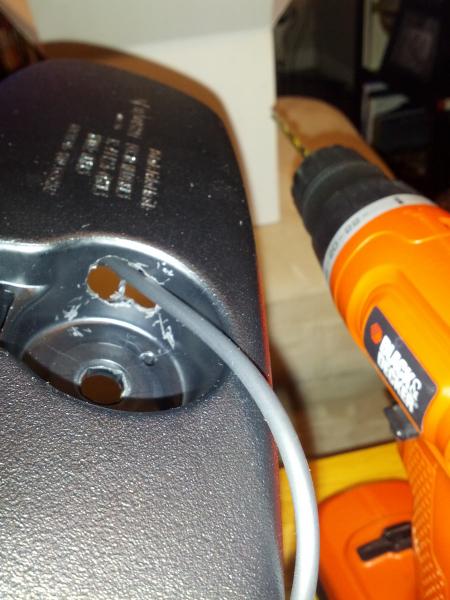 Taking the stem off with a torx bit, I could drill a hole in the side and viola, could easily tie in with the standard control cords through the roof... 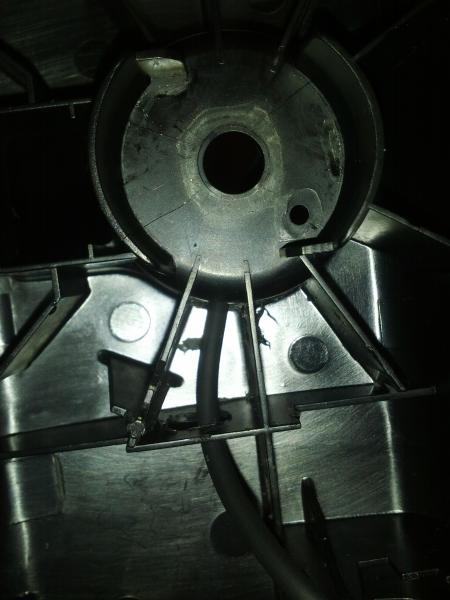 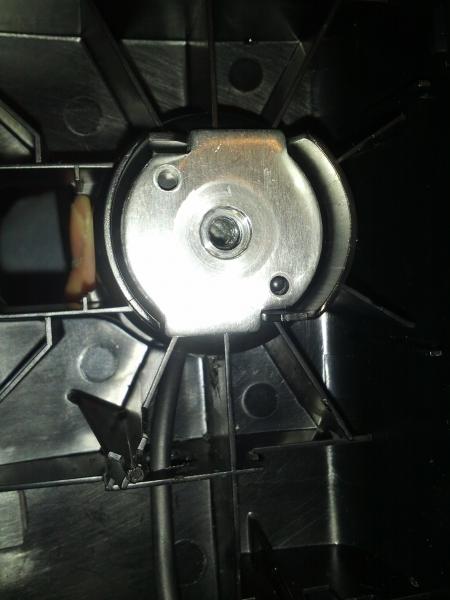 I used an industrial adhesive that I had lying around to attach the display to the mirror. It bonded instantly and was perfect. Just have to be really careful applying it to the parts. I used a toothpick to apply a very thin layer to the housing of the display. I will have pics of the display when I get a proper power source that doesn't require me to use both hands to work.
__________________
WISHLIST |
|
|
|
|
04-20-2014, 09:28 AM
|
#9 (permalink) | |
|
A True Z Fanatic
Join Date: Sep 2012
Location: West Michigan
Posts: 31,410
Drives: Granma red Z
Rep Power: 2684430 |
Quote:
 I appreciate all the pics! I appreciate all the pics!
|
|
|
|
|
|
04-23-2014, 02:59 PM
|
#11 (permalink) |
|
Enthusiast Member
Join Date: Aug 2012
Location: Canada
Posts: 259
Drives: '12 M6 Panty Peeler
Rep Power: 14 |
I'll add installing the rest of the Beltronics STi-R shifters and components if enough people are interested.
I am thinking of placing the GPS module in the passenger A-Pillar (reserving drivers side for the awesome Galeforce custom gauge A-pillar  ) )The central unit will probably go behind the dash, along with the speaker and assorted wires. Not sure where I am going to mount the control panel and USB port....might have to go in my little box with my ipod connector from my pioneer HU
__________________
WISHLIST |
|
|
|
|
04-29-2014, 01:06 PM
|
#12 (permalink) |
|
Enthusiast Member
Join Date: Aug 2012
Location: Canada
Posts: 259
Drives: '12 M6 Panty Peeler
Rep Power: 14 |
So I have the ZR4 shifters, which have been proven not to work with all laser guns. I bought the kit last year, so not surprised by this. Still installing them anyway.
Finally got my headliner down and going to route the display wire along the top and down the passenger A pillar. I am also routing my HU mic to the stock mic location. Will upload all the pics when I am done....
__________________
WISHLIST |
|
|
|
|
04-29-2014, 01:14 PM
|
#13 (permalink) |
|
A True Z Fanatic
Join Date: Sep 2009
Location: Mod Capital of Canada
Age: 59
Posts: 7,354
Drives: cars. lots of cars.
Rep Power: 40183 |
RIP visor hinge covers....

__________________
 H&R / Stillen / Berk / HKS / Swift / Michelin / UpRev / SPC / Amuse Rep / Seibon / Fringe XVO / TWM / more... My Journal |
|
|
|
|
04-29-2014, 01:18 PM
|
#14 (permalink) | |
|
Enthusiast Member
Join Date: Aug 2012
Location: Canada
Posts: 259
Drives: '12 M6 Panty Peeler
Rep Power: 14 |
Quote:
 Forgot to mention I took out my console and going to route my iPod connector for my HU and the usb update port for the radar detector into the lid. Trying to figure out where I am going to place the control unit and how much length I need for all the wires. I am concerned my display connector isn't going to reach into my dash. Anyone know what I can use for a extension? Would a normal telephone cord work? lol
__________________
WISHLIST |
|
|
|
|
|
04-29-2014, 01:20 PM
|
#15 (permalink) |
|
Track Member
Join Date: Mar 2010
Location: Edmonton
Posts: 855
Drives: 10' MB Z34 6MT T/S/N
Rep Power: 24 |
While the plug is the same, you need to ensure the telephone cord has all 6 (or maybe 8) wires, I believe the STI-R display uses them all. Standard old school telephone cable had 4 wires/4 pins in use on the modular connector. Check the # of pins on the connector, that's how many wires need to be inside the cable.
Edit just looked at mine, 6 wires. Sent from my iPhone using Tapatalk |
|
|
|
|
| Bookmarks |
|
|
 Similar Threads
|
||||
| Thread | Thread Starter | Forum | Replies | Last Post |
| [FOR SALE] Escort 9500ix radar red display w/hardwire custom switch *MINT* | SATX_NISMO | Parts for sale (Private Classifieds) | 23 | 10-21-2013 08:46 PM |
| [FOR SALE] Radar Detector Escort Passport 9500ix (Red Display) SoCal | BeemaaZ | Parts for sale (Private Classifieds) | 30 | 07-22-2013 12:00 AM |
| Radar Detector STI-R Plus NA with blue display | Fezzik | Exterior & Interior | 4 | 07-24-2011 08:45 PM |
| [FOR SALE] Mirror Radar Mount | Vince's Red-Z | Parts for sale (Private Classifieds) | 0 | 05-24-2011 02:36 PM |


 9Likes


 Linear Mode


