
|
Hey guys, I apologize if a thread has already been created for toe bolt install. I searched around and didn't see anything. I understand this is a pretty simple, self
|
|||||||
 |
|
|
LinkBack | Thread Tools | Display Modes |
|
|
 11-30-2011, 12:46 AM
|
#1 (permalink) |
|
A True Z Fanatic
 Join Date: Aug 2011
Location: Tacoma, WA
Age: 43
Posts: 1,498
Drives: a POS truck
Rep Power: 497   |
Hey guys, I apologize if a thread has already been created for toe bolt install. I searched around and didn't see anything. I understand this is a pretty simple, self explanatory type of mod, but some people still go to a shop and pay to have this done. Save your money and do this yourself. Its easy!
First off, I see this question all the time. "I just installed springs, will I need aftermarket toe bolts"? That just depends how much of a drop it is. We all know whenever you lower your car with springs or coilovers, you should go get an alignment. Make life easy for yourself and buy a toe bolt kit. SPL and SPC sale their kit for around 30$. It gives you so much more room for toe adjustability compared to stock. 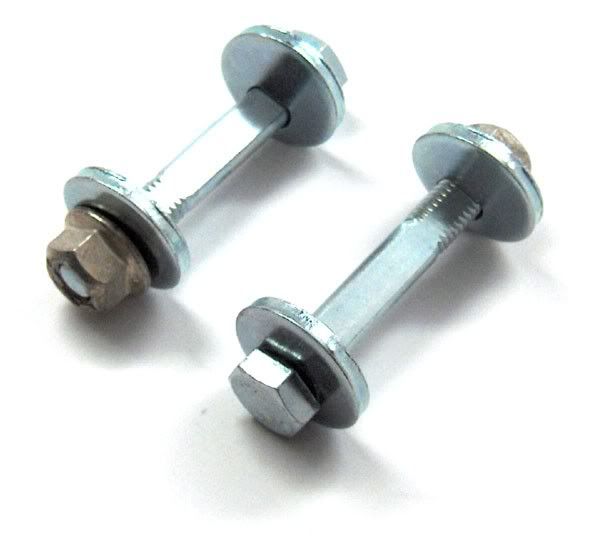 Tools need- -Rotary tool with a bit that can grind metal/aluminum. You can use a file but that would take forever. -Jack and jack stands -Impact wrench if ya got it. If not basic metric sockets/wrenchs 17mm, 19mm -Eye protection/hearing protection -Paint marker -Of course your toe bolt kit. Step 1. Lets get the rear of your car off the ground. Use ramps or jack stands for the rear. Remember, never use a jack to support your vehicle. I used stands, but just in case a Final Destination tries to happen, I have my floor jack under there as a back up. Chock the front wheels. 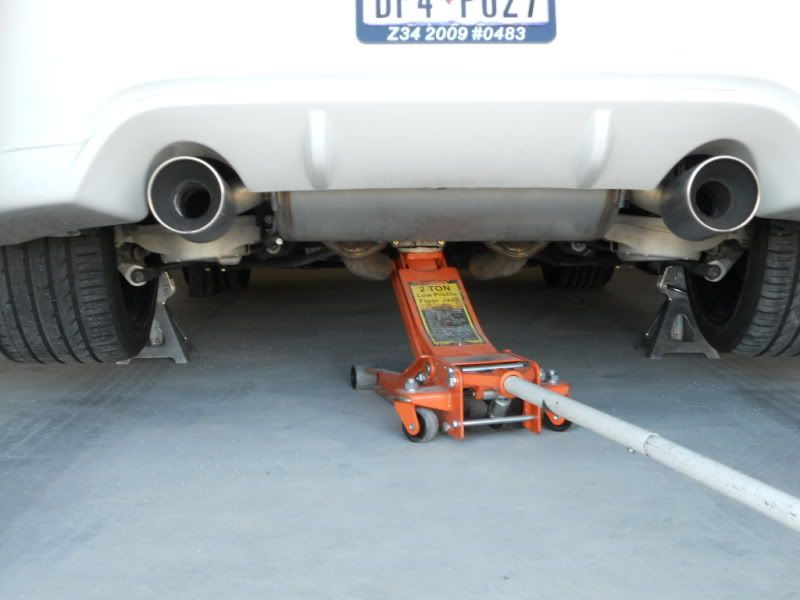 I ended up taking the rear wheels off so I have more room to maneuver around. Step 2. Once your car is safely off the ground, get up under there and took a good look at what you are going to be working with. I don't want to insult anybodies intelligence, but your toe bolt is circled in blue. Its the one that is holding one end of the spring bucket. 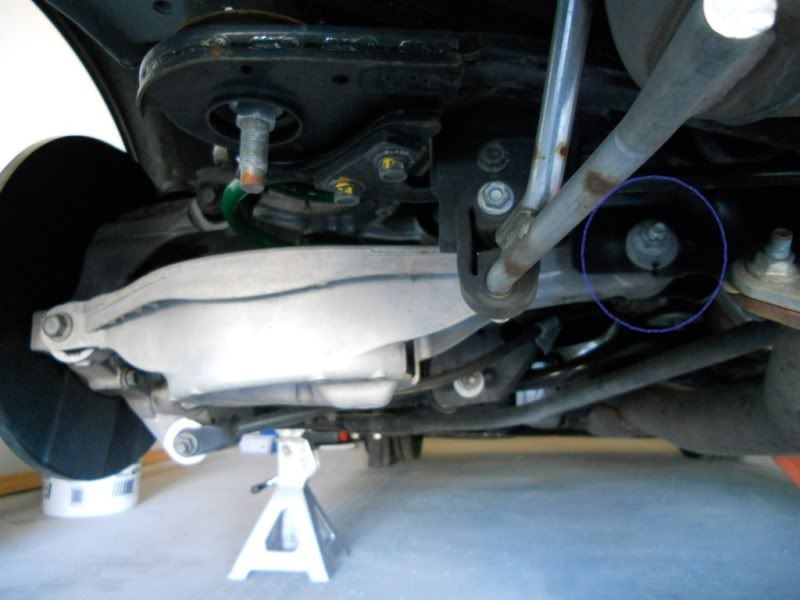 Step 3. Before your remove the toe bolt, use a marker to draw a line on the washer part and subframe. That way once you take the bolt out, and put your new eccentric bolt in, you'll at least be able to somewhat keep your alignment. 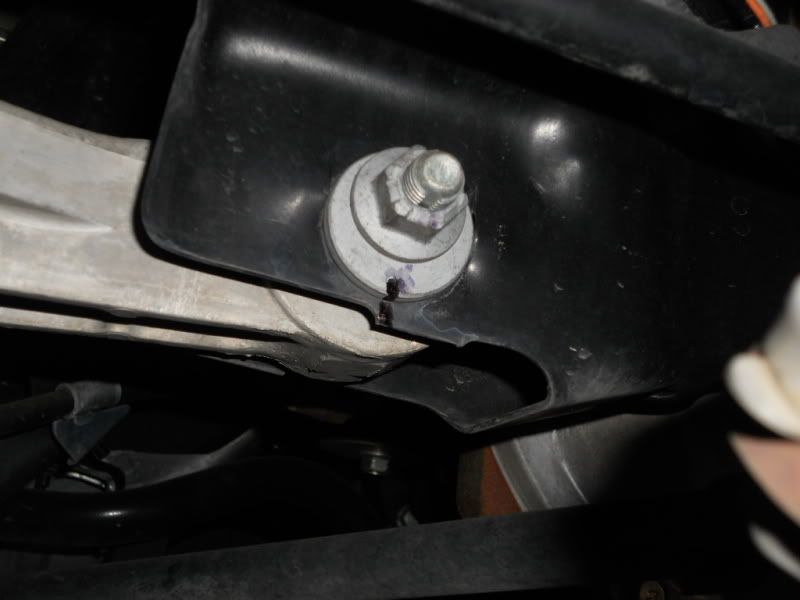 Step 4. Now that you have located your toe bolt and made your marks, lets go ahead and loosen it up. Impact wrench would be great if you have one. If not, I used a 17mm socket and small breaker bar for the nut, and used a 19mm box wrench to hold the front of the bolt. It was on there pretty tight so put some muscle into it. Once you get it loose, use your jack and slightly jack up the spring bucket. That will take the tension off the bolt so you can pull it right out 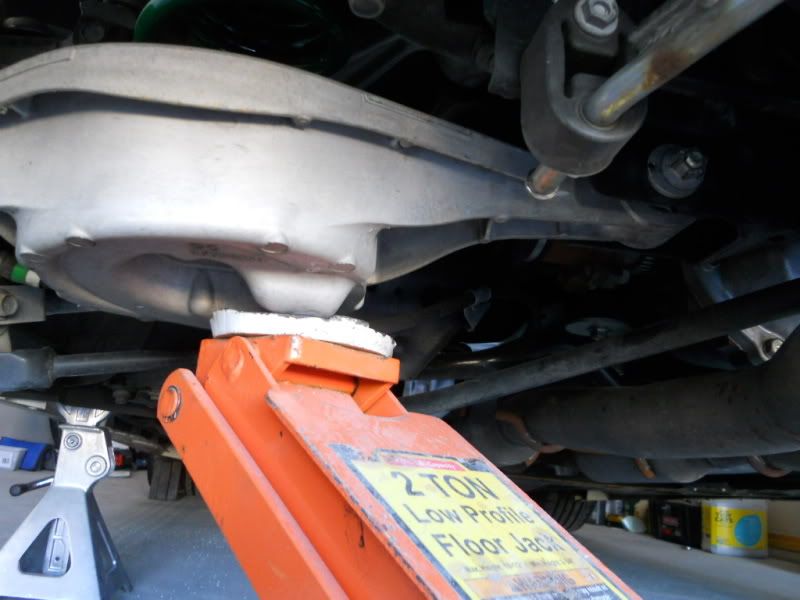 Step 5. Once you pull the bolt out, go ahead and slowly lower your jack. The entire spring bucket part is going to come down along with the spring. I went ahead and removed the spring bucket all together so I had more room to maneuver. This isn't necessary but recommended. 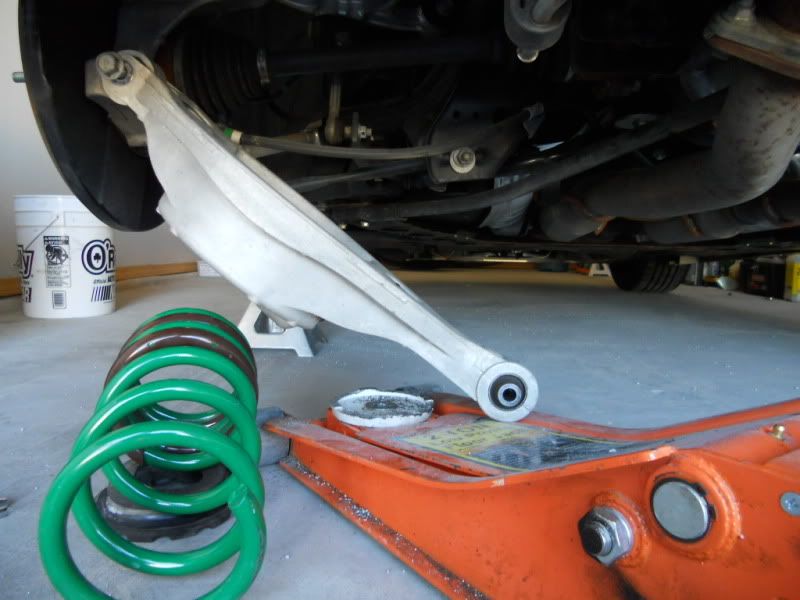 Step 6. Go ahead and get your rotary tool ready. I have a dremel, and I used bit 117. Its made for carving wood, and cutting soft metal. The sub frame that you will be cutting is aluminum, and you'll be shaving off just alittle, this bit was perfect for it and was really quick. 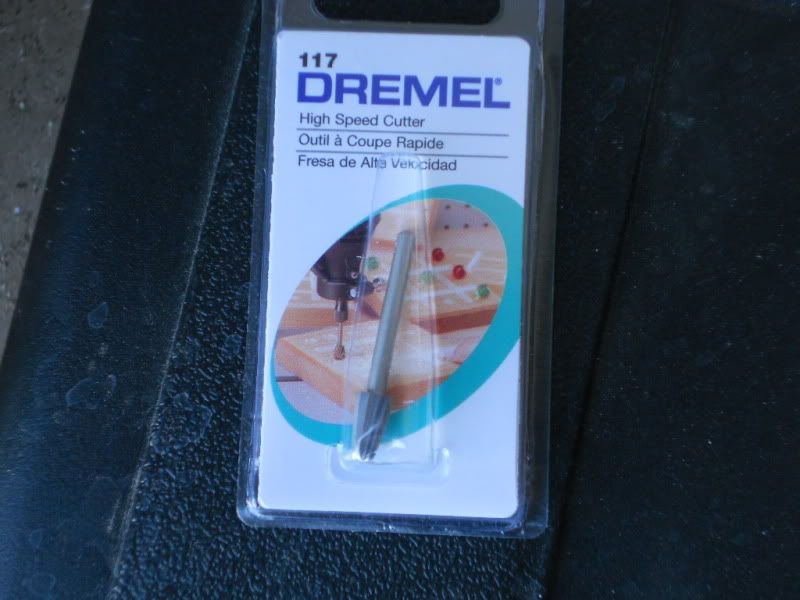 Step 7. Whatever toe bolt kit you bought, SPL or SPC, it should have came with a template. Put your template up on the subframe over the toe bolt hole. Don't worry, it will fit in between the two wedges and stay by itself. Now you can use a marker to mark off the area you'll be cutting. Don't use a black sharpie like I did. It was really hard to see once I started cutting so I would recommend a white or yellow paint marker. 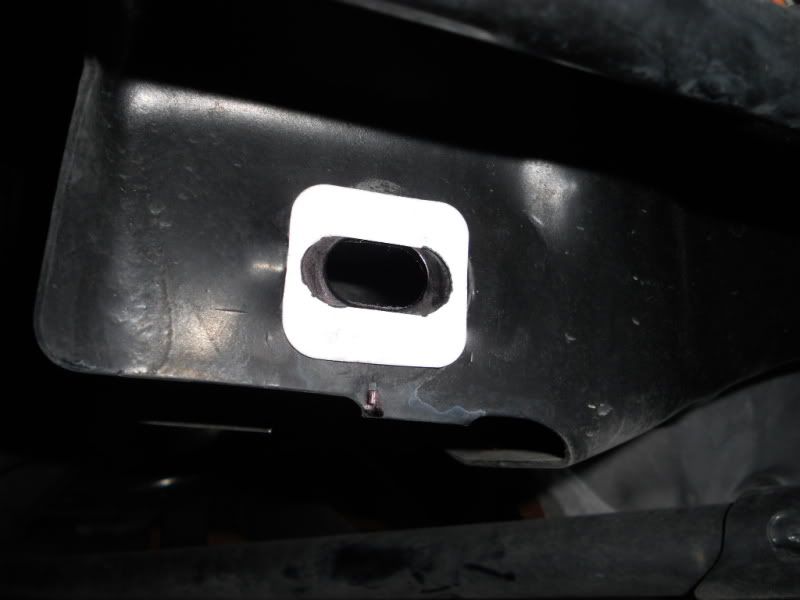 Step 8. Ok, now you are ready to start grinding and elongating the hole. Keep in mind, its a tight area. You have the exhaust right next to it so getting a dremel tool up in there is a little tough. Just take your time. Remember, wear eye protection. Aluminum shards are going to be flying all over the place. Also, I recommend hearing protection as well. Once you get done with that, you'll need to grind down the front part on the other side of it as well. Not the best picture, you are looking up and at an angle here. But blue circles are showing the holes you'll need to enlarge.  Step 9. Once you enlarged the holes, go ahead and pull out the new eccentric bolt out of your kit. I went ahead and made a line on it just like the stock bolt. Remember, you made that line on the subframe earlier as well so when you put this new bolt in, you can line up the marks so that way your alignment isn't to terribly off. You can see with the way the new bolt is shaped, and grinding the holes larger, how you have more adjustability compared to stock. 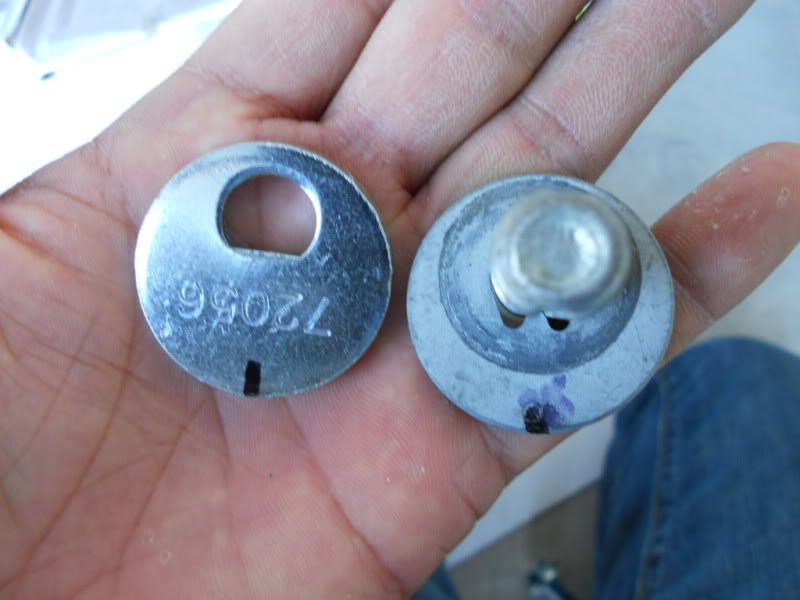 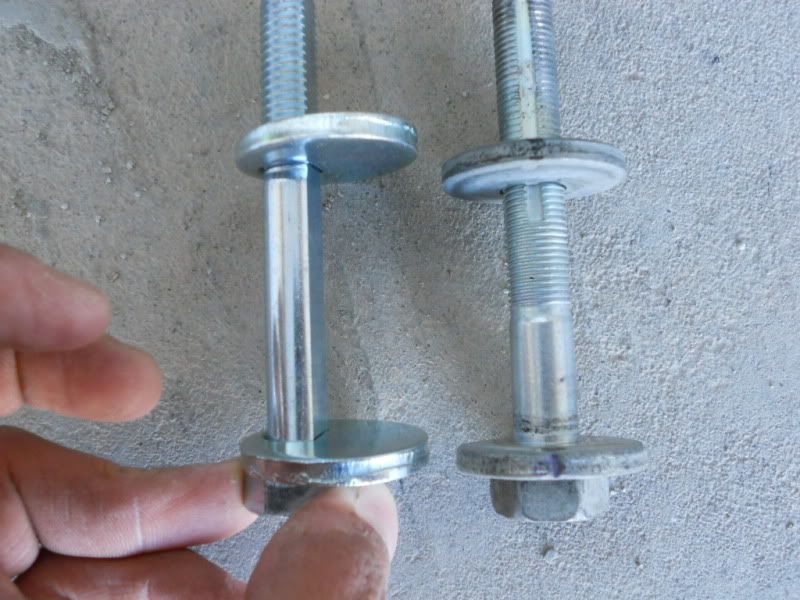 Step 10. Put your spring back into the bucket. Use your jack and raise up the bucket and line it up with the hole and put in your new eccentric bolt. Remember, line it up with the marks you made. Go ahead and tighten down the bolt to 73 ft lbs. Do the other side just like this and you are all set! *Nismo owners- When you get to the right/passenger side, life is easier if you take off the damper. As you can see in the picture, it would be really hard to get your rotary tool up in there if you didn't take it off 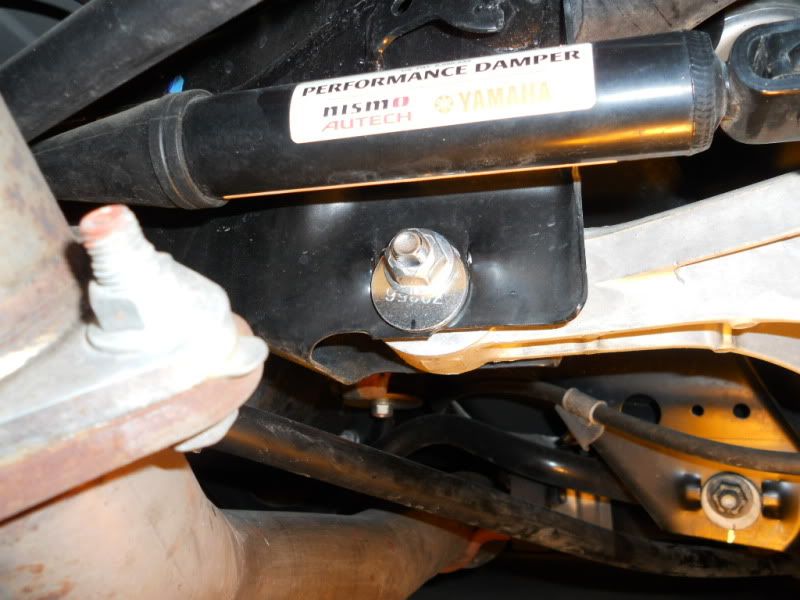 Thats all there is too it. Now go get an alignment and you'll be all set. There is a DIY thread on here for camber arm install. If you are doing toe bolts, might as well do the camber arms as well. Hope this helps you guys out. By all means go ahead and add recommendations if I left something out or if you found an easier way of doing something. Rep points appreciated if you found this useful. 
Last edited by MJB; 11-30-2011 at 01:19 AM. |

|

|
|
11-30-2011, 07:42 AM
|
#3 (permalink) |
|
A True Z Fanatic
Join Date: Jan 2009
Location: Florida
Posts: 1,428
Drives: N54 135i
Rep Power: 294 |
couple of suggestions:
You only need to grind the "inside" of the slot (the side that faces toward the center of the car) on both the front and back end of the toe bolt mounts. (four grinding areas total). A dremel flex shaft makes getting up in there MUCH easier. 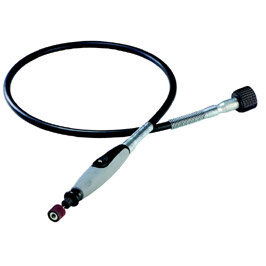 The Dremel #115 cutting bit is the easiest to do this with, IMO, but it's very similar to the #117 pictured above. It tears right through like butter. Pretty cheap, also.  Great DIY. Thanks for uploading it! |
|
|
|
|
11-30-2011, 05:29 PM
|
#4 (permalink) | |
|
A True Z Fanatic
Join Date: Aug 2011
Location: Tacoma, WA
Age: 43
Posts: 1,498
Drives: a POS truck
Rep Power: 497 |
Quote:
. I only cut out the "inside" on the passenger side because I remembered that from when I did it on my 350z. Saves time.And thats a cool dremel tool you posted. Never seen one like that before. That would definitely be easier to work with since its so small. |
|
|
|
|
|
12-01-2011, 10:50 AM
|
#5 (permalink) | |
|
Track Member
Join Date: Nov 2010
Location: Dallas
Posts: 625
Drives: '10 370z 6spd
Rep Power: 3372 |
Quote:
I would like to reiterate the eye protection suggestion. Its important that you use something that wraps around and protects the eye from all sides. Like the OP said, these little shards go flying all over the place and they can find their way into any little opening. I used goggles like these: 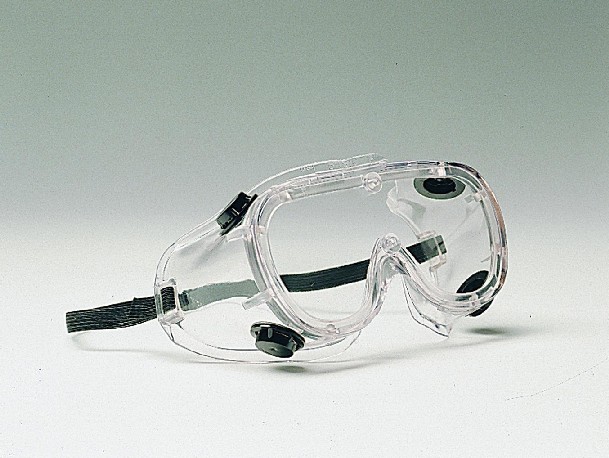 One sliver still managed to get through one of the vents and, with my terrible luck, landed right in the corner of my eye. Hurt like hell because it was sharp and HOT! lol. I decided to tape the little vents closed for the rest of the job and take breaks every couple minutes to defog the lenses.
__________________
some mods Last edited by Mandingo; 12-01-2011 at 11:04 AM. |
|
|
|
|
|
01-05-2013, 12:13 PM
|
#6 (permalink) |
|
Track Member
Join Date: Aug 2012
Location: Albuquerque NM
Posts: 577
Drives: 2010 Roadster 7AT
Rep Power: 308 |
[QUOTE=cheshirecat;1428965]couple of suggestions:
You only need to grind the "inside" of the slot (the side that faces toward the center of the car) on both the front and back end of the toe bolt mounts. (four grinding areas total). Anyone have pics of this detail.... Just to make sure I am clear on exactly the way this should be done 
|
|
|
|
|
01-05-2013, 02:15 PM
|
#7 (permalink) | |
|
A True Z Fanatic
Join Date: Aug 2011
Location: Tacoma, WA
Age: 43
Posts: 1,498
Drives: a POS truck
Rep Power: 497 |
[QUOTE=blueranger;2095545]
Quote:
__________________
09 Nismo #0483 sold. Viper or C7 next time around. |
|
|
|
|
|
01-06-2013, 11:42 AM
|
#8 (permalink) | |
|
Track Member
Join Date: Aug 2012
Location: Albuquerque NM
Posts: 577
Drives: 2010 Roadster 7AT
Rep Power: 308 |
[QUOTE=MJB;2095655]
Quote:
|
|
|
|
|
|
03-14-2013, 08:23 PM
|
#9 (permalink) | |
|
Track Member
Join Date: Sep 2012
Location: San Diego
Posts: 824
Drives: A Car
Rep Power: 15 |
[QUOTE=MJB;2095655]
Quote:
|
|
|
|
|
|
03-17-2013, 05:38 PM
|
#10 (permalink) | |
|
Enthusiast Member
Join Date: Nov 2011
Location: Huntsville, AL
Posts: 338
Drives: 2011 370 6M/T
Rep Power: 15 |
Quote:
|
|
|
|
|
|
12-05-2011, 11:34 AM
|
#12 (permalink) |
|
A True Z Fanatic
Join Date: Apr 2010
Location: Naples, FL
Posts: 2,659
Drives: 40th
Rep Power: 23 |
Very nice write up. I do have one problem though. Both my room mate and I put in toe bolts in the 370Z's. We went thru (4) 115 Dremel bits and more than an hour of labor here to cut these holes out on his car alone. There are 4 holes to cut. The two towards the rear were very easy and the two towards the front is where the drill bits wouldn't hold up.
So we had appointments for both our alignments in the morning I decided not to do my toe bolts that night. The Tire Kingdom was to do the alignments. I asked the kid to see if he could cut them out real quick and he did so I slipped him $40. This was the best investment I ever had. It would cost more to buy a Dremel and bits, plus the effort of actually doing it. It took the shop less than 5min with a diamond bit on an air tool.
__________________
2010 40th Anniversary 370Z  |
|
|
|
|
02-06-2012, 11:05 PM
|
#14 (permalink) |
|
Enthusiast Member
Join Date: Jan 2012
Location: NJ
Posts: 469
Drives: 98 2g DSM
Rep Power: 15 |
I'm a little confused. Why are these things called toe bolts? Judging from the pictures, it pushes or pulls the lower control arm in or out and not front to back. This tells me that it adjusts camber, not toe. Unless i'm just looking at the pics completely wrong.
|
|
|
|
|
02-06-2012, 11:21 PM
|
#15 (permalink) | |
|
A True Z Fanatic
Join Date: Dec 2010
Location: Amarillo, TX
Posts: 1,041
Drives: 2010 Boosted 40th
Rep Power: 18 |
Quote:
__________________
AeroJacket l BC Racing l B&M l K&N l EVO-R l TWM Performance l Tanabe l AAM l Drop Engineering l Zenclosure 
|
|
|
|
|
|
| Bookmarks |
|
|
 Similar Threads
|
||||
| Thread | Thread Starter | Forum | Replies | Last Post |
| DIY:REAR Fog Light install with New harness for US spec 370Z + Radar hardwire w/pics | AK370Z | DIY Section (Do-It-Yourself) | 198 | 09-14-2019 03:11 PM |
| Sunline rear Aero Spats...pics for those w/ install questions! | kevr6 | Exterior & Interior | 25 | 05-04-2014 04:01 PM |
| [FOR SALE] FS: SPC rear camber arms w/ toe bolts | jnaut | Parts for sale (Private Classifieds) | 12 | 09-21-2011 09:19 AM |
| Berk Test Pipe install...*^$#ing factory bolts!!! | mjohn617 | Intake/Exhaust | 76 | 01-30-2011 04:41 PM |
| can't find the other bolts that hold the rear spoiler | deolee | DIY Section (Do-It-Yourself) | 7 | 01-02-2011 03:50 AM |


 25Likes


 Hybrid Mode


