
 |
I would say I recently installed my NST Pulley kit, but that would be misleading, since I installed them about 3 months ago. Anyway, I thought I would get around
|
|||||||
 |
|
|
LinkBack | Thread Tools | Display Modes |
|
|
#1 (permalink) |
|
Track Member
 Join Date: Oct 2011
Location: South Florida
Posts: 882
Drives: 12 PW 370z 6MT Sport
Rep Power: 15       |
I would say I recently installed my NST Pulley kit, but that would be misleading, since I installed them about 3 months ago.
Anyway, I thought I would get around to some quick thoughts on the installation, and my personal review of the kit. Unfortunately this time around, I don't have too many pictures! Here is a link to the kit if anyone needs it: NST - The Leader In Nissan 370Z Pulley Development I purchased a kit from a forum member, that was brand new, never used. I had the underdrive crank pulley, overdrive alternator pulley, and the shorter Gates belt. Pulley Removal and Installation: I began my install by jacking the car up on all 4 corners, and removing the the black plastic splash guard. I then promptly began draining the radiator, since I planned on removing the radiator hoses for maximum room to work with. The radiator has a drain plug that allows easy draining. I then went topside, and removed the radiator overflow bottle, and the two radiator hoses, both top and bottom. Then for removing the fans, the are only 3 bolts if I recall correctly that hold the top of the fans in place. The bottom has two legs that are seated in holes - just lift the fans and move them away from the holes. There is also a ribbon of connectors on top of the fans that you need to disconnect, or cut away since they have zip ties holding them. Remove the fan by going UNDER the car - the top has no space. After removing the fans, you have this much space: 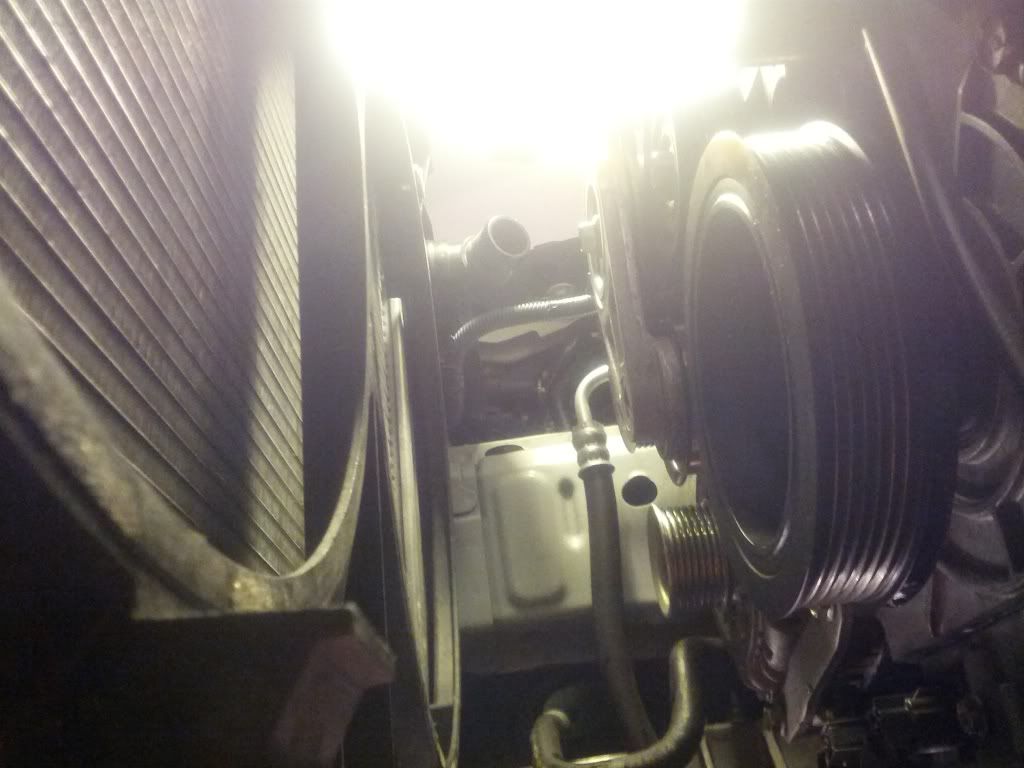 Once the fans are out, remove the serpentine belt from the car. The tensioner has a groove that you can place a rod in so you can lock it in place, like so: 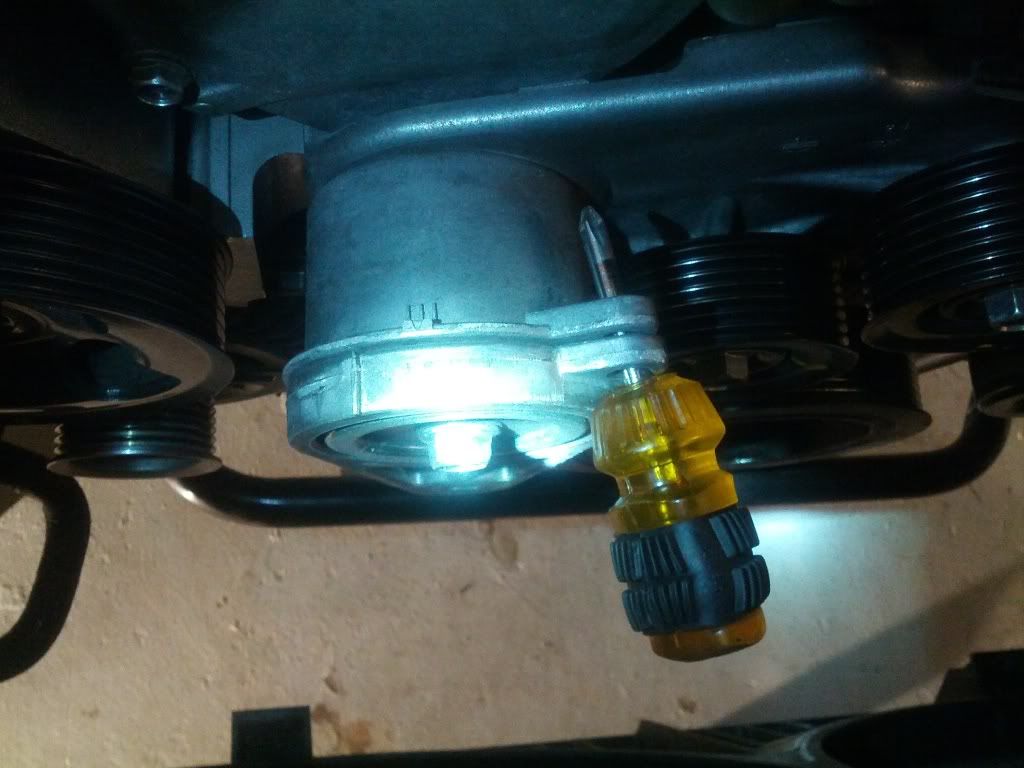 Now, for the tricky part...removing the crankshaft bolt. I'm not gonna lie. The bolt on my car was STUCK. HARD. At one point, I was debating removing my AC condenser and radiator, just to get an impact on the bolt. Luckily, I found a way. Here's how I removed the crankshaft bolt from our cars. 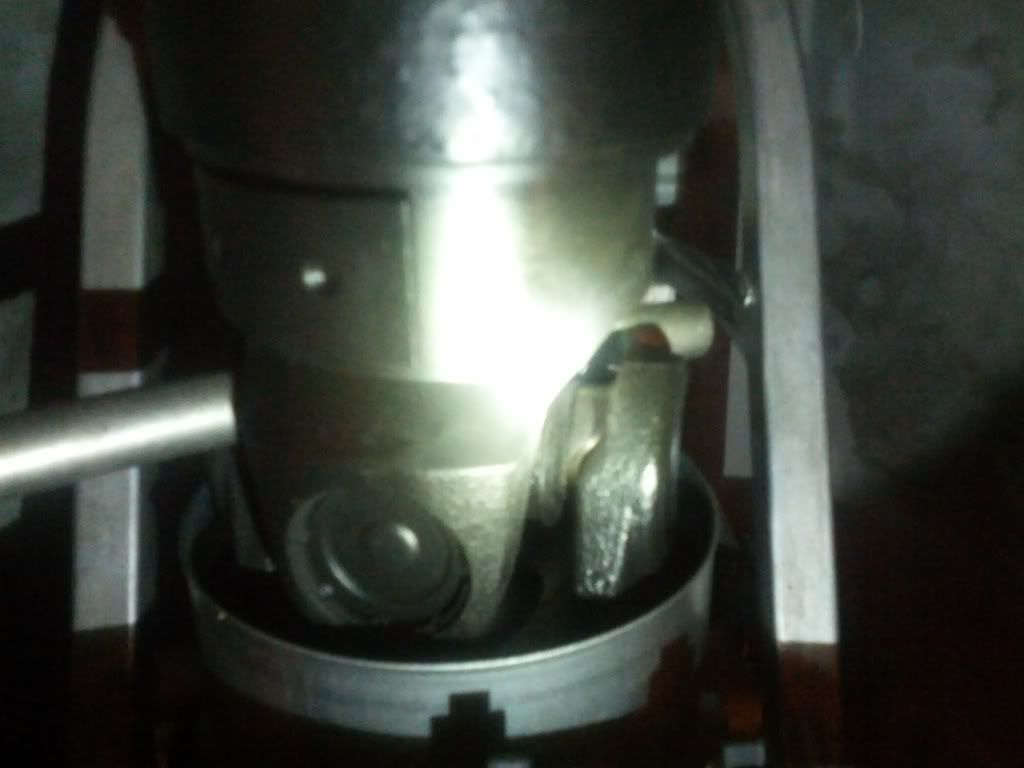 This looks a little confusing, but it is the spare tire iron, stuck in the U-joint of the driveshaft, closest to the transmission. I put the car in 3rd gear, and wedged the tire iron against the metal frame of the car: 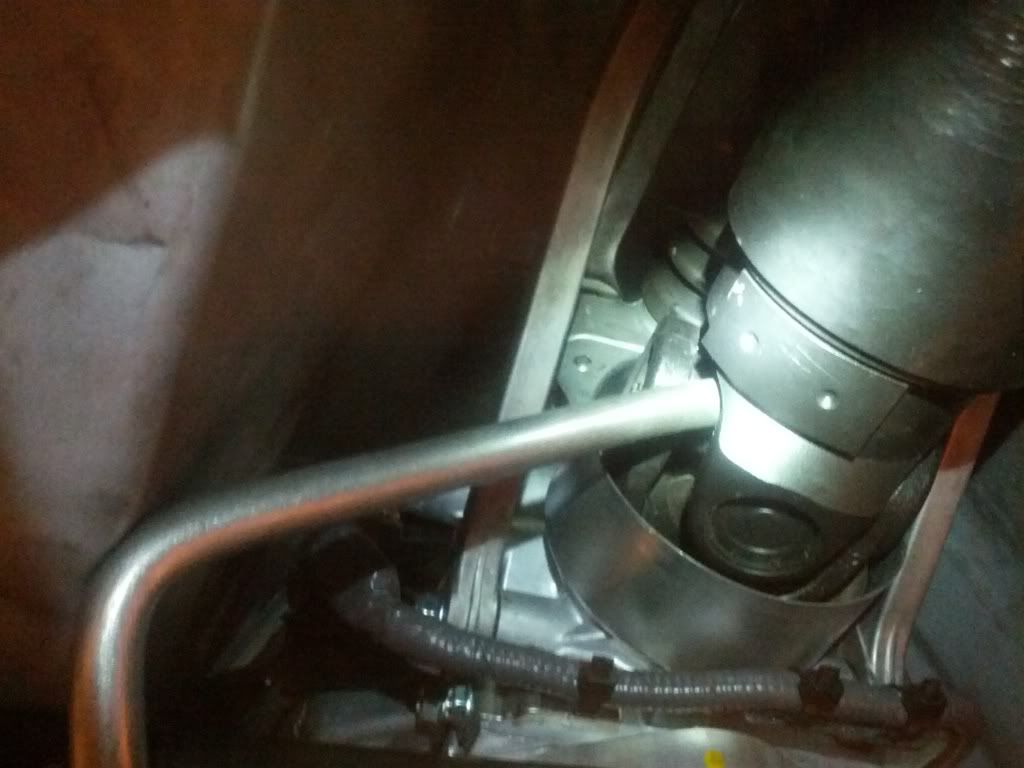 The head of the iron is firmly planted against the frame of the car in this picture. It is not touching anything else but the frame. With the engine effectively seized, I could now tackle the crankshaft bolt. I took a breaker bar, deep socket, and a 4 foot water pipe I had laying around, and attacked it from the top. Me and a friend pulled so hard, that the rear wheels started to lift due to the slack being lost in the driveline! But, after much muscle, the bolt went loose, and a satisfying sigh was let out. From there, I proceeded with the rest of the install, using a tiny jaw puller from autozone (someone's journal had this trick in there, forgot who though.), and removed the crank pulley with no hassle. The stock pulley weighs a ton! The alternator was next. I removed the alternator completely from the car - 3 bolts if I recall held it in place. I disconnected the leads, and as I tried to remove it from the car, I realized I would have to remove the swaybar to get it out from the engine bay. I went the lazy route, and just had the alternator sit on the swaybar: (Took picture after installing the pulley, haha.) 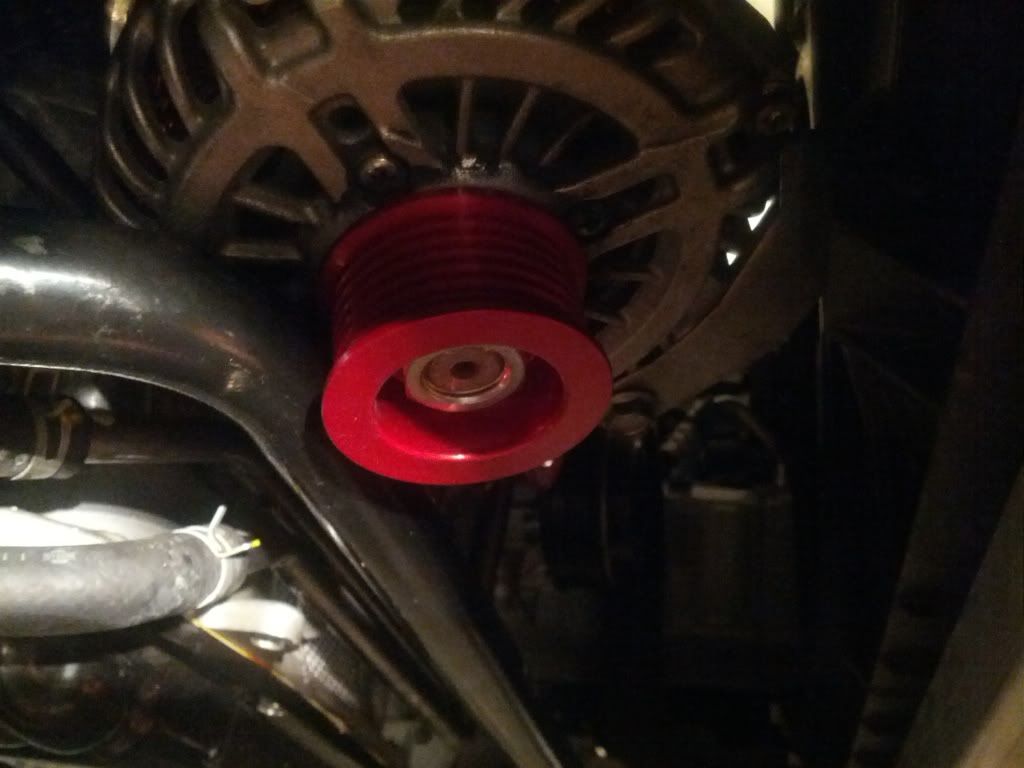 I took an impact gun to the bolt, and it came off right away. I reversed my removal of the alternator at this point. For the NST crank pulley, mine was a tight fit. I sanded down the interior edges a bit, and it was a tiny bit smoother. I put the pulley on the crank snout as best I could, then used the crank bolt to seat it the rest of the way. Torqued it back down hard as well. After this, it was super smoothing sailing. Just reverse everything you did, with the shorter belt, install the fans, hoses, and overflow bottle, and refill the radiator. Review: Overall, I felt little to no butt dyno difference. The car does rev faster, however, albeit a small amount. The SRM responds slightly quicker, and just tapping the gas in neutral makes it jump a little higher. It's nothing like a lightweight flywheel, but it's something! Powerwise, I'd say it's had an effect on my car, but that's something for a dyno to prove.  The installation was honestly not difficult, once I figured out the tricks. I'm a self taught shade-tree kinda guy, and it's nothing too crazy if you have the right tools. I also have driven 4k miles, with not a single mishap or sign of trouble. I checked the bolts after doing my oil recently, and they are tight as a drum. Both pullies are seated nice and firm. 
__________________
2012 Pearl White 370Z GReddy Twin Turbo  |
|
|

|
|
|
#3 (permalink) |
|
Enthusiast Member
Join Date: Nov 2012
Location: Sydney
Posts: 428
Drives: 11 Nissan 370Z MB M6
Rep Power: 139            |
I'm onto night #2 of my pulley install.
First night was pretty fruitless. Bolt stuck on hard. Tried penetrating lubricant and jolting the starter but i must've chickened out & let go of the clutch too soon because our cars don't have a mechanical ignition switch. Tonight i managed to crack it loose... too loose in fact! I also had another go at using a cheater pipe on the breaker bar but no luck. Back to the dodgy trick. After 3 more jolt attempts, the latter 2 which lifted the front of the car a bit, the engine started!!! Oil spattered around the front of the engine and underneath. Not a pretty sight but i've done my best to clean it all up. If anyone knows where the ignition fuse is, they should reply here to save someone the mess i made. I found a fuse labelled IGN SW but wasnt sure so i left it in. In hindsight, i should've played safe and taken that fuse out. Removing the fans makes it a lot easier as you have more working space. Im not a big guy and i still found the space to be cramped. For anyone doing the starter jolt trick, you need to have the breaker bar floating in the air at least 2 inches from the floor/whatever you intend to use as the striking surface. This creates some momentum before the end of the bar strikes the floor. Having it butted snug against the floor didnt work for me. Battery is in good condition too and had the belt already removed. Only use a 6pt socket for this, preferably an impact socket. My crank pulley didnt put up much of a fight. i didnt even need the puller. maybe when the engine started, it spun loose.. As for the alternator... what a bitch to remove!! 3 bolts - 1x tight 14mm long one (upper), 1x 12mm long one & a short 12mm one. The 12mm ones are easy to crack. 14mm bolt needed some muscling with the breaker bar & deep impact socket. Then there is the 3 wire electrical connector, followed by the +12V lead secured by a 12mm nut in a very cramped space. Finally, 2x 8mm screws/bolts holding the loom bracket to the rear of the alternator. then wiggle the alternator free. be careful when it discovers freedom.. dont want to slice open any hoses or rip any looms! Lowering the swaybar isnt hard. Just 4x 14mm nuts  best to lower it before you wiggle the alternator free. having the alternator resting as described above, then drop onto your foot/leg/crotch when the sway bat swings free is not fun. best to lower it before you wiggle the alternator free. having the alternator resting as described above, then drop onto your foot/leg/crotch when the sway bat swings free is not fun.Removing the pulley required some penetrating lube and a rattle gun. My little 10.8V one got it loose after a few goes so those with larger more capable guns will have no problem. Use a 6pt socket (24mm or 15/16 size). The nut is quite soft and shallow so you definitely dont want to munch thru it. I was unable to get a good enough grip using the belt and hand method to tighten the nut to the specified 118Nm using a torque wrench. I'm just going to rattle it on for a good while and call it done. Hope this helps someone in the future. |
|
|

|
|
|
#4 (permalink) |
|
Track Member
Join Date: Nov 2010
Location: Dallas
Posts: 625
Drives: '10 370z 6spd
Rep Power: 3371            |
According to the shop manual, we are supposed to torque the crankshaft bolt to 30 ftlbs then tighten an additional 90 degrees.
Even with the aid of a floor jack I was only able to tighten the bolt about 65 degrees. At that point, my breaker bar was bending a startling amount and the bolt was not getting any tighter. Think that is enough? I'm afraid that trying to tighten it more will break something honestly.
__________________
some mods |
|
|

|
|
|
#5 (permalink) |
|
A True Z Fanatic
 Join Date: Aug 2012
Location: Edmonton Alberta Canada
Posts: 2,089
Drives: 40th 370z
Rep Power: 133            |
The fact taht it says 30ft lbs and then turn an additional 90 degrees means the bolt is probably a torque to yield and should be replaced. It would also explain why you were unable to get it to go 90 degrees as the bolt would have already been stretched so to speak. Doubt you will have any issues with it tho.
__________________
2007 Chevy Duramax - EFILive Tuned By Me 2010 40th W/ Nav - Boosted Performance - UpRev Tuned By Me The Mrs. Ride -2012 335XI N55 BMW - Cobb Tuned By Me, Built by her  My Build --> http://www.the370z.com/members-370z-...39s-build.html |
|
|

|
|
|
#6 (permalink) |
|
Enthusiast Member
Join Date: Nov 2012
Location: Sydney
Posts: 428
Drives: 11 Nissan 370Z MB M6
Rep Power: 139            |
it's not actually specified as a single use item in the service manual, which is odd. mine hasn't loosened. I put a paint mark on the bolt head and the pulley and check it every oil change
|
|
|

|
|
|
#7 (permalink) |
|
Track Member
Join Date: Nov 2010
Location: Dallas
Posts: 625
Drives: '10 370z 6spd
Rep Power: 3371            |
Thanks guys. I actually did replace the bolt with a new one. I figured $6 was cheap peace of mind. Maybe I'll try to re-torque after a few heat cycles and see if it budges.
On another note, my oem crank pulley looks to have been balanced from the factory. They drilled out some spots of the outer ring. Do you think they were just balancing the pulley itself or is this to balance the whole crankshaft? I always thought the crankshaft was balanced internally on modern vehicles and didn't require pulley balancing to compensate... 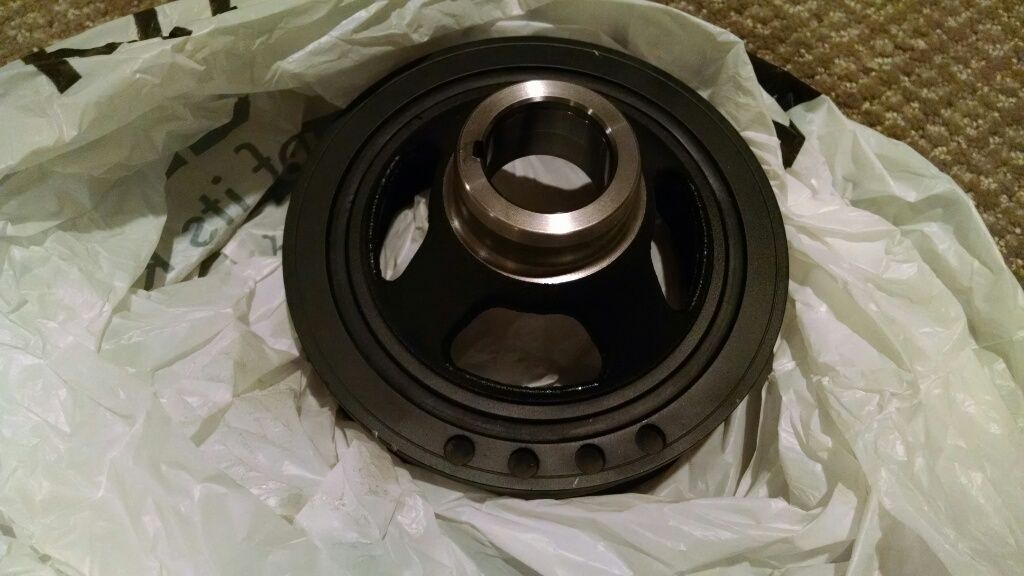
__________________
some mods |
|
|

|
|
|
#8 (permalink) |
|
Enthusiast Member
Join Date: Nov 2012
Location: Sydney
Posts: 428
Drives: 11 Nissan 370Z MB M6
Rep Power: 139            |
i cant remember if the threads are meant to be lubricated or fitted dry but if it doesnt specify lubing the threads, i'd recommend spraying the end of the crankshaft (where the bolt goes into) with brake cleaner, then blast it dry with shop air and then install the bolt. Sometimes the threads are dirty or unneccessary oil gets pushed into the end as the bolt is driven in. The pressure has to go somewhere.
Anything that rotates should be balanced. The crank is internally balanced but if you slap a heavy pulley on the end which isnt balanced then it's going to upset things |
|
|

|
|
|
#9 (permalink) |
|
Enthusiast Member
Join Date: Nov 2014
Location: LR, Arkansas
Posts: 428
Drives: 2012 370Z
Rep Power: 11  |
How much smaller of a belt do I need? I just ordered the NST alternator / crank kit. Their website stated the stock belt should work unless it's wore out then it would need to be replaced.
|
|
|

|
|
|
#10 (permalink) |
|
Enthusiast Member
Join Date: Nov 2012
Location: Sydney
Posts: 428
Drives: 11 Nissan 370Z MB M6
Rep Power: 139            |
nah even with a brand new OEM belt it is too long. I am using a 7PK2000 and it's still slightly too long but it's been running fine for almost a year now. OEM is 7PK2020 from memory
|
|
|

|
|
|
#11 (permalink) |
|
Enthusiast Member
Join Date: Nov 2014
Location: LR, Arkansas
Posts: 428
Drives: 2012 370Z
Rep Power: 11  |
Thank you but which is the correct size then if your 7PK2000 is slightly too long. Their website shows a "Gates Belt K070786" but I work at a auto distributing company. We don't carry gates belts. Only their water pumps. We have dayco belts like the 7PK200 you have. And motorcraft belts I can get it basically for free if I find the same size as the "K070786" but in dayco or motor craft.
|
|
|

|
|
|
#12 (permalink) |
|
Enthusiast Member
Join Date: Nov 2012
Location: Sydney
Posts: 428
Drives: 11 Nissan 370Z MB M6
Rep Power: 139            |
dont take my word for it but if i was to do it again, i'd try a 7PK1990.
7PK - number of ribs 1990 - the circumference in millimetres the aim is to line up the marks on the auto tensioner (refer to service manual) and unless my 7PK2000 is actually longer than it should be, i doubt a 7PK2010/K070786 would bring it into spec since it's longer. good luck man |
|
|

|
|
|
#13 (permalink) | |
|
Enthusiast Member
Join Date: Nov 2014
Location: LR, Arkansas
Posts: 428
Drives: 2012 370Z
Rep Power: 11  |
Quote:
Because the Gates K070786 is "Outside Circumference (in.) 79.183" so in mm it'd be 2011mm and yours is 2000mm? So 7PK1990 belt would be ideal? Last edited by AstatenateZ; 01-02-2015 at 06:18 PM. |
|
|
|

|
|
|
#14 (permalink) |
|
A True Z Fanatic
Join Date: Sep 2010
Location: Crooklyn
Posts: 1,013
Drives: 370Z 6psd-sport-pkg
Rep Power: 21            |
Here i was reading and thinking, well the vq37vhr is a high rev and high vibrational engine where the front of the engine the crankshaft vibrates the most, nissan comprehend the vibrations by equipping heavy flywheel and a heavy pulley, dont u guys think that in the long run due to lighter pulley would break down the bearings, basically diminishing life?
__________________
Kids don't do Drugs, Drugs are bad, so let the professional druggies do Drugs for you.  537whp/496lb/tq@8-9PSI 93 octane 537whp/496lb/tq@8-9PSI 93 octane
|
|
|

|
|
|
#15 (permalink) |
|
Enthusiast Member
Join Date: Nov 2012
Location: Sydney
Posts: 428
Drives: 11 Nissan 370Z MB M6
Rep Power: 139            |
Yep, K070786 cross references to a 7PK2010. You can do cross reference checks on autopartoo.com or the belt manufacturers' websites usually have a cross ref search area. You can even put in OEM part numbers on some sites. The Bando site lists the wrong belt for our Z. I've emailed them but they didnt respond so dont follow the Bando site if anyone is searching for an OEM belt. Oddly enough, Bando makes the belts for Nissan...
I am just speculating that a 1990mm circumference belt will make the tensioner marks line up perfectly so feel free to try it and report back. Check to see if the store does no-fuss exchanges before purchasing  otherwise, 7PK2000 is what i've had on for over a year now with no issues. otherwise, 7PK2000 is what i've had on for over a year now with no issues.As for the vibration issues, well let's just say it's a debatable topic. I've had the pulley for over a year now and engine still feels smooth. 3 oil changes and there has only been a tiny bit of metal powder on the magnetic plug but i am yet to do any UOA. To conclude, there's a risk with everything so weigh it up and make your own educated decisions 
|
|
|

|
 |
| Bookmarks |
| Thread Tools | |
| Display Modes | |
|
|
 Similar Threads
|
||||
| Thread | Thread Starter | Forum | Replies | Last Post |
| HKS Hi-Power Installed and Reviewed | Alstann | Intake/Exhaust | 52 | 07-20-2016 01:01 PM |
| [FOR SALE] stillen crank pulley | Huan'z | Parts for sale (Private Classifieds) | 20 | 04-14-2012 10:01 PM |
| [WTB] Underdrive crank pulley | ben1620 | Parts for sale (Private Classifieds) | 3 | 04-09-2012 08:33 PM |
| stillen crank pulley | Huan'z | Engine & Drivetrain | 3 | 03-31-2012 10:20 AM |