
|
I have spent the last couple of weekends working on the Z. I decided to remove the bumper and radiator core support for full access to the timing cover to
|
|||||||
|
|
LinkBack | Thread Tools | Display Modes |
 02-22-2025, 12:23 PM
|
#13 (permalink) |
|
Base Member
Join Date: Jan 2014
Location: California
Posts: 165
Drives: 09 Nissan 370Z GM M6
Rep Power: 6723   |
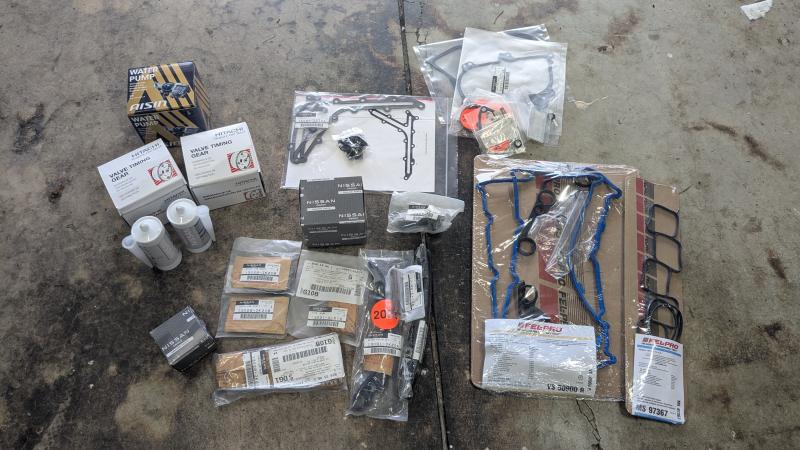 I have spent the last couple of weekends working on the Z. I decided to remove the bumper and radiator core support for full access to the timing cover to make sure I could see everything. The extra 2 hours of work was worth it IMO because removing the timing cover afterwards was pretty straight forward with full, unimpeded access to everything. I tried all kinds of things to get the crank bolt off, but even with the car in 6th gear with e-brake on and wheels chalked, there was too much play in the drive train and I was able to slop the breaker bar over from bumper to bumper. My impact tools were not strong enough and I didnt want to apply heat that close to the crank pully. I achieved success by using the old serpentine belt as a belt wrench by wrapping it around itself on the crank pully and looping it around the compressor. When tightened, the belt would pinch on itself, the crank stopped dead, and I was able to put all the force into the bolt and it broke loose without too much difficulty. Removing the crank bolt using the old belt. 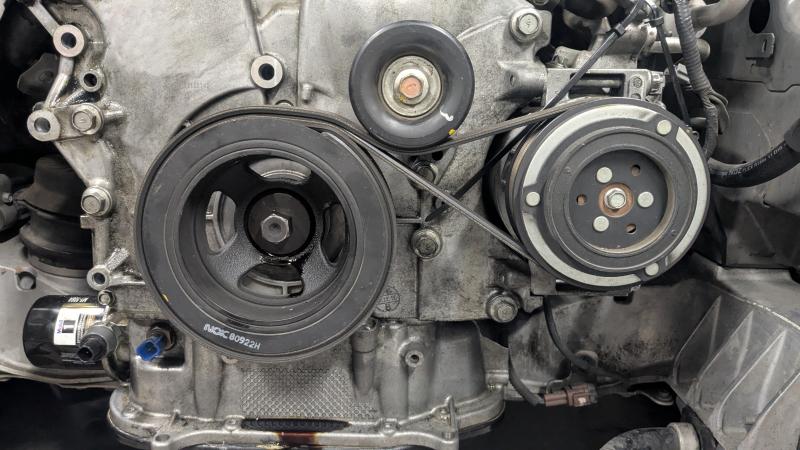 When I opened up the timing cover, I was surprised to see how clean the area was. I didnt see any oil staining/oil varnish. I also was able to easily confirm that the engine was mechanically in time. I then removed the intake plenum and valve cover gaskets to get wrenches on the intake and exhaust cams so that I could remove the cam phasers/sprockets. FINDING: Comparing the old intake cam phasers to the new ones, I noticed that the left phaser (bank 2) matched exactly. The first finger on the tone wheel was pointing just after the 7th tooth on both units. The right phaser, however, was clocked one tooth off! The old one was pointing to the 4th tooth and the new one was pointing to the 5th tooth. This aligns with the fact that I was only getting a p0011 (bank 1) error code. (I tried to compensate for the parallax effect as much as I could to illustrate this...)   Replaced both intake phasers and installed new timing chain kit. Another thing I noticed was that the new timing chains were MUCH tighter than the old ones. It was very difficult to get the new phasers on with the exhaust sprockets without assistance from a buddy to push the tensioner down the extra 0.5mm to get all available slack. Time to reassemble! 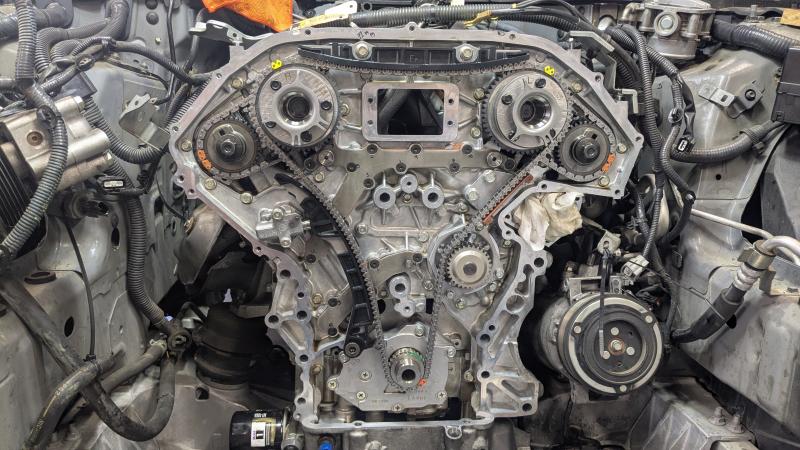 The reassembly so far has been mostly uneventful. I also used the serpentine belt technique to tighten the bolt the additional 90 deg after torquing to 33ft-lbs. I found that with the proper footing (and a 4 breaker bar) it wasnt too difficult to get the additional 90 degrees of rotation.  Installing the new crank bolt note the 90deg markings used after initial 33 ft-lb torque.  I am almost to the point where all I need to do is reinstall the lower oil pan and add some cheap oil to flush out any debris that fell in or got loose into the semi-old filter. Im going to cycle the engine a few times with the fuel pump disconnected to get oil pressure to the tensioners without the engine able to fire up. I dont know if this is really necessary to prevent the timing chains from jumping as the new chains are very tight and the oil pressure is removed after the engine stops anyway, but I guess it doesnt hurt. Then, Ill fire up the engine! The radiator is still off, so I cant run it for very long but I should be able to get some scope captures with the new parts before I spend all the time to reassemble everything else. One thing I noticed with the oil pan was that it got a little bent when removing it. The old RTV was on so tight that I had to use a pry bar to wedge an opening large enough for the gasket cutter. Its not a big bend, but enough that the pan has a slight rocking when the mating edge is placed on a flat surface. Im assuming that the mounting bolts will correct this when tightened and the new RTV will fill resulting little gaps if there are any? I guess ill find out if it develops a small leak .. Last edited by radensb; 02-22-2025 at 12:29 PM. |

|

|
| Bookmarks |
|
|
 Similar Threads
|
||||
| Thread | Thread Starter | Forum | Replies | Last Post |
| VVT Camshaft Sprocket Phaser check | RDWizard | Engine & Drivetrain | 22 | 10-07-2022 09:13 AM |
| Need help please! Code P0011 | 2009_370z | Engine & Drivetrain | 24 | 09-21-2017 06:33 PM |
| Code P0011 | ben.kathy | Nissan 370Z Owners Manual / Service Manuals | 10 | 09-20-2017 07:19 PM |
| Fixed p0011 but p0300 still here | steve216 | Engine & Drivetrain | 1 | 04-04-2017 09:40 PM |
| Help Error Code P0011 | NeverBoneStck | Engine & Drivetrain | 15 | 06-28-2015 12:57 AM |


 11Likes


 Threaded Mode

