
|
First off I want to give credit to spearfish25 for his write up on using the stock wiring to power the fog light. This is how i was able to
|
|||||||
 |
|
|
LinkBack | Thread Tools | Display Modes |
|
|
 05-24-2013, 12:04 AM
|
#1 (permalink) |
|
A True Z Fanatic
Join Date: Feb 2013
Location: Sacramento, CA
Posts: 1,372
Drives: 40th Anniversary
Rep Power: 17   |
First off I want to give credit to spearfish25 for his write up on using the stock wiring to power the fog light. This is how i was able to make this happen in 10 mins from start to finish. (the wiring not light install)
these are all the tools you'll need.  This install is for folks that want the fog light to come on whenever you turn your parking lights or headlights on. You can modify my instructions to add an inline switch in one of the dummy switches next to the cup holder if you choose. I chose not to at this time because I have my sub control in the center dummy switch. So first off I didnt want to have to run all new wiring from the front of the car to the back, through the gromett, to the fog light in order to have a switch. I also like the idea of using OEM plugs if i can just because...well because. I have the 40th with the heated seat package but you may be able to this with other non-heated seat models. I took apart the fog light per another DIY in this forum and found that others had issue with the bolt not coming off because of so much lock-tite. One came off without a problem but the other got stuck. What i did was just got a socket on the front of the a drill and a flat screwdriver and let the nut spin. Using the screwdriver as a wedge I was able to spin the nut off by the heat from the friction of the drill spinning the nut. BEST way to get it off without frustration. I installed the fog light in the reverse order of the DIY and plugged in the OEM plug as show below.  The next thing you have to do is take of the long trip on the door jam below. Place you fingers under the bottom edge and pull straight up.  Next take the corner kick panel off. Use a panel pulling tool to gently pry it out.  You will now expose the BCM. you want to look for the ORANGE single wire at the top left of the BCM  This is the one wire that gives power through the OEM fog light plug and does nothing else. Now here is the scary part. You need to cut this wire and strip wire opposite of the white wire block  I used about 6 feet of 14 gauge wire and heat shrunk it to the orange wire  Next all you need to do is take side knee pad off and run your wire through the center console. Pull up on the cup holder to expose the wire blocks connected to the heated seat switchs. Now here is where the magic happens! On the brown wire block look for the RED wire. This is your switched wire that comes on with your parking lights.  I didnt want to do any cutting or splicing so decided to stuff the 14 gauge wire into the wire block. there is plenty of room in there.  I then taped it down so it wont come out and wire tied everything.  Thats it! put everything back together, you're done! Rep's Rock Hand em out if ya got em'! 
__________________
Are U in Sacramento or Central Valley California? Click here!
Foglight Hardwire in less than 10 minutes! DIY: Automatic VDC off Last edited by Cbtech; 05-29-2013 at 04:58 PM. |

|

|
|
05-24-2013, 12:23 AM
|
#2 (permalink) |
|
Track Member
Join Date: May 2012
Location: Colorado
Age: 44
Posts: 896
Drives: 2012 Nissan 370Z
Rep Power: 16 |
great DIY!!! Although your video is set to private....
__________________
2012 370Z BLACK EDITION/ FLT BLK Rays / 5% 3M Tint / DW's / Z1 SS & 2 Piece Rotors Nismo S-Tune OEM / Beluga CBE & Y-PIPE / DDX370 / GTR Start .4 Fluid / NST Blue Kit 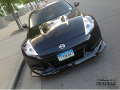
|
|
|
|
|
05-24-2013, 12:39 AM
|
#3 (permalink) | |
|
A True Z Fanatic
Join Date: Feb 2013
Location: Sacramento, CA
Posts: 1,372
Drives: 40th Anniversary
Rep Power: 17 |
Quote:
fixed!
__________________
Are U in Sacramento or Central Valley California? Click here!
Foglight Hardwire in less than 10 minutes! DIY: Automatic VDC off |
|
|
|
|
|
05-24-2013, 01:28 AM
|
#4 (permalink) |
|
A True Z Fanatic
 Join Date: Feb 2011
Location: Irvine
Posts: 1,682
Drives: 13 PW sport 6mt
Rep Power: 20 |
Does it also brighten when the brakes are engaged?
__________________
35% Hooper Optik | Takeda Attack CAI | F.I. HFC | Hotchkis Sway Bar | Stillen 24row | OS Giken Super Lock LSD | TK Shift Knob | EVO-R Carbon Diffuser
|
|
|
|
|
05-24-2013, 01:50 AM
|
#6 (permalink) | ||
|
A True Z Fanatic
Join Date: Feb 2013
Location: Sacramento, CA
Posts: 1,372
Drives: 40th Anniversary
Rep Power: 17 |
Quote:
Quote:
Mine literally takes 10 mins.  sent via my wrist watch calculator
__________________
Are U in Sacramento or Central Valley California? Click here!
Foglight Hardwire in less than 10 minutes! DIY: Automatic VDC off |
||
|
|
|
|
05-24-2013, 04:29 PM
|
#7 (permalink) |
|
A True Z Fanatic
Join Date: Feb 2013
Location: Sacramento, CA
Posts: 1,372
Drives: 40th Anniversary
Rep Power: 17 |
Stickied!! awesome thanks Admins
also the heated seats still work without issue 
__________________
Are U in Sacramento or Central Valley California? Click here!
Foglight Hardwire in less than 10 minutes! DIY: Automatic VDC off Last edited by Cbtech; 05-24-2013 at 04:42 PM. |
|
|
|
|
05-24-2013, 04:46 PM
|
#8 (permalink) |
|
Base Member
Join Date: Mar 2013
Location: Alabama
Posts: 77
Drives: 13 CP PEARL WHT A/T
Rep Power: 40 |
Good job!
__________________
 Soundstream Head Unit, Soundstream 5ch, Focal 6.5" Soundstream 3.5" ES 10" Wicked Cas Box, NISMO CAI, FI CBE w 18" Res. Z Speed Undrshrd Rear Fog w/ Sw. FI Ign. Sw. Fairlady Customz Painted Roof & Mirrors. Soundstream Head Unit, Soundstream 5ch, Focal 6.5" Soundstream 3.5" ES 10" Wicked Cas Box, NISMO CAI, FI CBE w 18" Res. Z Speed Undrshrd Rear Fog w/ Sw. FI Ign. Sw. Fairlady Customz Painted Roof & Mirrors.
|
|
|
|
|
06-11-2013, 10:08 AM
|
#9 (permalink) |
|
Enthusiast Member
Join Date: Mar 2012
Location: Cullman, Alabama
Posts: 252
Drives: Sold Z
Rep Power: 15 |
Will i need to purchase the "basic connector" wiring harness to do this mod or just the Reverse Fog light and everything else is already there?
JDM Fairlady Z Reverse Fog Light |
|
|
|
|
11-12-2015, 05:53 PM
|
#10 (permalink) | |
|
A True Z Fanatic
Join Date: Sep 2015
Location: hangtown, CA
Posts: 1,164
Drives: 16 370Z auto
Rep Power: 591 |
Quote:

|
|
|
|
|
|
06-12-2013, 02:46 PM
|
#11 (permalink) |
|
A True Z Fanatic
Join Date: Feb 2013
Location: Sacramento, CA
Posts: 1,372
Drives: 40th Anniversary
Rep Power: 17 |
if the fog light is OEM you wont need to buy any additional connectors. The wiring harness is already installed in the car all you have to do is install the light and plug it in!
__________________
Are U in Sacramento or Central Valley California? Click here!
Foglight Hardwire in less than 10 minutes! DIY: Automatic VDC off |
|
|
|
|
06-12-2013, 08:35 PM
|
#12 (permalink) | |
|
A True Z Fanatic
Join Date: Aug 2010
Location: Lawrenceville,Ga
Posts: 4,293
Drives: My foot up your azz
Rep Power: 31 |
Quote:
__________________
2013 ZL1 754 rwhp 747 rwtq 
|
|
|
|
|
|
06-12-2013, 09:22 PM
|
#14 (permalink) | |
|
A True Z Fanatic
Join Date: Feb 2013
Location: Sacramento, CA
Posts: 1,372
Drives: 40th Anniversary
Rep Power: 17 |
Quote:
always gonna be haters. ") sent via my wrist watch calculator
__________________
Are U in Sacramento or Central Valley California? Click here!
Foglight Hardwire in less than 10 minutes! DIY: Automatic VDC off |
|
|
|
|
|
06-14-2013, 02:00 PM
|
#15 (permalink) |
|
Enthusiast Member
Join Date: Mar 2012
Location: Cullman, Alabama
Posts: 252
Drives: Sold Z
Rep Power: 15 |
Just installed my fog light. I had 0 issues getting those screws off that hold the fog light in. Just used a little blow torch and heated the nuts up for about 3-4 seconds to melt the loctite and boom comes off.
|
|
|
|
|
| Bookmarks |
|
|
 Similar Threads
|
||||
| Thread | Thread Starter | Forum | Replies | Last Post |
| DIY: Rear Fog Light Wire Via BCM and Stock Wiring | spearfish25 | DIY Section (Do-It-Yourself) | 53 | 01-17-2017 10:20 AM |
| Wire JDM Foglight for headlight AND brake? | Alstann | Exterior & Interior | 5 | 04-11-2012 09:24 AM |
| Hard Wire Ipod?? | 370guy | Audio & Video | 2 | 11-10-2011 04:36 PM |
| steering wheel feels light after a couple hard acclerations | kevin.z | Nissan 370Z General Discussions | 0 | 02-04-2010 10:53 PM |
| Headlight and tail light overlays | cwj370 | Parts for sale (Private Classifieds) | 4 | 12-11-2009 12:24 AM |


 6Likes


 Hybrid Mode


