
|
Hey everyone. I recently made my own version of a rear lower brace, or tie bar. I originally was going to make this for myself as I have made many
|
|||||||
 |
|
|
LinkBack | Thread Tools | Display Modes |
 03-15-2011, 07:30 PM
|
#1 (permalink) |
|
Premium Member
 Join Date: Nov 2010
Location: baton rouge, la
Posts: 164
Drives: s2000
Rep Power: 16  |
Hey everyone. I recently made my own version of a rear lower brace, or tie bar. I originally was going to make this for myself as I have made many things for previous cars and my race bikes. Anyway after some interest here on the forum I decided to sell a few of them. This is the promised "How-to" on installing the bar.
Things needed: Jack Jack stands (somewhat optional) 17mm socket and ratchet. Time: 5 min. maybe. Step 1: Jack the rear end of the car up as much as needed to access the two nuts seen below. You can see what I used as a jacking point, but feel free to use your own if desired. I also did not use jackstands, as this took me about 5 min with taking pictures and I can somewhat fit under the car without the jack.  Step 2: Loosen the two nuts seen here. They are attached to the arm that seats the bottom of the spring. They also are the adjustment point for the rear toe. You can mark where they currently are (before taking loose) or you can just go get another alignment after the install. 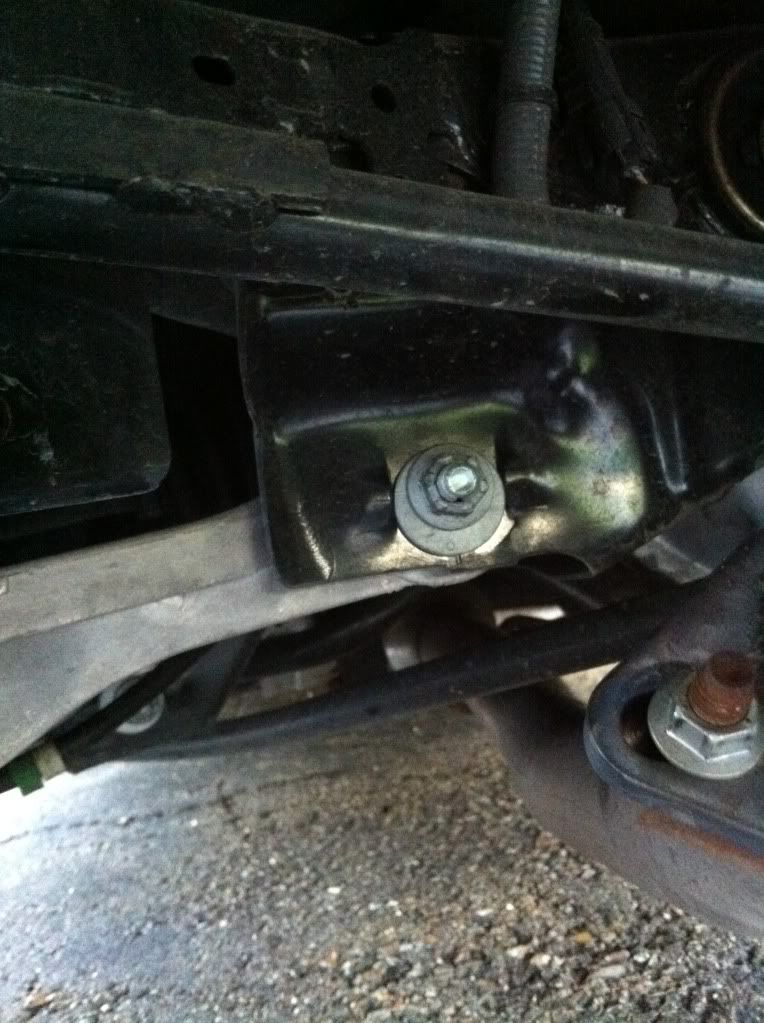 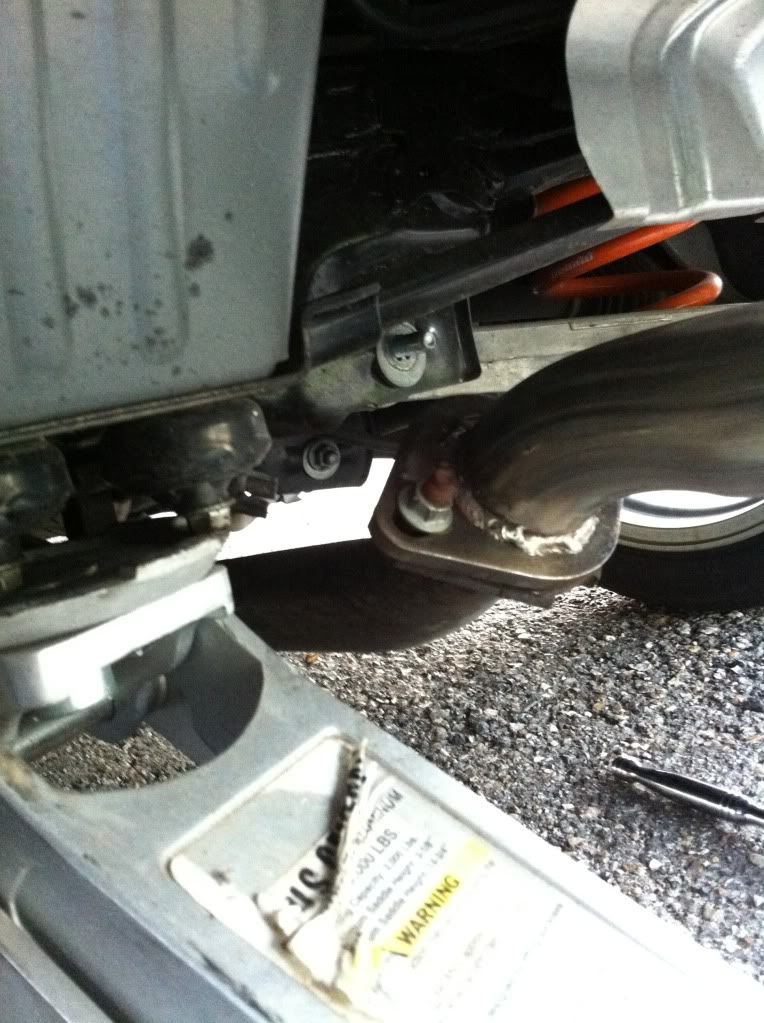 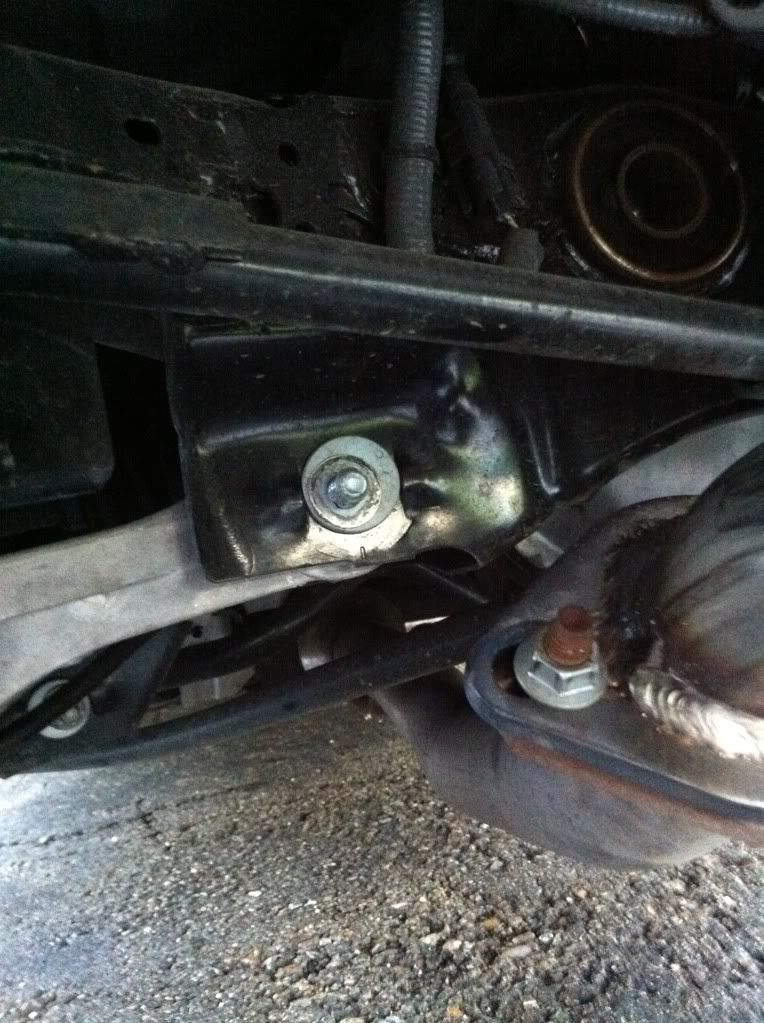 Step 3: Slide the rear brace into place and poke the bolts through the holes in the brace. 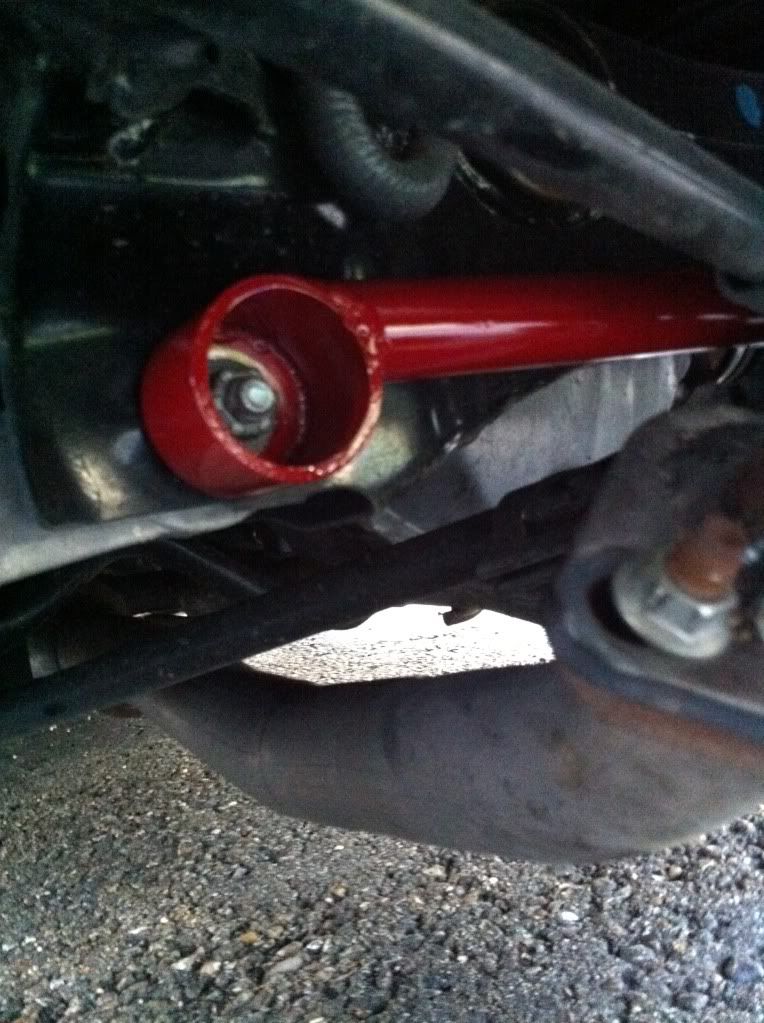 Step 4: Tighten the nuts back down and admire your work. Then once you are done, lower the car and enjoy! 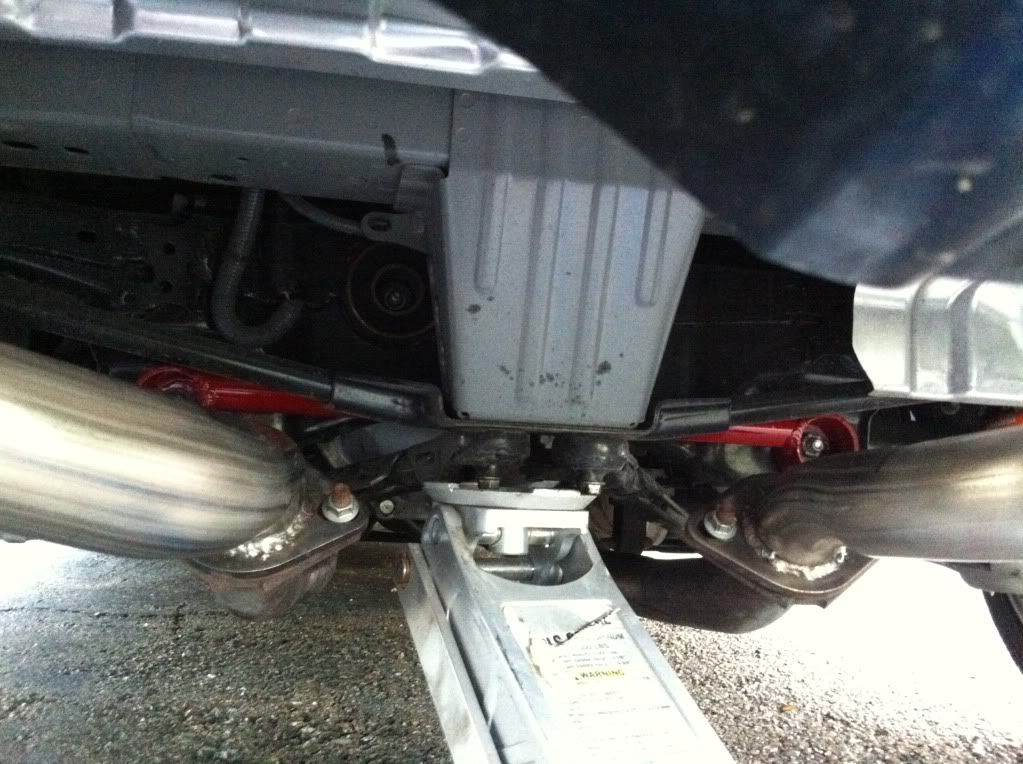
__________________
|

|

|
|
03-17-2011, 11:38 AM
|
#2 (permalink) |
|
A True Z Fanatic
Join Date: Mar 2009
Location: North East
Posts: 6,203
Drives: 09 370Z Sport M6
Rep Power: 655  |
It seems as though there is not enough room for the eccentric washer inside the hole so you left that underneath right? In that case shouldn't you add another washer on the outside underneath the nut to increase surface area and improve it's ability to hold the toe setting?
__________________
Hotchkis ARB | Stillen CAI | Art Pipes | Berk CBE | Stillen AP Racing Brakes | AE Performance Oil Cooler | BC Racing ER Coilovers | Doran Control Arms |
|
|
|
|
03-17-2011, 11:52 AM
|
#3 (permalink) |
|
Premium Member
Join Date: Nov 2010
Location: baton rouge, la
Posts: 164
Drives: s2000
Rep Power: 16 |
I left that washer underneath. And yes you could add another washer under the nut to increase surface area, I did not as you can see, but its up to the end user on that one. I felt the nut would grab onto the aluminum well enough. Personal preference though.
__________________
|
|
|
|
|
03-25-2011, 08:09 AM
|
#4 (permalink) |
|
Enthusiast Member
Join Date: Oct 2010
Location: Suffolk
Posts: 336
Drives: 2010 370Z Red
Rep Power: 16 |
Looks nice! Props for being inventive. Seeing things like this makes me want my own dam Welder. LOL
__________________
2010 Solid Red Z: Mods: Stillen G3 Intakes | BC Coilovers | H&R 20/25 Spacers | Stillen Splitter | Stillen LW Pullie TBI | Red GTR Start | LED Interior | Kenwood Double Din 
|
|
|
|
|
03-25-2011, 08:14 AM
|
#5 (permalink) | |
|
Premium Member
Join Date: Nov 2010
Location: baton rouge, la
Posts: 164
Drives: s2000
Rep Power: 16 |
Quote:
Thanks!! you should pick one up! 
__________________
|
|
|
|
|
|
| Bookmarks |
|
|
 Similar Threads
|
||||
| Thread | Thread Starter | Forum | Replies | Last Post |
| DIY:REAR Fog Light install with New harness for US spec 370Z + Radar hardwire w/pics | AK370Z | DIY Section (Do-It-Yourself) | 198 | 09-14-2019 03:11 PM |
| Stealth Bazooka install plus powdercoated rear brace bar | Mike | Audio & Video | 36 | 04-09-2014 08:09 PM |
| Rear lower brace | lazer_Z | Brakes & Suspension | 54 | 03-30-2011 05:35 PM |
| GT Spec Rear Lower Tie Brace | Z1Performance | Suspension/Brakes | 2 | 12-18-2009 05:33 PM |


 Linear Mode


