
|
An auto dimming mirror isn't an option for the 370Z in the UK (I'm not sure about elsewhere) and I recently noticed how cheaply second they were being sold on
|
|||||||
 |
|
|
LinkBack | Thread Tools | Display Modes |
|
|
 11-18-2010, 12:54 PM
|
#1 (permalink) |
|
Enthusiast Member
Join Date: Sep 2009
Location: England
Posts: 258
Drives: UK Yellow 370Z
Rep Power: 17  |
An auto dimming mirror isn't an option for the 370Z in the UK (I'm not sure about elsewhere) and I recently noticed how cheaply second they were being sold on ebay so a plan was hatched...
This guide can be adapted for use with the 350Z or any other car for that matter. The great thing about doing this on the 370Z is that there is already the perfect power supply located in the right place to make things easier. You will need * An auto dimming mirror - I used a BMW E36 mirror that I bought on ebay for less than £20. This turned out to be perfect both in dimensions but also in fitting * A long self-tapping screw * A drill and drill bit to suite the screw * A hacksaw * Some 2-core power cable (I used some black flex from an lead I had lying around) - OR 3-core if you wish to wire in the reversing signal * A pair of snips and / or wire strippers * Some electric connecting blocks / scotch locks / soldering iron - your preference * Some insulating tape or heat-shrink insulation * A screwdriver * A plastic tool to part the BMW mirror and remove your 370Z plastics - I used a old credit card Before I start here are the 2 mirrors for comparison: 
__________________
In the UK? Check out nissansportz.com - 350Z, GT-R, 370Z and more...
 2004 Sunset 350Z to 2009 Limited Edition Ultimate Yellow 370Z |

|

|
|
11-18-2010, 12:54 PM
|
#2 (permalink) |
|
Enthusiast Member
Join Date: Sep 2009
Location: England
Posts: 258
Drives: UK Yellow 370Z
Rep Power: 17 |
Removing the Nissan mirror
The Nissan mirror clips onto a metal plate that is securely fixed to the windscreen. In these pictures you can see the fixing (note also the rain sensor above the mirror): In this shot (from beneath) you can just see there is a plastic clip that need to be opened so the mirror slides off it's mount. 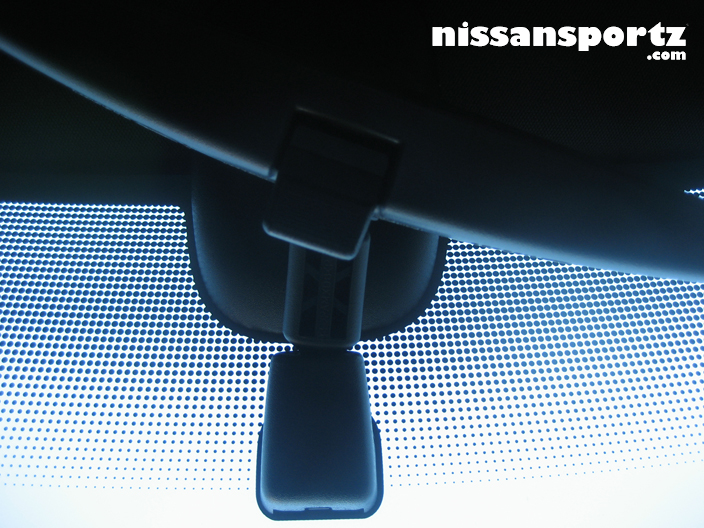 In this shot you can see that the mount can be parted into 2 which gives better access to that clip 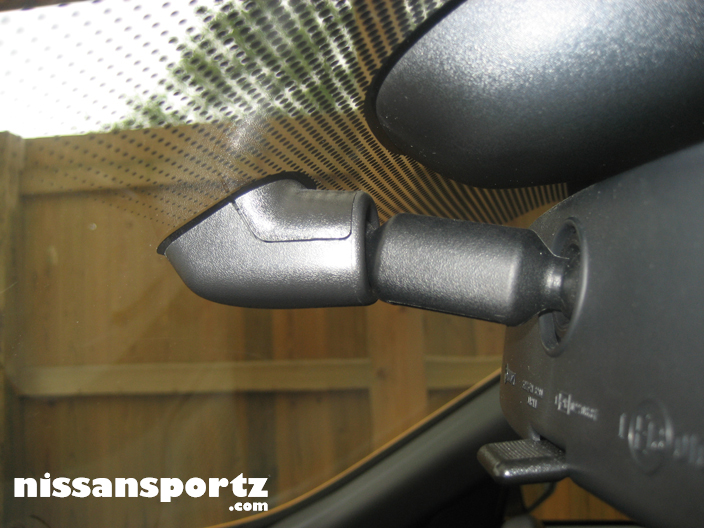 With the Nissan mirror removed I then dismantled the mounting bracket. I did this as I needed to cut the bracket off the Nissan mirror. I later decided that I did not need to dismantle the ball joint and that it was very difficult to put back together! Close up of ball joint - the metal ring needed to be removed to pull the jpint apart - in hindsight I would not recommend doing this as putting it back together is really hard! 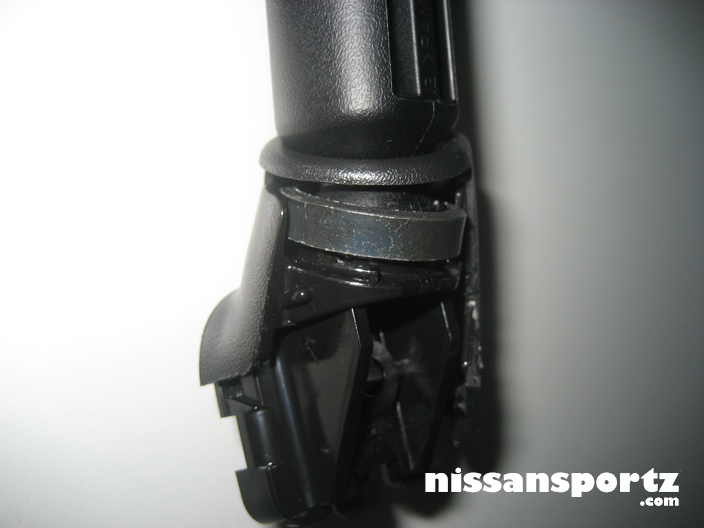 Ball joint dismantled: 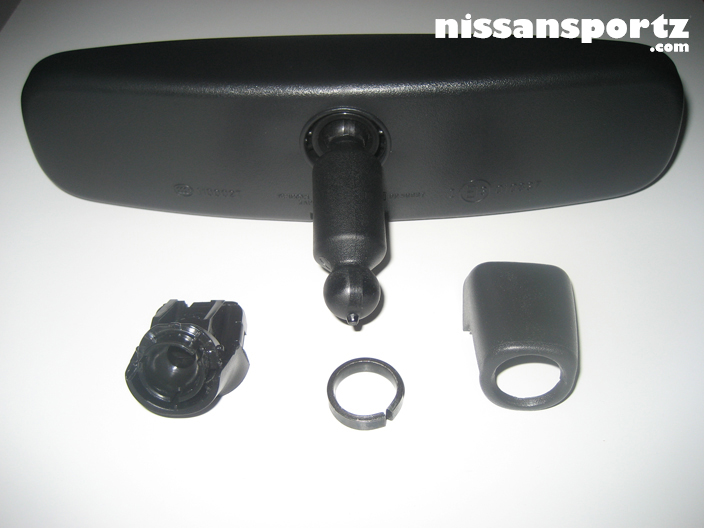 Cut the joint as close as you can to the mirror using a hacksaw: 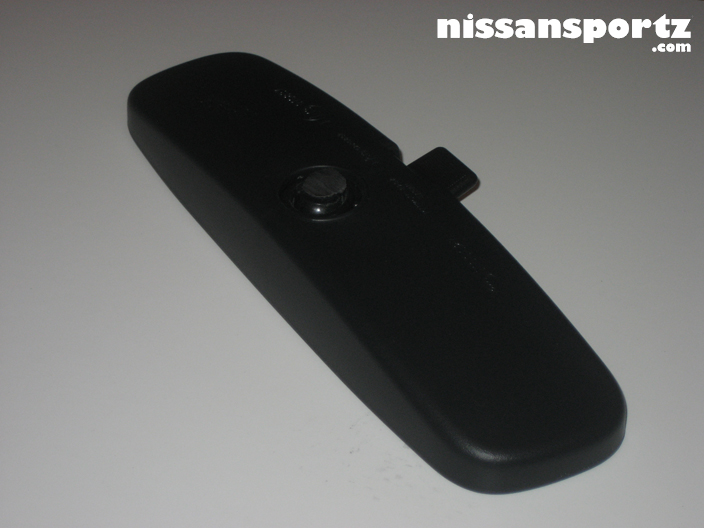 Preparing the BMW mirror Open the mirror by prying the bezel off the front. I used a credit card for this and found it to be quite easy: 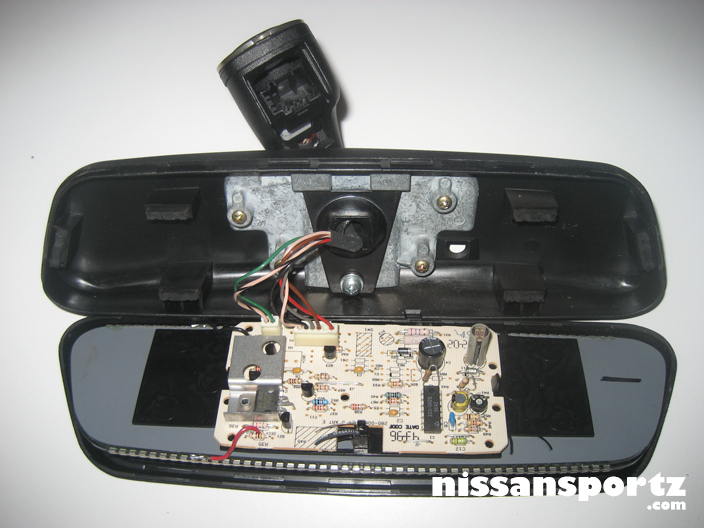 Unclip the cables from the PCB on the back of the mirror. Next, unscrew the black sprung-metal clip in the mirror back to release the ball joint. Remove the plastic cap over the ball and the bracket is free. Snip the cables - you will only need the Red and Brown cable for power. If you wish to wire in a reversing signal then keep the Grey cable too (see later). With the BMW bracket free I used the hacksaw to cut the ball off the end: 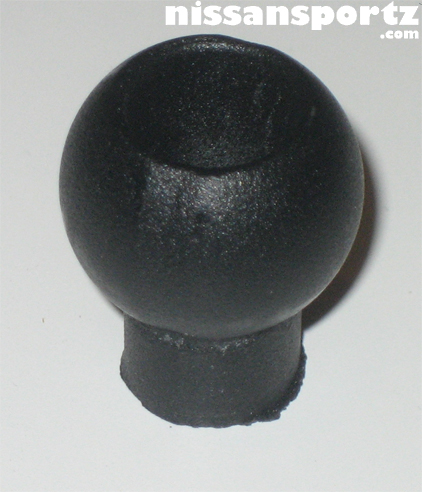 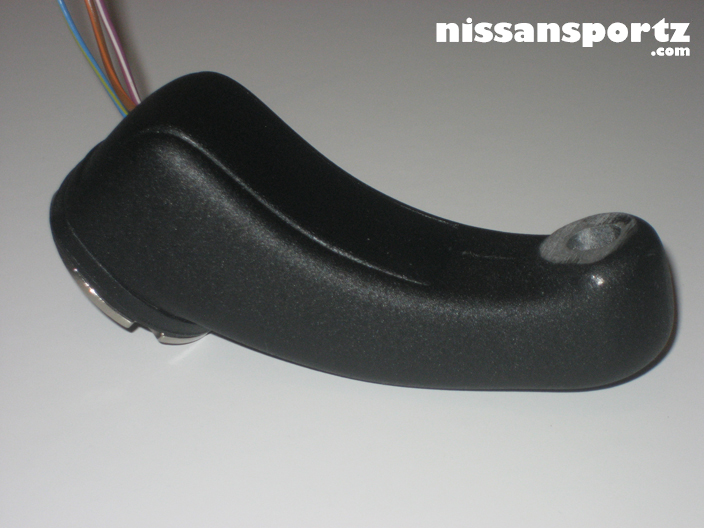
__________________
In the UK? Check out nissansportz.com - 350Z, GT-R, 370Z and more...
2004 Sunset 350Z to 2009 Limited Edition Ultimate Yellow 370Z |
|
|
|
|
11-18-2010, 12:55 PM
|
#3 (permalink) |
|
Enthusiast Member
Join Date: Sep 2009
Location: England
Posts: 258
Drives: UK Yellow 370Z
Rep Power: 17 |
Preparing the new mirror
I used a long self-tapping screw to fix the BMW ball to the end of Nissan mount. The BMW ball already has a hole through it so just drill a pilot hole into the Nissan mount and screw together. The resulting bracket should look like this: 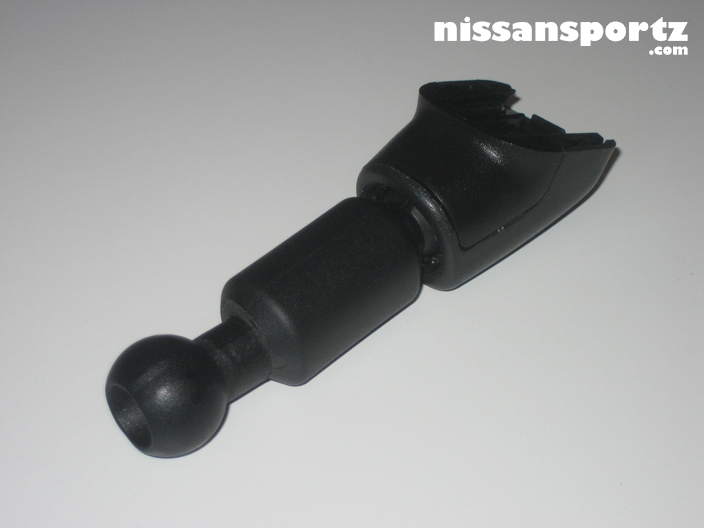 To wire the mirror up I joined a length of black 2-core power cable to the Red (+12v) and Brown (GND) BMW cables. Note: In the BMW the grey cable is also used to input a reverse signal. This is to prevent the mirror from dimming when reversing. I chose not to use this option as I did not think it worth the extra work. I may chose to wire it in the future but could also just fit a switch to cut the 12v power instead. There is a small round plug in the back of the BMW mirror than covers the tension adjustment. Rather than drill a hole to pass the cable through, I used this hole instead. At this point I tested my connections by wiring the mirror into a 12v supply. With the power on, cover the light sensor on the back of the mirror and you should see the mirror slowly darken. With this tested, press the mirror and front bezel in place. The mirror is now ready for refitting: 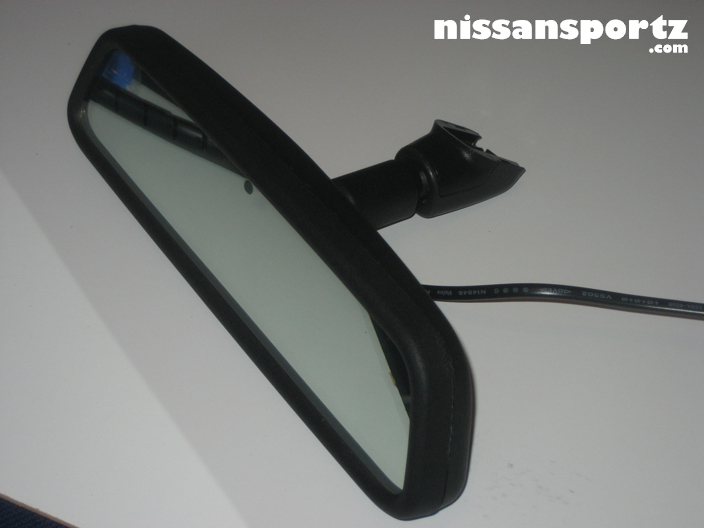
__________________
In the UK? Check out nissansportz.com - 350Z, GT-R, 370Z and more...
2004 Sunset 350Z to 2009 Limited Edition Ultimate Yellow 370Z |
|
|
|
|
11-18-2010, 12:55 PM
|
#4 (permalink) |
|
Enthusiast Member
Join Date: Sep 2009
Location: England
Posts: 258
Drives: UK Yellow 370Z
Rep Power: 17 |
Removing the Nissan plastics
Gently pry the rain sensor cover off the screen. There are a couple of velvro-like clips that hold it on so don't worry about any scary noises when this is removed! 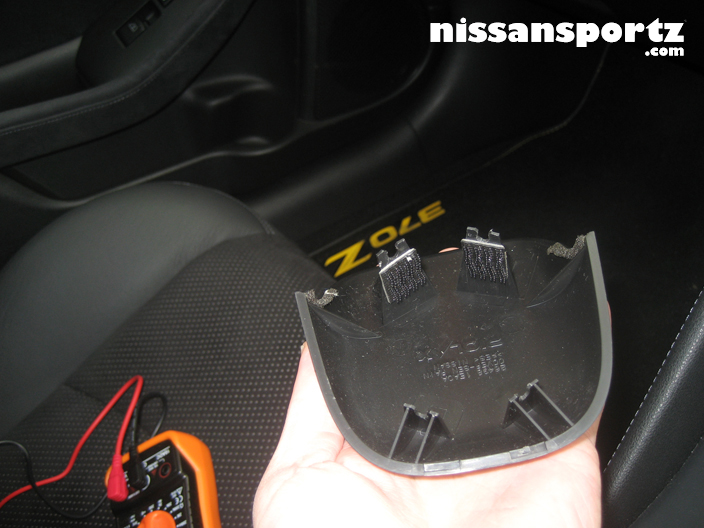 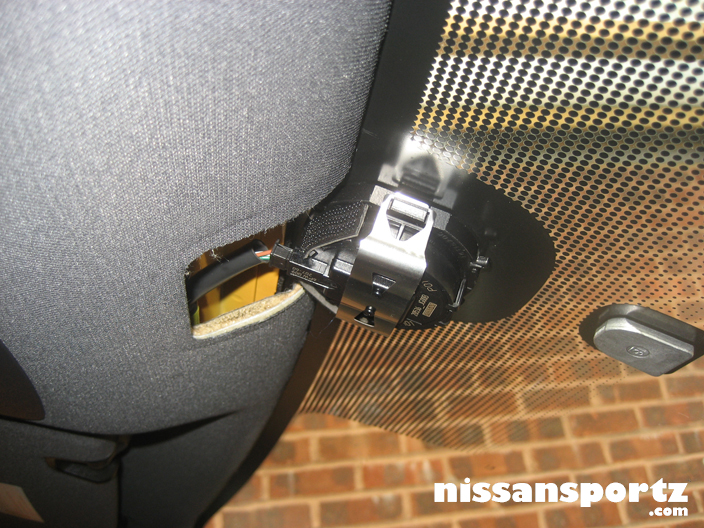 Pry the interior lights open like so (there are 4 clips holding each one on): 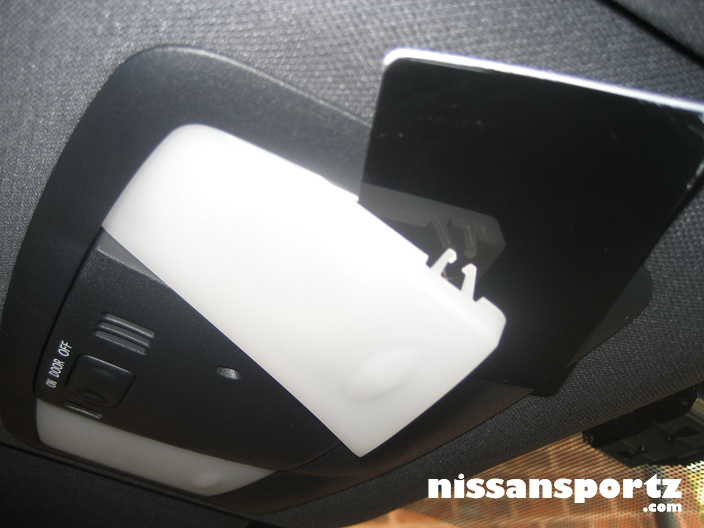 Unclip the centre section that holds the ambient light (your power supply for the mirror) and sensor: 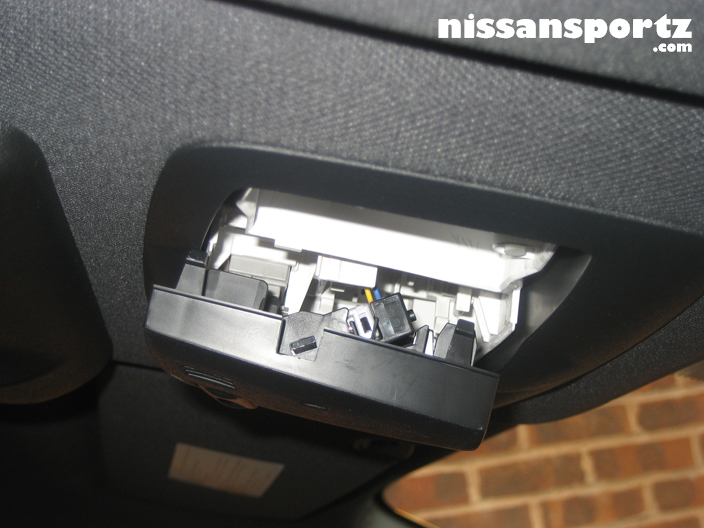 The cables are quite short but the 2 devices unclip easily: 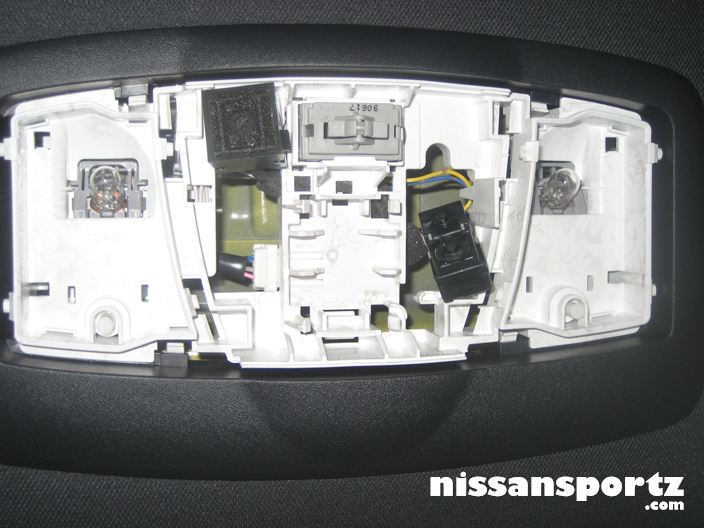 The Blue (+12v) and Yellow (GND) cables going to the ambient light are your power supply for the auto dimming mirror. The ambient light is only powered when the side lights are on. Do not power the mirror from the interior lights as these are permanently live and the mirror will drain your battery.
__________________
In the UK? Check out nissansportz.com - 350Z, GT-R, 370Z and more...
2004 Sunset 350Z to 2009 Limited Edition Ultimate Yellow 370Z |
|
|
|
|
11-18-2010, 12:56 PM
|
#5 (permalink) |
|
Enthusiast Member
Join Date: Sep 2009
Location: England
Posts: 258
Drives: UK Yellow 370Z
Rep Power: 17 |
Fitting the new mirror
Clip the mirror to the screen. Next, feed the power cable from the mirror up past the rain sensor and then into the headlining to appear by the ambient light. Wire the cable into the ambient light cables. I used scotch locks as this was the easiest option. Turn on the side lights and test the mirror is working before tidying the cables and refitting the plastics. Here is the final result: 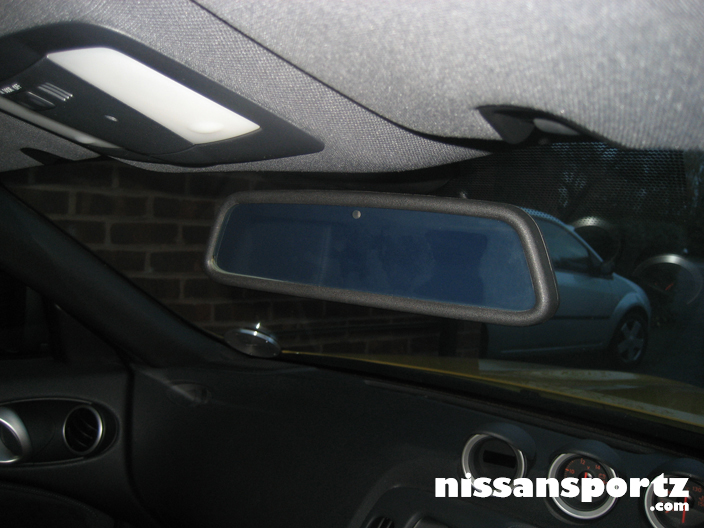 I have not tried to hide the cable yet but it cannot be seen from inside the car. Even with the camera flash exposing it in this shot I think it looks OK: 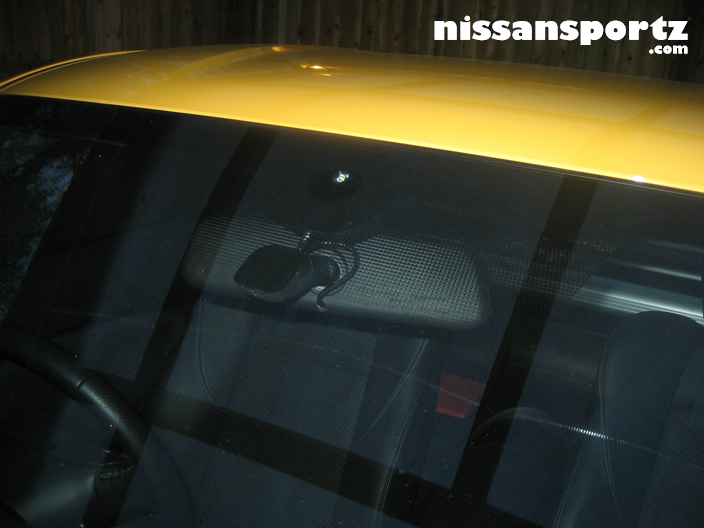 Not bad for £20 and a few hours work I think. I hope you find this guide useful 
__________________
In the UK? Check out nissansportz.com - 350Z, GT-R, 370Z and more...
2004 Sunset 350Z to 2009 Limited Edition Ultimate Yellow 370Z |
|
|
|
|
11-18-2010, 03:41 PM
|
#7 (permalink) | |
|
Enthusiast Member
Join Date: Sep 2009
Location: England
Posts: 258
Drives: UK Yellow 370Z
Rep Power: 17 |
Quote:
 yep! Sadly it's the heavy bit hanging from the roof to higher my centre of gravity! Luckily it doesn't say BMW anywhere on it yep! Sadly it's the heavy bit hanging from the roof to higher my centre of gravity! Luckily it doesn't say BMW anywhere on it 
__________________
In the UK? Check out nissansportz.com - 350Z, GT-R, 370Z and more...
2004 Sunset 350Z to 2009 Limited Edition Ultimate Yellow 370Z |
|
|
|
|
|
11-27-2010, 10:52 PM
|
#8 (permalink) |
|
Enthusiast Member
Join Date: Sep 2010
Location: NJ
Posts: 385
Drives: 370z
Rep Power: 16 |
Nice Right up. But just like my G35c i think you can use the map light power supply. The car has an auto setting where it will cut the power to the map lights after you turn it off..(I think, will test this out when I do my V1 install)
__________________
2010 370z Brilliant Silver/Frost - Touring - Sport - Navigation - 6MT |
|
|
|
|
11-28-2010, 10:12 AM
|
#9 (permalink) |
|
Enthusiast Member
Join Date: Sep 2009
Location: England
Posts: 258
Drives: UK Yellow 370Z
Rep Power: 17 |
Thanks
That could be a difference with the UK car. If I leave the map light on then it stays on even when the car is not running and I shut the door.
__________________
In the UK? Check out nissansportz.com - 350Z, GT-R, 370Z and more...
2004 Sunset 350Z to 2009 Limited Edition Ultimate Yellow 370Z |
|
|
|
|
06-05-2018, 03:44 PM
|
#11 (permalink) |
|
Base Member
Join Date: Aug 2017
Location: Hampshire UK
Posts: 225
Drives: 2017 370Z Coupe
Rep Power: 74895  |
Did mine today using a Nissan Navara mirror from Ebay which is a direct fit on the window mount.
I also purchased from Ebay: JST (JAPAN SOLDERLESS TERMINALS) - VHR-7N - HOUSING, RECEPTACLE,VH, 7WAY, 3.96MM and JST (JAPAN SOLDERLESS TERMINALS) - BVH-21T-P1.1 - CRIMP SOCKET, 0.33-0.83MM as the rear of the Navara mirror has the pins for a 7 way JST block connector. I only used 2 core wire (Pin No 7 12V and Pin No 6 Ground) as it would mean a lot of work to connect the third core (Pin No 5) to the reverse switch wire override. Last edited by StormWhite; 10-05-2018 at 08:12 AM. |
|
|
|
|
| Bookmarks |
|
|
 Similar Threads
|
||||
| Thread | Thread Starter | Forum | Replies | Last Post |
| Nissan Auto Dim rearview mirror | Jack370Z | Exterior & Interior | 3 | 10-11-2010 12:12 AM |
| AN fitting movement / rotation on Oil Cooler Lines? | TipsZ | Engine & Drivetrain | 26 | 03-12-2010 06:03 AM |
| Help test fitting HKS Oil Cap! | eXo5 | North East Region | 0 | 05-13-2009 01:57 PM |
| Auto-dimming rear view mirror - install? | alvinmathew88 | Exterior & Interior | 2 | 04-08-2009 09:53 PM |
| very concerned about fitting in the 370 | g35300mm | Nissan 370Z General Discussions | 10 | 02-23-2009 08:50 PM |


 1Likes


 Hybrid Mode


