
 |
There is a small self-contained box that hangs onto the bottom of the stock intake on the driver side - what is that thing? I assume it is not needed
|
|||||||
 |
|
|
LinkBack | Thread Tools | Display Modes |
|
|
#92 (permalink) |
|
A True Z Fanatic
 Join Date: Apr 2010
Location: Ny
Posts: 1,391
Drives: 2k10Z34Pw
Rep Power: 18  |
what is the torque setting on the strut tower brace?
__________________
||F.I.CBE 18" CF muffler||Injen CAI||CF Bpillars||CF Stage 1 Side mirror||CS Amuse Kit||JquadHeadlights||3mTB35%Tint||Work Gnosis GS2|| Wish List==>||GTM TT||Coils||Camber Arms||Tires||Wing||Hotchkis Sways|| |
|
|

|
|
|
#93 (permalink) |
|
A True Z Fanatic
Join Date: Jul 2010
Location: Newport Beach
Posts: 3,900
Drives: 2010 370Z/Saab 900se
Rep Power: 433            |
52 ftlbs is the torque figure in the service manual for the brace bolts.
__________________
-320whp / 259wftlbs- SP Rays -- RE-11s -- SpecialtyZ Tune -- Swift Springs -- Stillen 25R Oil Cooler -- Stillen G3 Intakes -- Berk HFCs -- F.I. 12" CBE -- Stillen Sway Bars -- Es14 Spring -- INGS+1 lip -- CF Spoiler -- GTR Start Button -- VLED Parking Lights -- PWJDM V2 shift knob |
|
|

|
|
|
#94 (permalink) | |
|
A True Z Fanatic
 Join Date: Apr 2010
Location: Ny
Posts: 1,391
Drives: 2k10Z34Pw
Rep Power: 18  |
Quote:

__________________
||F.I.CBE 18" CF muffler||Injen CAI||CF Bpillars||CF Stage 1 Side mirror||CS Amuse Kit||JquadHeadlights||3mTB35%Tint||Work Gnosis GS2|| Wish List==>||GTM TT||Coils||Camber Arms||Tires||Wing||Hotchkis Sways|| |
|
|
|

|
|
|
#96 (permalink) |
|
Base Member
Join Date: May 2011
Location: Oregon
Posts: 3
Drives: 09 Nissan 370Z 7AT
Rep Power: 15  |
Thank you for the write-up! I wasn't sure if a CAI would be a good idea since I live in Oregon and it rains a lot. My big concern was buying something that sat too low and would end up creating a mess. You beat me with living in a flood zone though lol.

|
|
|

|
|
|
#98 (permalink) |
|
Enthusiast Member
 Join Date: Mar 2011
Location: Bronx, NY
Posts: 372
Drives: '08 SFP IS-F
Rep Power: 15  |
Nope. The intake tubes simply don't fit without grinding the ducts down. I did my install today. As long as you have a dremel it's really easy and just requires some steady hands to get a nice cut and sand on them.
|
|
|

|
|
|
#99 (permalink) |
|
Base Member
Join Date: Jun 2011
Location: Sideways
Posts: 107
Drives: Like a Boss
Rep Power: 15  |
Stillen Gen 3 Intakes and Exhaust came to my friends job on Thursday night. Friday afternoon he put the exhaust on for me...Saturday morning I put the intakes on. So I didn't let them collect dust at all. I reset the ECU and had to fix the auto up on windows. I didn't do the pedal dance ecu reset like I should have since I unplugged battery...took no chances!
Definitely invest in a Dremmel, or just buy one use it for 5 minutes and return it. either way works. Car definitely pulls harder, but engine is still breaking in so I gotta wait a little longer to see cars full power.(I installed both of these parts at just under 1000 miles lol!) The car sounds amazing, you don't really hear the intakes as much as the exhaust. I've already gotten a load of compliments, the thick exhaust tips are very sexy. I just have to adjust the exhaust a bit next time it is on the lift. One side sticks out more than the other. Should be a simple fix. HFC's coming before end of year...or in the spring, haven't decided! Also on a side note, I did not remove the brace, saw no need to since there was plenty of room. Also I used the suggested fix to clear the AC lines by slicing the second tube in half and wrapping the lines. I only had a little duct tape so when I go clean filters I'll put a stronger adhesive on.
__________________
CURRENT: '11 Gun Metallic 370Z 6MT Sport SOLD: '10 Solid Red 370Z 6MT Sport - Car Pictures | '08 Obsidian IS250 6MT | '04 Eternal Blue Pearl RSX |
|
|

|
|
|
#101 (permalink) |
|
Base Member
 Join Date: Jun 2011
Location: MD
Posts: 51
Drives: 09' 370Z PG Touring
Rep Power: 15  |
One quick question about dremmeling, after the sides are cut (assuming you cut only the needed amount for the hose) would you be able to re-install the OEM intake without any issues? Only asking because if hell froze over and the wife could pry the key outta my hand and we had to sell the Z it sometimes seems easier to sell it back as stock. Thanks.
|
|
|

|
|
|
#102 (permalink) | |
|
Enthusiast Member
 Join Date: Mar 2011
Location: Bronx, NY
Posts: 372
Drives: '08 SFP IS-F
Rep Power: 15  |
Quote:
I'm reverting my car back to stock, but my question would be if the functionality of the OEM intakes still be the same with the cuts made on those passages? |
|
|
|

|
|
|
#103 (permalink) |
|
Base Member
Join Date: Jun 2011
Location: Sideways
Posts: 107
Drives: Like a Boss
Rep Power: 15  |
I'm unsure, if you really had to leave intakes in I don't think it would be the end of the world. Don't mod if you are in a lease. It really depends on how big you make the holes I suppose, you could always try stuffing the stock pipes back in.
__________________
CURRENT: '11 Gun Metallic 370Z 6MT Sport SOLD: '10 Solid Red 370Z 6MT Sport - Car Pictures | '08 Obsidian IS250 6MT | '04 Eternal Blue Pearl RSX |
|
|

|
|
|
#104 (permalink) |
|
Base Member
Join Date: Jul 2011
Location: Austin/Tampa
Posts: 33
Drives: 2011 T/S Black 370z
Rep Power: 15  |
With the help of my brother, I installed my Stillen G3 yesterday.
First off, a big thanks to AK for having this play by play thread, and thank you for everyone's contributions throughout. I wanted to note a few things I had troubles with and a few areas I felt were easy for me. Like everyone said, the bumper was really easy to take off. Nobody should turn down the opportunity to purchase this badass Stillen product because of the bumper removal. Everything else was very easy to remove. Based on the suggestions of some, I had removed the brace to make it easier to work with. A little additional work, but seriously only about 20 minutes added to the install time. A few pointers I have to give during my time installing this: 1. I avoided a cutter of some sort when boring out the hole. Instead of using a Dremel, I used a power drill, with a bit attachment. The attachment is this one from Dremel: 124 High Speed Cutter / Model: 124. Very easy to use and allows you to take your time without screwing up anything. I think it was about $10. Each side took about 10 minutes each to drill out. Very precise, and the holes turned out very well, very snug. Pic below of the passenger side (I'm unsure if this was taken at the final stage of boring out, because I had to go back and shave a little more off to get the pipe through): 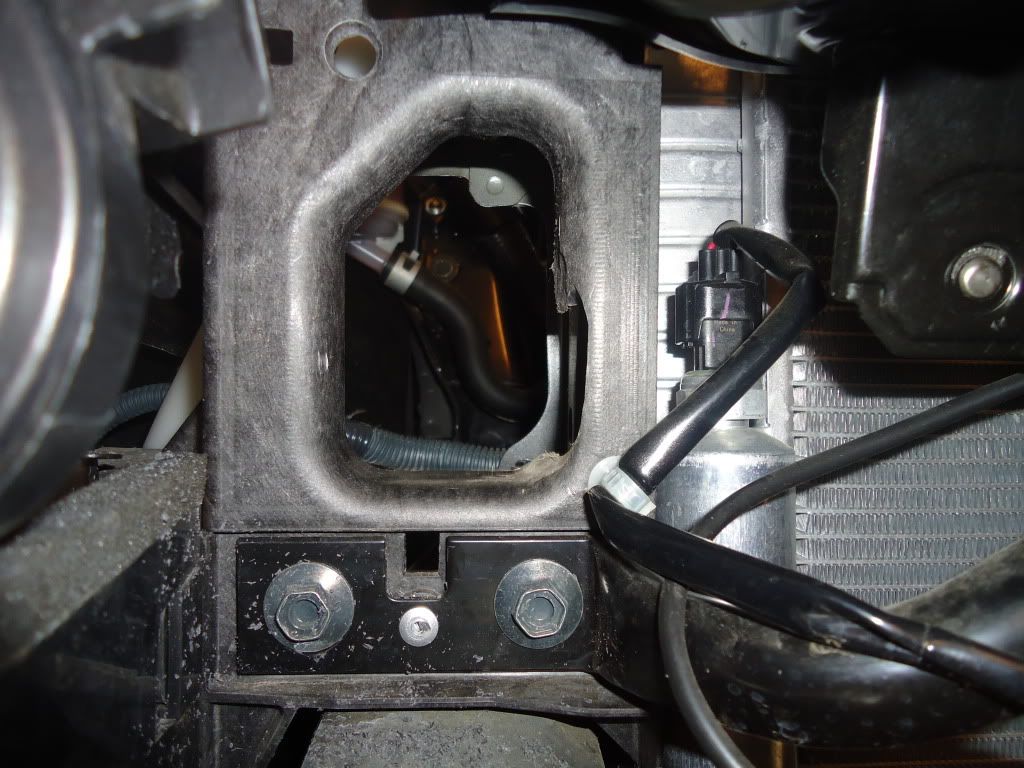 Here's a picture of the driver's side w/ tube throught the duct. Turned out to be a really smooth and tight fit (that's what she said).  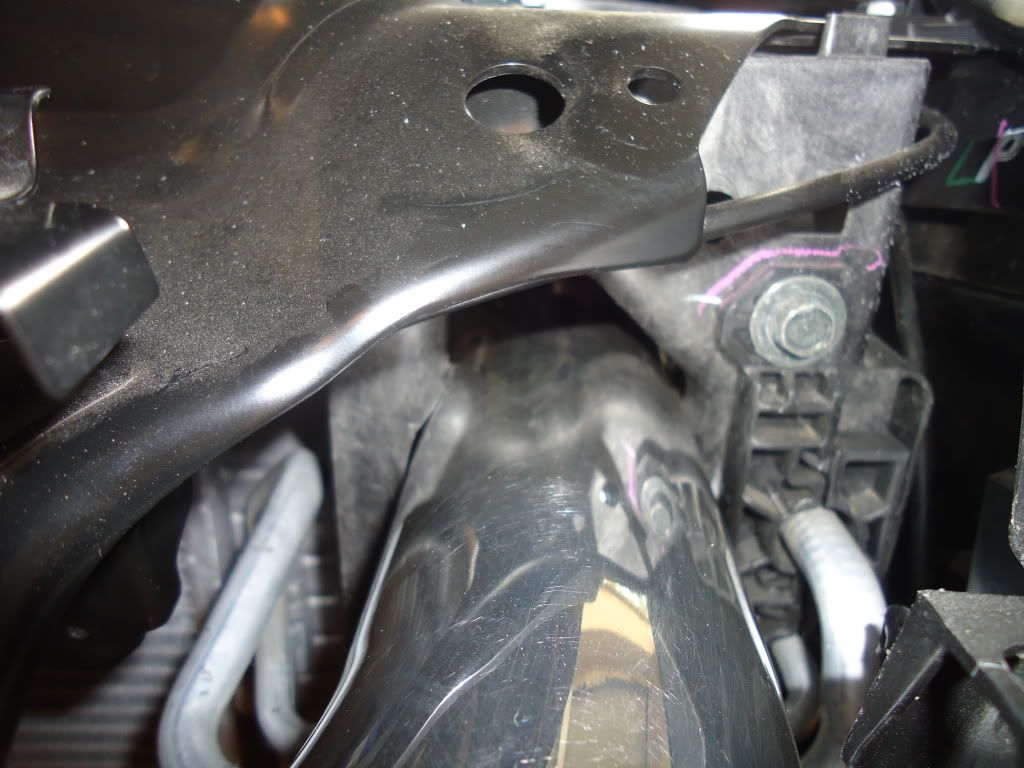 2. The pipes were a b|tch to configure. Twisting them and dealing with the fittings were a bit of a puzzle. This was the most difficult part in my opinion. What made it so hard were the filter locations. The filters were butting up against a screw in the front frame, which we tried our best to avoid on each side, but it didn't jive. In hindsight, if I had the right tool, I would have cut the excess screw off. We had to deal with the snug placement. I wish I had taken a picture of this. 3. When disconnecting the battery, remember that your auto-up window function gets turned off. Refer to your manual as it has a step-by-step to restore the default. I was flippin out for a moment on that one. 4. We didn't use tape or an adhesive to keep the rubber tube attached to the A/C lines. Instead, we cut one of the rubber tubes that were included in the kit, and placed it over both of the lines. To keep it intact, we used plastic ties. Those things aren't going anywhere. One thing to note: attached the rubber tube to the A/C line before doing any drilling of the ducts. This will ensure you do not slip and F up your lines. 5. Take a look at AK's wiring around the driver side tube. Look closely at the placement of the wiring around the driver side cone, to be more specific. We had a bit of trouble getting the placement right. After examining the picture, we had to unclip the wiring from the brace, and place it like so: 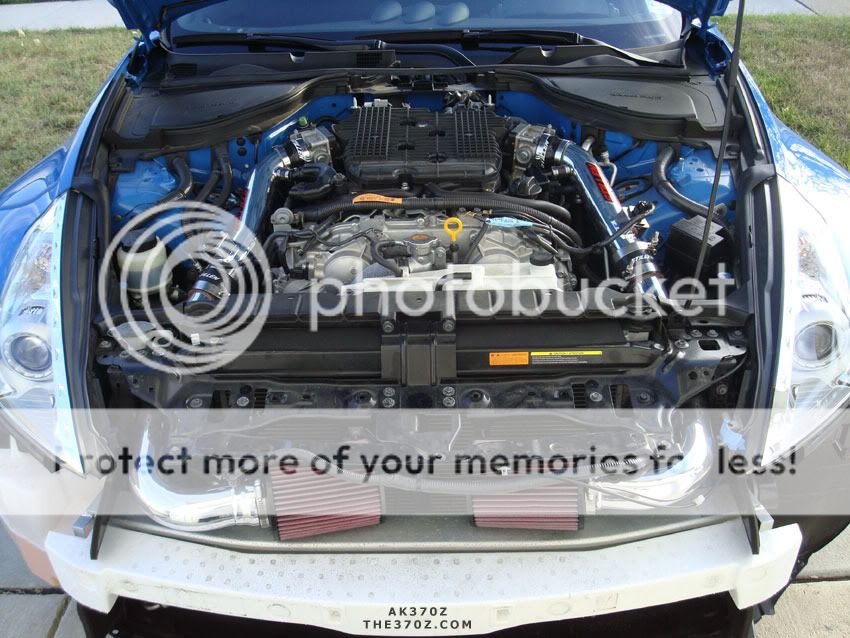 Quick picture of the iPad w/ AK's step by step  : :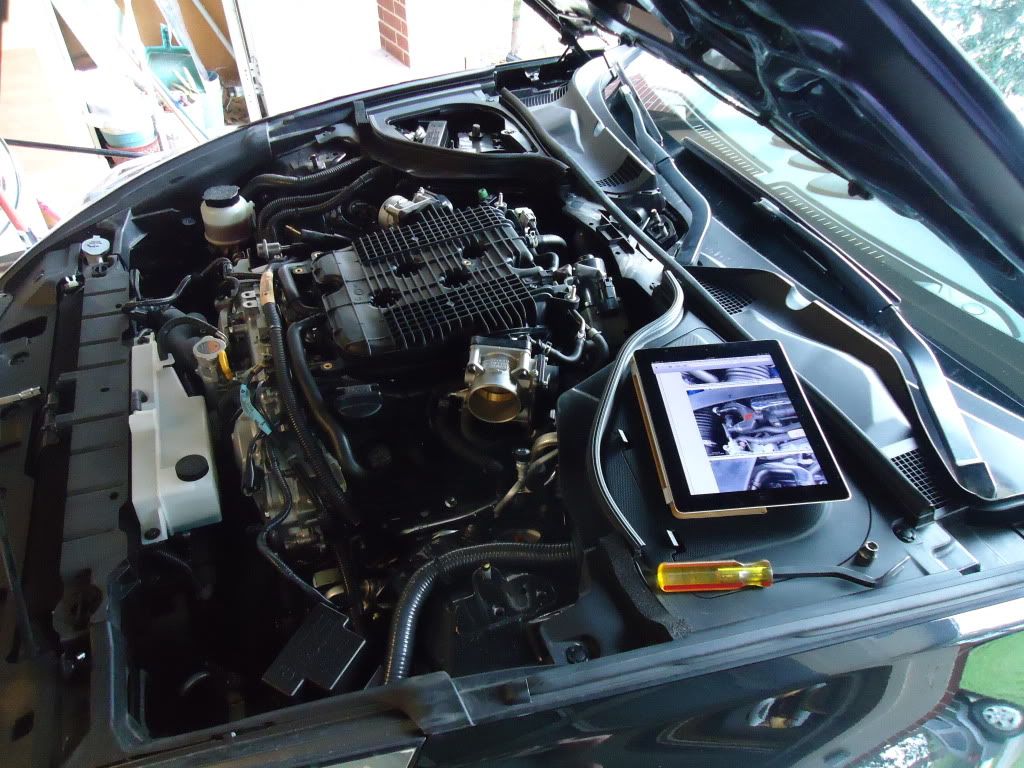 After the install - ain't she purty?: 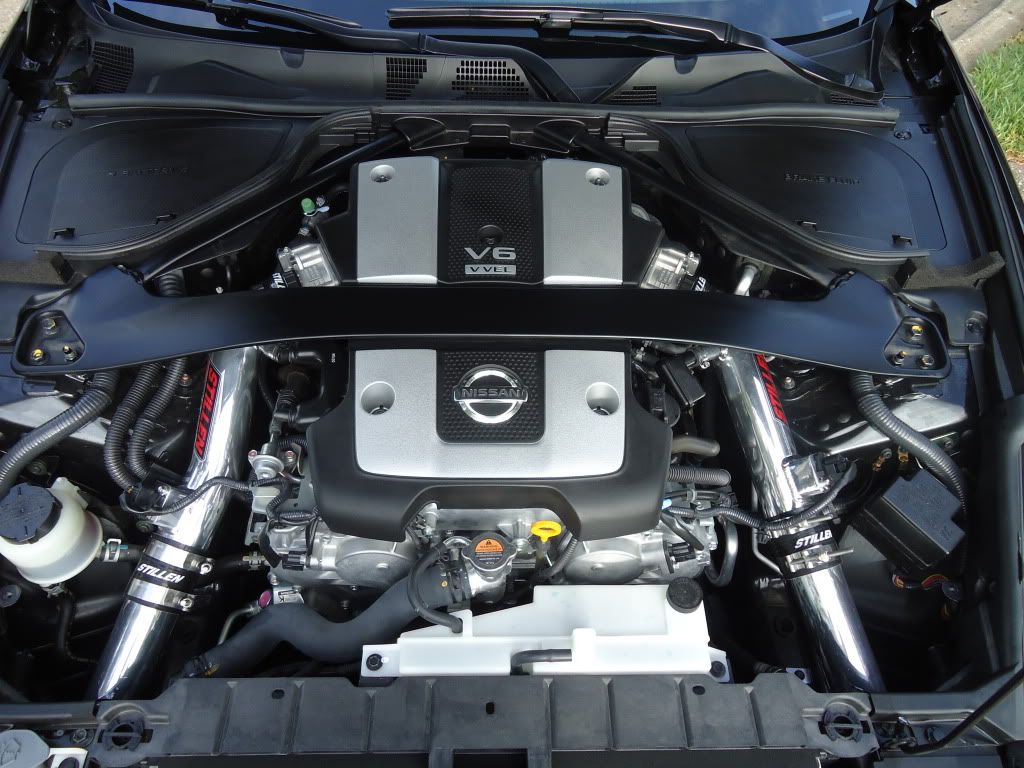 Video of how it sounds: VIDEO In summary, this add on was pretty easy to install. Total time was about 3 hours, with most of the time spent aligning the pipes. Bumper was very easy. A lot screws, but no time at all to take off. Your new intake sound kicks in around 5500 RPM's. I have noticed a difference in both sound and performance. On my way back to Austin From Houston (162 miles), it took about 1/4 of a tank from a full tank. My guestimates are that a full tank with intake will achieve 400+ miles. Not too shabby for a sports car. Next up, cat back exhaust. I think I'll get that done the same time I have an Oil Cooler installed in a few months. 
|
|
|

|
 |
| Bookmarks |
|
|
 Similar Threads
|
||||
| Thread | Thread Starter | Forum | Replies | Last Post |
| Fujimura cf Rear diffuser installed! (with pics)( AK370Z) | AK370Z | Exterior & Interior | 73 | 04-24-2016 04:47 PM |
| Finally Got my exhaust! HKS Hi-Power Ti Exhaust (many Pics, Video inside AK370Z) | AK370Z | Intake/Exhaust | 102 | 05-11-2013 01:32 PM |
| Finally Fully Detailed My 370Z with Porter Cable (AK370Z) 90+ pics inside | AK370Z | Detailing / Washing / Waxing / Cosmetic Maintenance and Repair | 24 | 06-11-2011 08:48 PM |
| finally amuse stti extra exhaust arrived + lots of pics | zuperman 370 | Intake/Exhaust | 22 | 03-16-2011 12:25 AM |
| Installed my Stillen G3s. lots of pics and a short review | ssqpolo | Nissan 370Z Photos / Spyshots / Video / Media Gallery | 45 | 09-23-2009 03:20 PM |