Nissan 370Z Forum  

Request: DIY Oil Pressure Gauge Install

I'd love for someone to post a step-by-step install procedure for placing an oil pressure gauge in the three gauge cluster (replace voltage or clock). Obviously, interested in pics of

Go Back   Nissan 370Z Forum > Nissan 370Z Tech Area > DIY Section (Do-It-Yourself)


Like Tree2Likes

Reply
 
LinkBack Thread Tools Display Modes
Old 03-07-2010, 05:24 PM   #1 (permalink)
A True Z Fanatic
 
spearfish25's Avatar
 
Join Date: Mar 2009
Location: Naples, FL
Posts: 4,117
Drives: to work
Rep Power: 1856
spearfish25 has a reputation beyond reputespearfish25 has a reputation beyond reputespearfish25 has a reputation beyond reputespearfish25 has a reputation beyond reputespearfish25 has a reputation beyond reputespearfish25 has a reputation beyond reputespearfish25 has a reputation beyond reputespearfish25 has a reputation beyond reputespearfish25 has a reputation beyond reputespearfish25 has a reputation beyond reputespearfish25 has a reputation beyond repute
Send a message via AIM to spearfish25
Default Request: DIY Oil Pressure Gauge Install

I'd love for someone to post a step-by-step install procedure for placing an oil pressure gauge in the three gauge cluster (replace voltage or clock). Obviously, interested in pics of how to install the pressure sensor and wire the thing.
__________________
2013 Cadillac V-Wagon, RIP Z
spearfish25 is offline   Reply With Quote
Old 03-07-2010, 05:31 PM   #2 (permalink)
A True Z Fanatic
 
vipor's Avatar
 
Join Date: Aug 2009
Location: Euless, TX [ DFW ]
Age: 41
Posts: 13,531
Drives: Nismo 09-0183 QAB
Rep Power: 48
vipor has a reputation beyond reputevipor has a reputation beyond reputevipor has a reputation beyond reputevipor has a reputation beyond reputevipor has a reputation beyond reputevipor has a reputation beyond reputevipor has a reputation beyond reputevipor has a reputation beyond reputevipor has a reputation beyond reputevipor has a reputation beyond reputevipor has a reputation beyond repute
Default

Clock removal-gauge replacement

LOL just saw you posted in that thread
__________________

2009 NISMO # 0193 | QAB | Albums! | 05.04.10 (Dynojet) 291.94hp/248.28tq
Oil Cooler (DIY) | Custom Headlights | GTSPEC Braces | F.I. Long Tube Headers
vipor is offline   Reply With Quote
Old 03-07-2010, 07:03 PM   #3 (permalink)
A True Z Fanatic
 
spearfish25's Avatar
 
Join Date: Mar 2009
Location: Naples, FL
Posts: 4,117
Drives: to work
Rep Power: 1856
spearfish25 has a reputation beyond reputespearfish25 has a reputation beyond reputespearfish25 has a reputation beyond reputespearfish25 has a reputation beyond reputespearfish25 has a reputation beyond reputespearfish25 has a reputation beyond reputespearfish25 has a reputation beyond reputespearfish25 has a reputation beyond reputespearfish25 has a reputation beyond reputespearfish25 has a reputation beyond reputespearfish25 has a reputation beyond repute
Send a message via AIM to spearfish25
Default

Quote:
Originally Posted by vipor View Post
Clock removal-gauge replacement

LOL just saw you posted in that thread
Yeah, but nobody has really done it and documented the process!
__________________
2013 Cadillac V-Wagon, RIP Z
spearfish25 is offline   Reply With Quote
Old 03-07-2010, 07:37 PM   #4 (permalink)
A True Z Fanatic
 
vipor's Avatar
 
Join Date: Aug 2009
Location: Euless, TX [ DFW ]
Age: 41
Posts: 13,531
Drives: Nismo 09-0183 QAB
Rep Power: 48
vipor has a reputation beyond reputevipor has a reputation beyond reputevipor has a reputation beyond reputevipor has a reputation beyond reputevipor has a reputation beyond reputevipor has a reputation beyond reputevipor has a reputation beyond reputevipor has a reputation beyond reputevipor has a reputation beyond reputevipor has a reputation beyond reputevipor has a reputation beyond repute
Default

Yeah AAM did it on Lou's car, but they aren't sharing. They did say that it was difficult though.
__________________

2009 NISMO # 0193 | QAB | Albums! | 05.04.10 (Dynojet) 291.94hp/248.28tq
Oil Cooler (DIY) | Custom Headlights | GTSPEC Braces | F.I. Long Tube Headers
vipor is offline   Reply With Quote
Old 03-07-2010, 08:02 PM   #5 (permalink)
A True Z Fanatic
 
spearfish25's Avatar
 
Join Date: Mar 2009
Location: Naples, FL
Posts: 4,117
Drives: to work
Rep Power: 1856
spearfish25 has a reputation beyond reputespearfish25 has a reputation beyond reputespearfish25 has a reputation beyond reputespearfish25 has a reputation beyond reputespearfish25 has a reputation beyond reputespearfish25 has a reputation beyond reputespearfish25 has a reputation beyond reputespearfish25 has a reputation beyond reputespearfish25 has a reputation beyond reputespearfish25 has a reputation beyond reputespearfish25 has a reputation beyond repute
Send a message via AIM to spearfish25
Default

Quote:
Originally Posted by vipor View Post
Yeah AAM did it on Lou's car, but they aren't sharing. They did say that it was difficult though.
What do you think it tough...installing the gauge or the sensor? I wonder if there is a way to rig the sensor into the oil cooler tubing.
__________________
2013 Cadillac V-Wagon, RIP Z
spearfish25 is offline   Reply With Quote
Old 03-07-2010, 08:05 PM   #6 (permalink)
A True Z Fanatic
 
vipor's Avatar
 
Join Date: Aug 2009
Location: Euless, TX [ DFW ]
Age: 41
Posts: 13,531
Drives: Nismo 09-0183 QAB
Rep Power: 48
vipor has a reputation beyond reputevipor has a reputation beyond reputevipor has a reputation beyond reputevipor has a reputation beyond reputevipor has a reputation beyond reputevipor has a reputation beyond reputevipor has a reputation beyond reputevipor has a reputation beyond reputevipor has a reputation beyond reputevipor has a reputation beyond reputevipor has a reputation beyond repute
Default

The sensor looks easy to install, just a couple 1/2" NPT fittings.

Physically installing the gauge into the dash is the hard part.
__________________

2009 NISMO # 0193 | QAB | Albums! | 05.04.10 (Dynojet) 291.94hp/248.28tq
Oil Cooler (DIY) | Custom Headlights | GTSPEC Braces | F.I. Long Tube Headers
vipor is offline   Reply With Quote
Old 03-07-2010, 08:12 PM   #7 (permalink)
A True Z Fanatic
 
ChrisSlicks's Avatar
 
Join Date: Mar 2009
Location: North East
Posts: 6,203
Drives: 09 370Z Sport M6
Rep Power: 653
ChrisSlicks has a reputation beyond reputeChrisSlicks has a reputation beyond reputeChrisSlicks has a reputation beyond reputeChrisSlicks has a reputation beyond reputeChrisSlicks has a reputation beyond reputeChrisSlicks has a reputation beyond reputeChrisSlicks has a reputation beyond reputeChrisSlicks has a reputation beyond reputeChrisSlicks has a reputation beyond reputeChrisSlicks has a reputation beyond reputeChrisSlicks has a reputation beyond repute
Default

Definitely want to use a remote sender to make it easier. Running an oil line through the dash would be a PITA.
ChrisSlicks is offline   Reply With Quote
Old 03-07-2010, 08:14 PM   #8 (permalink)
A True Z Fanatic
 
vipor's Avatar
 
Join Date: Aug 2009
Location: Euless, TX [ DFW ]
Age: 41
Posts: 13,531
Drives: Nismo 09-0183 QAB
Rep Power: 48
vipor has a reputation beyond reputevipor has a reputation beyond reputevipor has a reputation beyond reputevipor has a reputation beyond reputevipor has a reputation beyond reputevipor has a reputation beyond reputevipor has a reputation beyond reputevipor has a reputation beyond reputevipor has a reputation beyond reputevipor has a reputation beyond reputevipor has a reputation beyond repute
Default

And risky. LOL

I've had a line bust before on an old Chevy of my brother's. Made quite the mess very quickly. Strangely enough the oil washed out.
__________________

2009 NISMO # 0193 | QAB | Albums! | 05.04.10 (Dynojet) 291.94hp/248.28tq
Oil Cooler (DIY) | Custom Headlights | GTSPEC Braces | F.I. Long Tube Headers
vipor is offline   Reply With Quote
Old 03-07-2010, 08:17 PM   #9 (permalink)
A True Z Fanatic
 
spearfish25's Avatar
 
Join Date: Mar 2009
Location: Naples, FL
Posts: 4,117
Drives: to work
Rep Power: 1856
spearfish25 has a reputation beyond reputespearfish25 has a reputation beyond reputespearfish25 has a reputation beyond reputespearfish25 has a reputation beyond reputespearfish25 has a reputation beyond reputespearfish25 has a reputation beyond reputespearfish25 has a reputation beyond reputespearfish25 has a reputation beyond reputespearfish25 has a reputation beyond reputespearfish25 has a reputation beyond reputespearfish25 has a reputation beyond repute
Send a message via AIM to spearfish25
Default

Quote:
Originally Posted by vipor View Post
The sensor looks easy to install, just a couple 1/2" NPT fittings.

Physically installing the gauge into the dash is the hard part.
This makes it look straight forward but doesn't really address removing the old gauge.
Attached Images
File Type: jpg Screen shot 2010-03-07 at 8.15.58 PM.jpg (31.0 KB, 254 views)
__________________
2013 Cadillac V-Wagon, RIP Z
spearfish25 is offline   Reply With Quote
Old 03-13-2010, 03:19 PM   #10 (permalink)
Base Member
 
Join Date: Mar 2010
Location: 370z
Posts: 178
Drives: 09 Touring
Rep Power: 15
rarwz will become famous soon enoughrarwz will become famous soon enough
Default

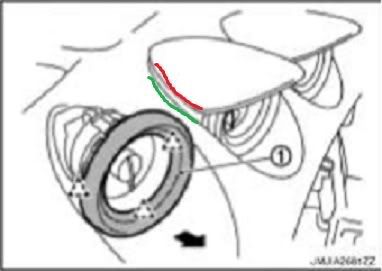
Well, today I started the investigation....
The very top piece is held on by 2 plastic pieces... IT IS NOT MEANT TO COME OFF, AND TAKING IT OFF WILL BREAK THE PIECES

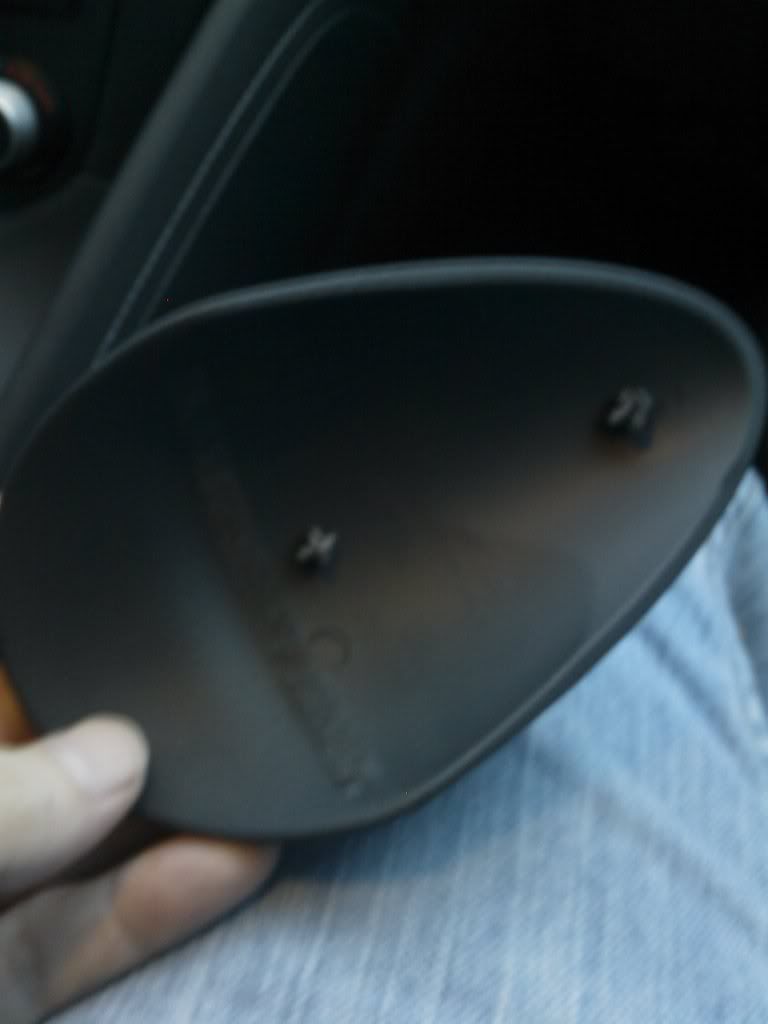
*THE NEXT PICTURE IS THE PIECE YOU ACTUALLY WANT TO REMOVE*


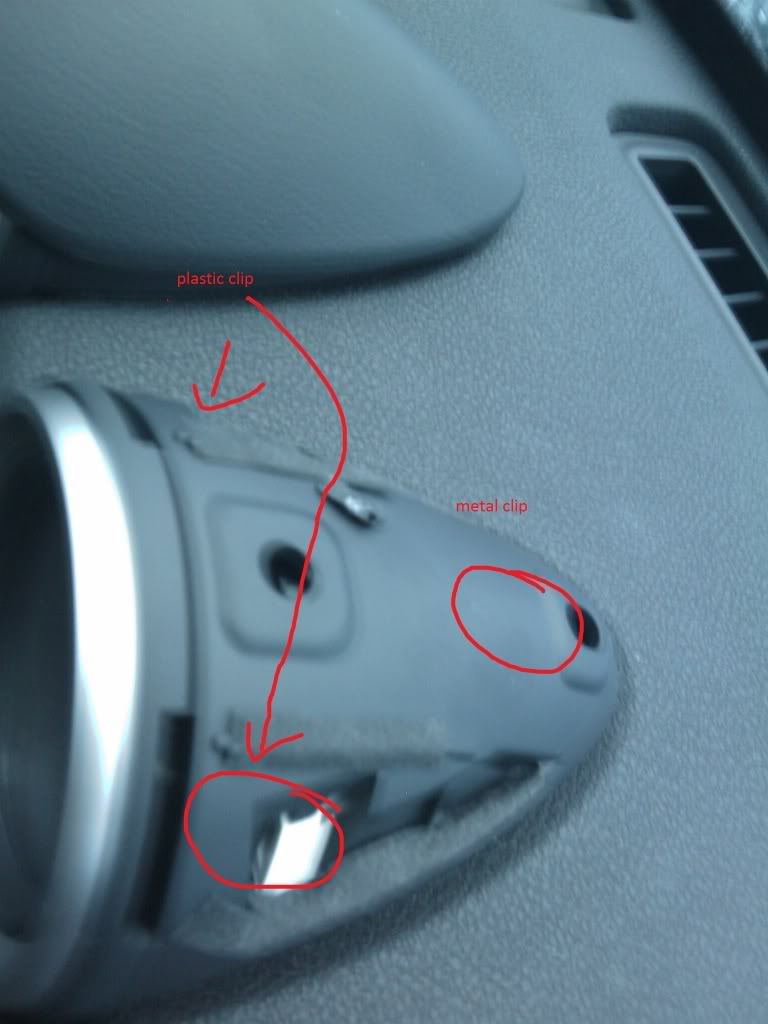
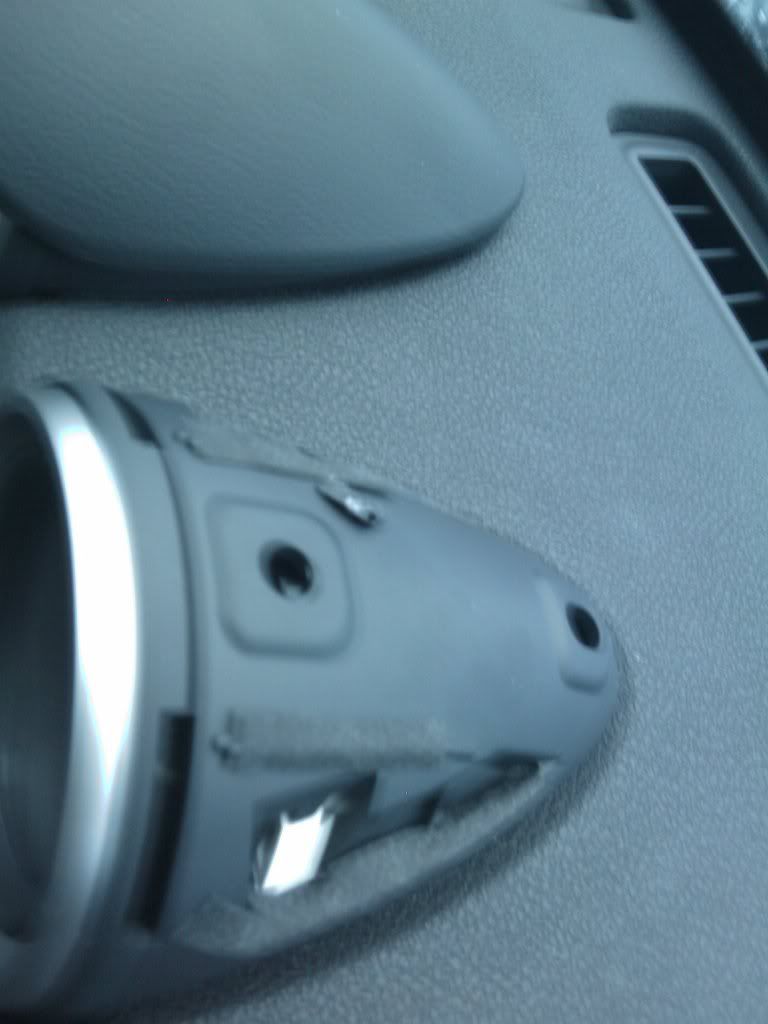
So the diagram from the book is wrong, what you actually want to take off via 2 plastic clips and the metal piece is the 2nd part down... stupid 370 book. This piece was easy to take out with a flat head screwdriver putting it in the crease between the plastic piece and the dash and just pushing up.

From there its very difficult to make progress w/o either taking the dash out, or coming in from where the stereo is. All the plastic clip on pieces (the grey inside liner, and about 2 or 3 more layers deep) all have clips on the top *and bottom*, and none of the bottom ones I could get off.


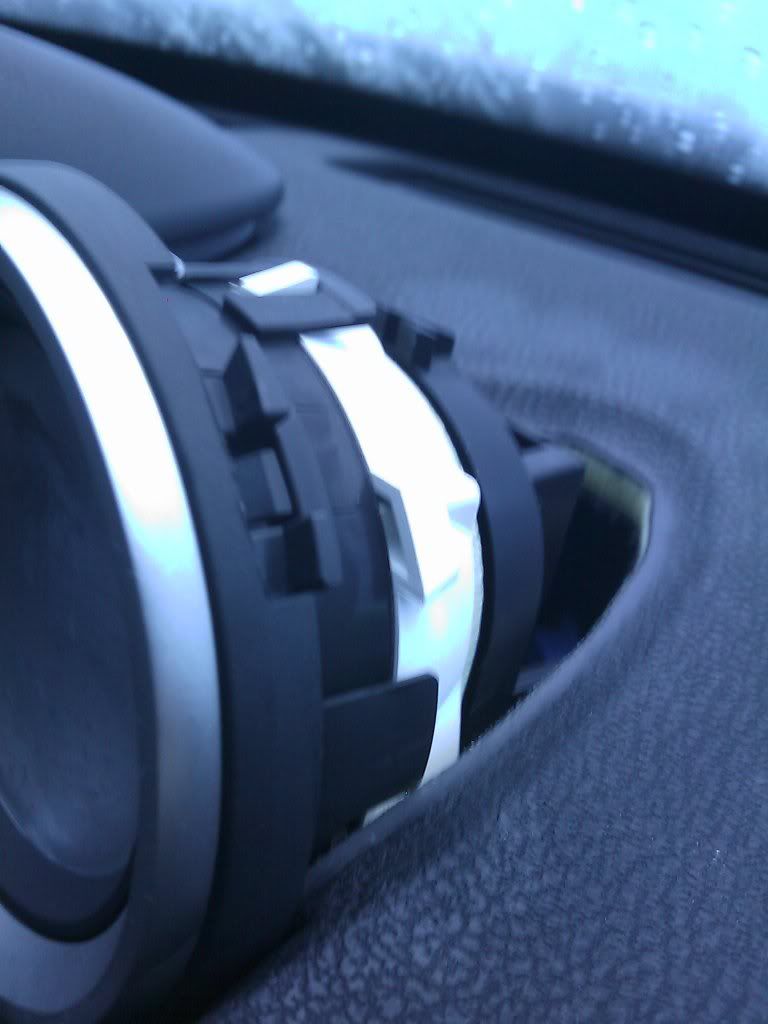
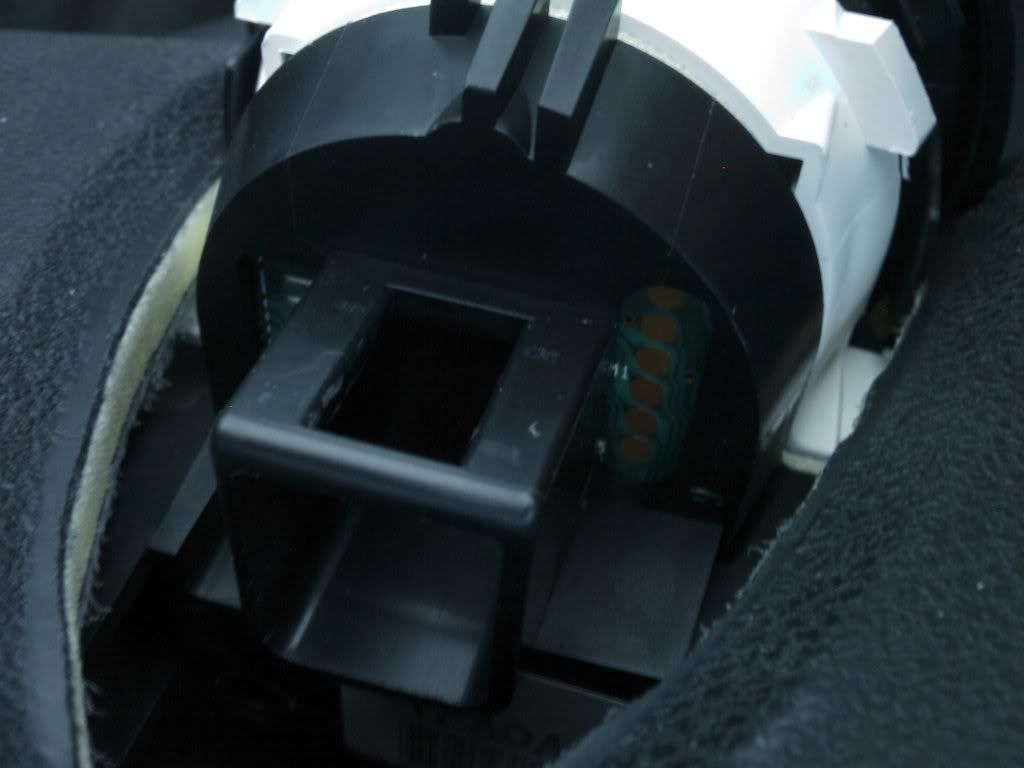
Here is a diagram showing clip locations, and possibly where the hidden ones are. I did not find a screw or clip in behind the gauge to hold it in, so that part is still a mystery.


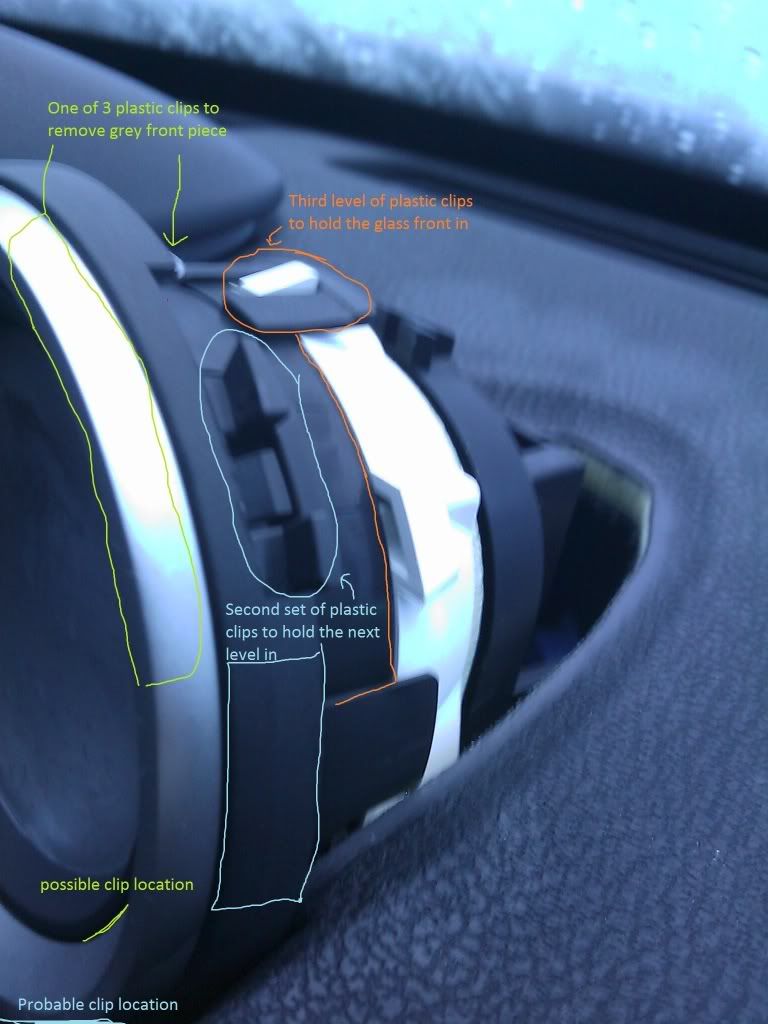
Also included is a size comparison... Looks like a little custom work would be required to get my autometer a/f gauge to sit flush.
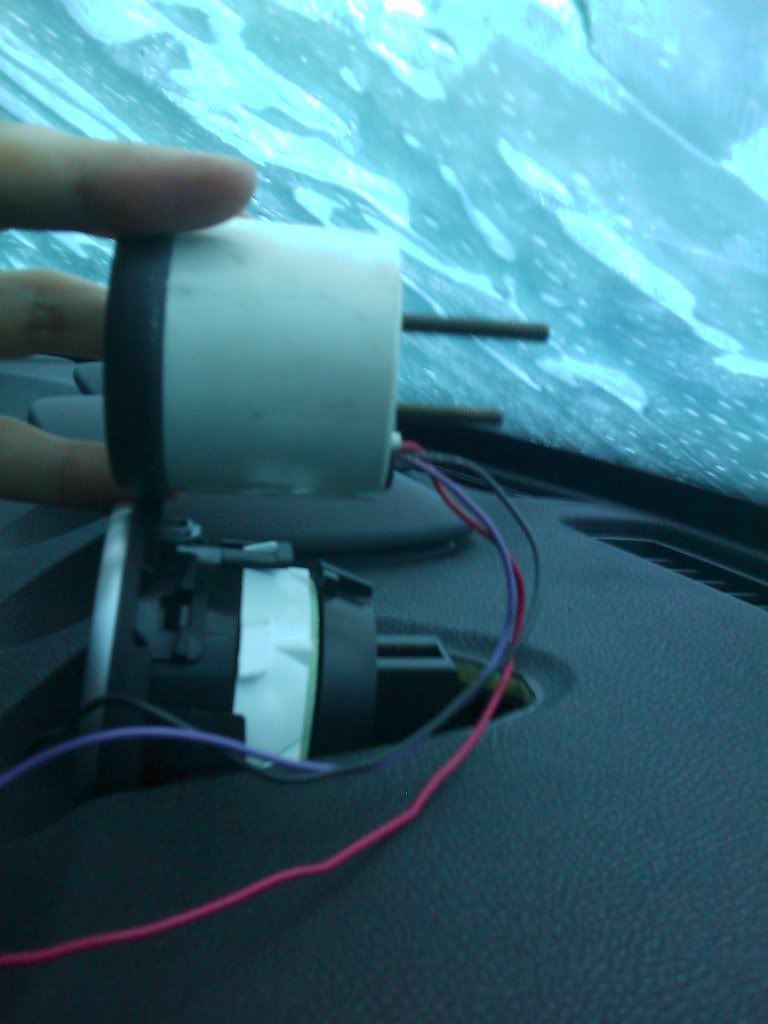
370zrider likes this.
rarwz is offline   Reply With Quote
Old 03-13-2010, 03:22 PM   #11 (permalink)
Base Member
 
Join Date: Mar 2010
Location: 370z
Posts: 178
Drives: 09 Touring
Rep Power: 15
rarwz will become famous soon enoughrarwz will become famous soon enough
Default

This may help clarify where you should and should NOT lift on so you dont break the top part like i did.
green = good.

rarwz is offline   Reply With Quote
Old 03-15-2010, 08:30 AM   #12 (permalink)
A True Z Fanatic
 
vipor's Avatar
 
Join Date: Aug 2009
Location: Euless, TX [ DFW ]
Age: 41
Posts: 13,531
Drives: Nismo 09-0183 QAB
Rep Power: 48
vipor has a reputation beyond reputevipor has a reputation beyond reputevipor has a reputation beyond reputevipor has a reputation beyond reputevipor has a reputation beyond reputevipor has a reputation beyond reputevipor has a reputation beyond reputevipor has a reputation beyond reputevipor has a reputation beyond reputevipor has a reputation beyond reputevipor has a reputation beyond repute
Default

Eww sucks to learn the hard way like that.. At least it looks like you may be able to epoxy that top portion back on there.
__________________

2009 NISMO # 0193 | QAB | Albums! | 05.04.10 (Dynojet) 291.94hp/248.28tq
Oil Cooler (DIY) | Custom Headlights | GTSPEC Braces | F.I. Long Tube Headers
vipor is offline   Reply With Quote
Old 03-15-2010, 10:30 AM   #13 (permalink)
A True Z Fanatic
 
spearfish25's Avatar
 
Join Date: Mar 2009
Location: Naples, FL
Posts: 4,117
Drives: to work
Rep Power: 1856
spearfish25 has a reputation beyond reputespearfish25 has a reputation beyond reputespearfish25 has a reputation beyond reputespearfish25 has a reputation beyond reputespearfish25 has a reputation beyond reputespearfish25 has a reputation beyond reputespearfish25 has a reputation beyond reputespearfish25 has a reputation beyond reputespearfish25 has a reputation beyond reputespearfish25 has a reputation beyond reputespearfish25 has a reputation beyond repute
Send a message via AIM to spearfish25
Default

+ Rep for doing all the R&D and taking one for the team! Hopefully Courtesy Parts has those top pieces so you can just replace them rather than glue.
DEpointfive0 likes this.
__________________
2013 Cadillac V-Wagon, RIP Z
spearfish25 is offline   Reply With Quote
Old 03-15-2010, 11:04 PM   #14 (permalink)
A True Z Fanatic
 
DIGItonium's Avatar
 
Join Date: Jan 2009
Location: Kansas
Posts: 3,800
Drives: 09 Z34-TT 6MT
Rep Power: 42
DIGItonium has a reputation beyond reputeDIGItonium has a reputation beyond reputeDIGItonium has a reputation beyond reputeDIGItonium has a reputation beyond reputeDIGItonium has a reputation beyond reputeDIGItonium has a reputation beyond reputeDIGItonium has a reputation beyond reputeDIGItonium has a reputation beyond reputeDIGItonium has a reputation beyond reputeDIGItonium has a reputation beyond reputeDIGItonium has a reputation beyond repute
Default

Thanks for the photos! Is it possible to fully expose the gauge faces and LCD display (i.e., pop off the needle and remove the faces) without removing the entire gauge assembly?

I'm going to get some custom gauge faces made and change out the LEDs, so I'm hoping that popping off the cover is all that's needed.

Thanks!
__________________
http://www.the370z.com/image.php?type=sigpic&userid=950&dateline=13162988  42
DIGItonium is offline   Reply With Quote
Old 03-16-2010, 09:21 AM   #15 (permalink)
Base Member
 
Join Date: Mar 2010
Location: 370z
Posts: 178
Drives: 09 Touring
Rep Power: 15
rarwz will become famous soon enoughrarwz will become famous soon enough
Default

not very easily. The problem is that there are usually 3 clips for each 'layer', of which 2 you can get to and 1 is on the bottom side. I just ordered my navtool, and will be taking out the nav unit, i'll let you know if you can get to the 3rd clip on the under side that way.

As of right now though and to the best of my knowledge, it would be quite a challenge.
rarwz is offline   Reply With Quote
Reply

Bookmarks

Thread Tools
Display Modes

Posting Rules
You may not post new threads
You may not post replies
You may not post attachments
You may not edit your posts

BB code is On
Smilies are On
[IMG] code is On
HTML code is Off
Trackbacks are On
Pingbacks are On
Refbacks are On


Similar Threads
Thread Thread Starter Forum Replies Last Post
STRI Oil Pressure Gauge... Amber 52mm to replace your clock ! travisjb Parts for sale (Private Classifieds) 33 03-09-2010 06:02 PM
Oil Pressure Gauge jpit Exterior & Interior 6 03-07-2010 08:36 PM
Oil cooler install Request Stealth_Z DIY Section (Do-It-Yourself) 4 12-17-2009 03:34 PM
Oil Pressure Gauge 37Z Exterior & Interior 0 06-14-2009 09:21 PM
What happened to the tire pressure gauge and speedo in the middle gauge cluster? rbratton Nissan 370Z General Discussions 33 01-24-2009 10:28 PM


All times are GMT -5. The time now is 09:33 AM.


Powered by vBulletin® Version 3.8.4
Copyright ©2000 - 2024, Jelsoft Enterprises Ltd.
Search Engine Optimization by vBSEO 3.6.0 PL2