
|
I've got a Nismo, and with Nitto NT01s, I started burning through Carbotech XP10s much quicker, so I just added the Stillen Brake Duct Kit. We'll see how that helps.
|
|||||||
 |
|
|
LinkBack | Thread Tools | Display Modes |
 04-28-2014, 11:55 PM
|
#1 (permalink) |
|
Base Member
Join Date: Mar 2013
Location: Dallas
Posts: 15
Drives: '13 370Z Nismo White
Rep Power: 14  |
I've got a Nismo, and with Nitto NT01s, I started burning through Carbotech XP10s much quicker, so I just added the Stillen Brake Duct Kit. We'll see how that helps.
The problem is that it's not ready made for Nismos. So I took some hints from some other posts I saw & fabricated a few things. Before & after pics:  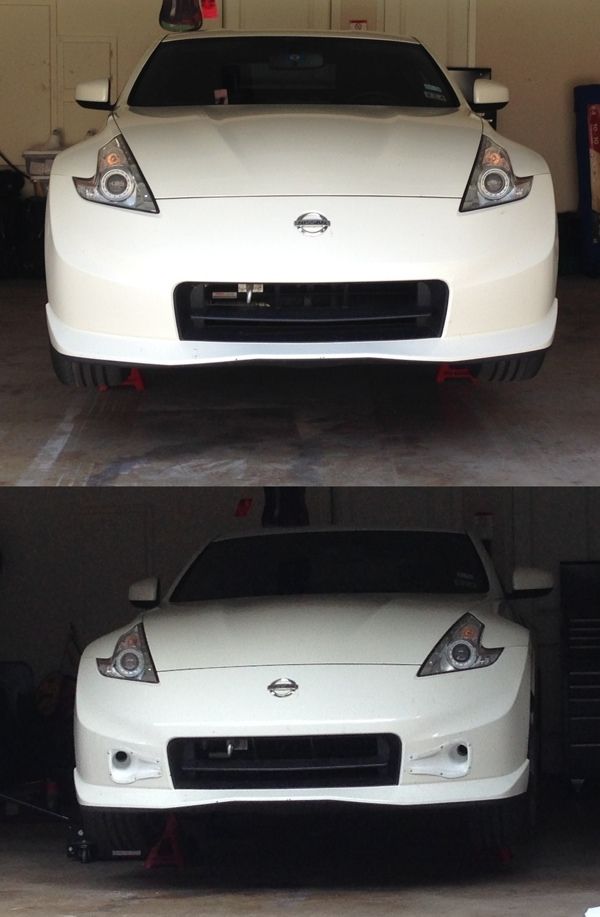 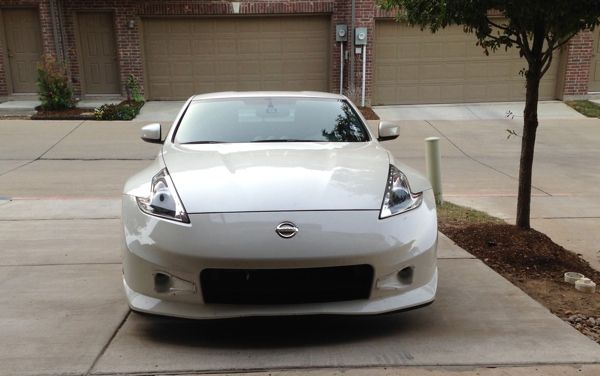  I bought the QuickCar Brake Cooling Ducts 60-003 recommended by Hexed: http://www.summitracing.com/parts/QCR-60-003 I bought the 3" to 2" reducers from Sears: Sears.com Similar to Rusty's Journal, I made templates out of thick paper: 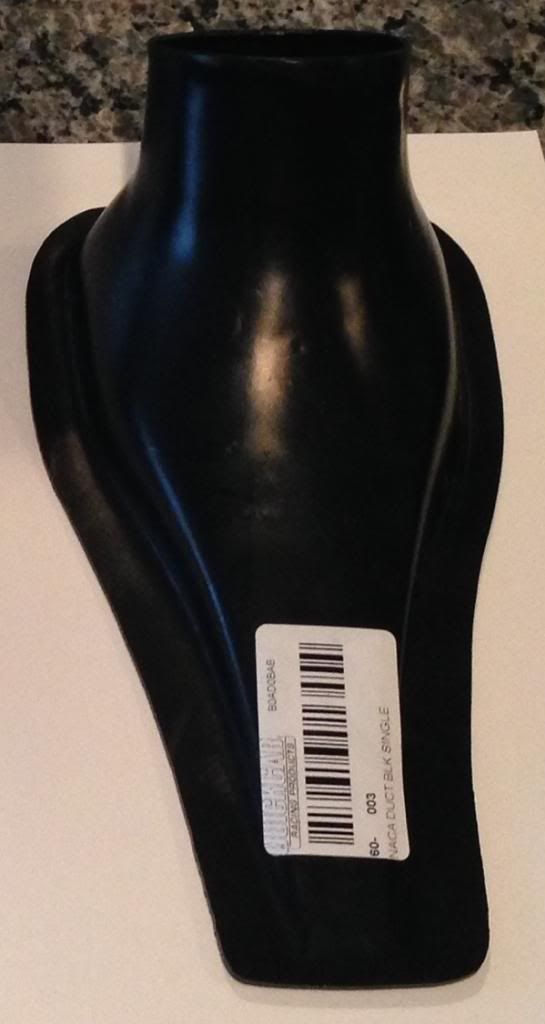 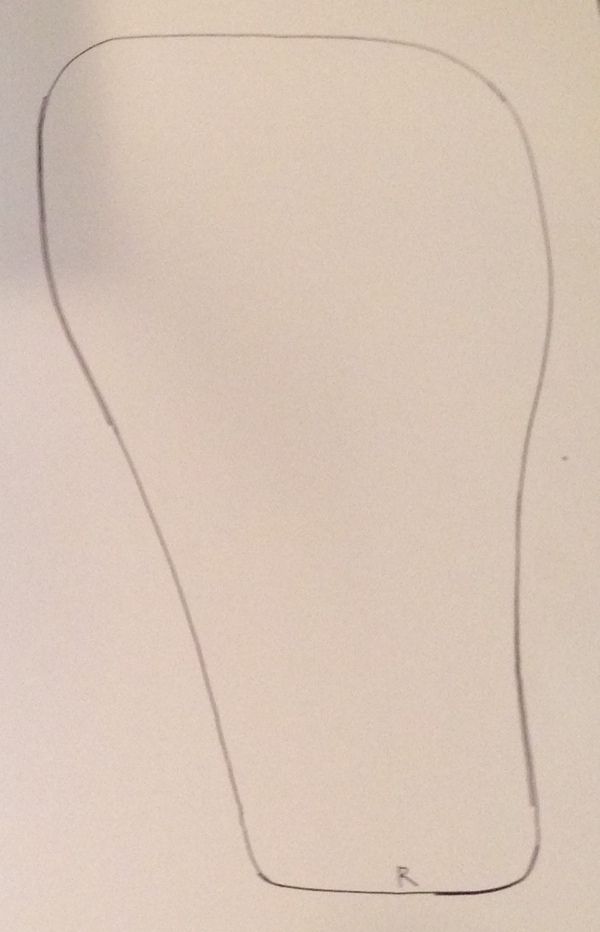 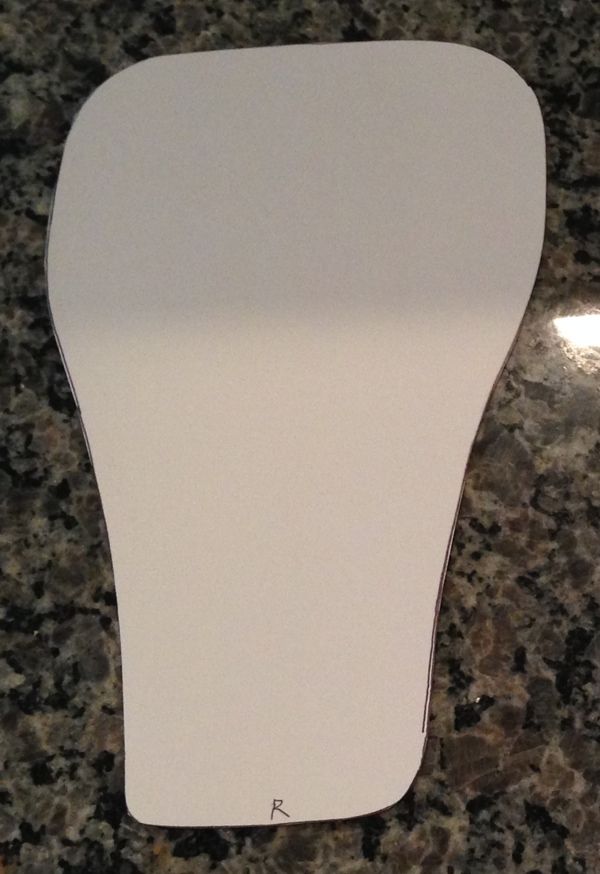 I cut out a section smaller than what I knew would be the end result:  And them trimmed it a little further:  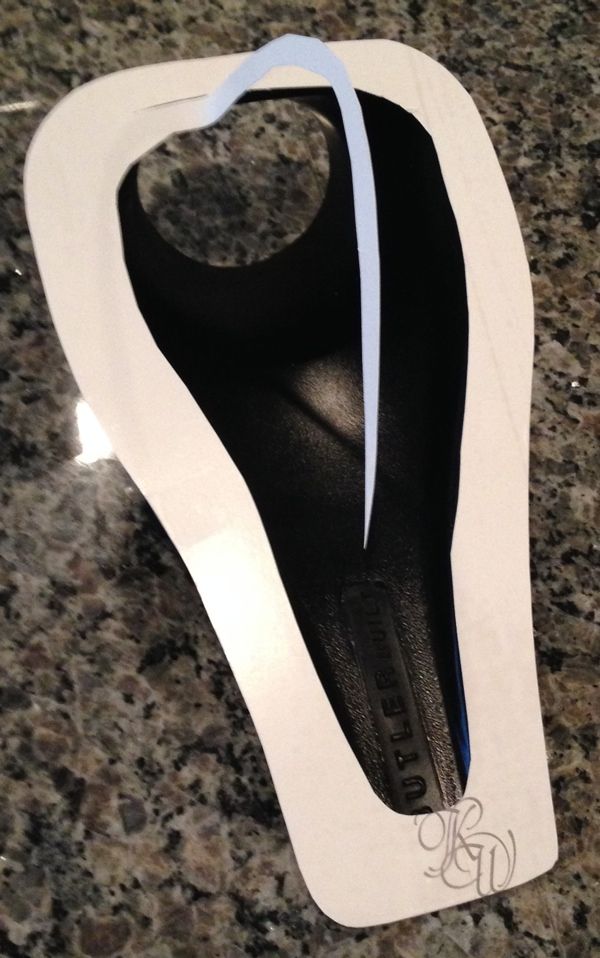 And then fine tuned it to fit over top of the duct:  I got my reducers out:  Since the ducts and the reducers were both the same size, I cut the extension off the reducers (could've been a little cleaner, although I later filled the gaps with silicone adhesive sealant) and drilled holes just large enough for zip ties: 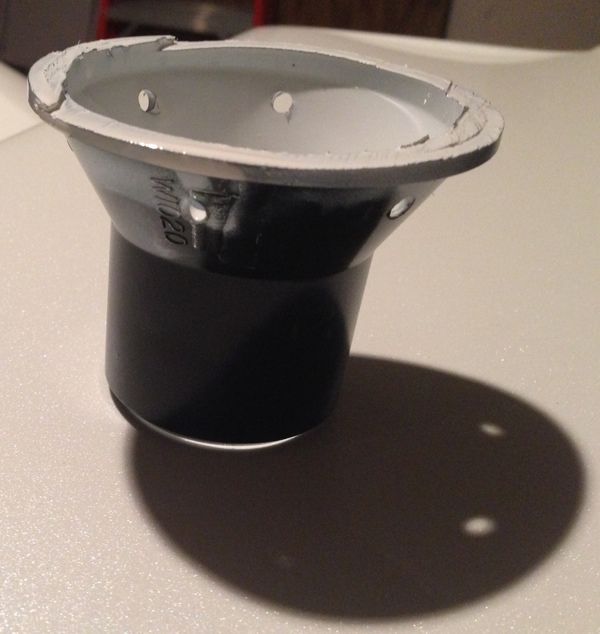 After painting the ducts & letting them dry, I drilled holes in the ducts to line up with the reducers:  And put the zip ties through: 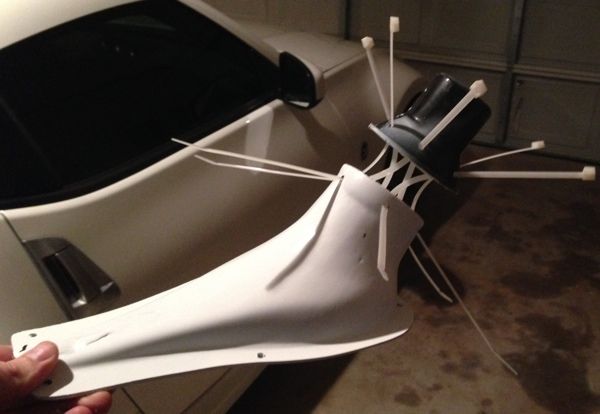   Once the zip ties were tight & cut, I added some silicone adhesive sealant to the drill holes & the gaps in between the ducts and the reducers.  Next I removed the front fascia, taped on the templates & drew with permanent marker on the inside of the templates. 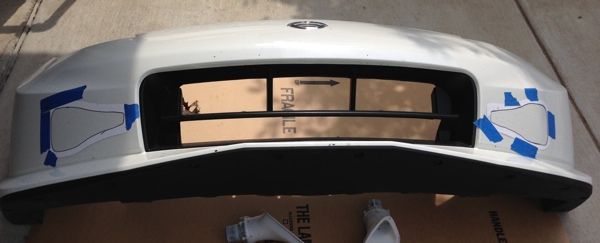 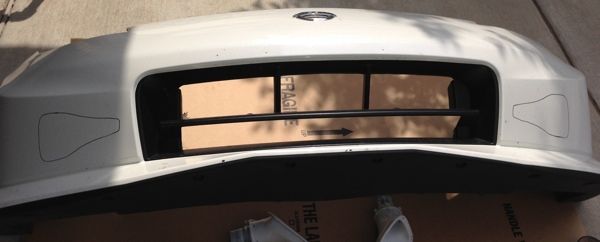  I drilled a pilot hole inside each area so that I could get the jig saw in, and then I cut conservatively inside the lines using a "soft metal blade" (yeah, it's not really metal though). I went back a couple of times to slightly shave/expand the cuts to fit the ducts. I'd rather cut a few times and have it right then cut it once too large. It's easy with a jig saw anyhow. 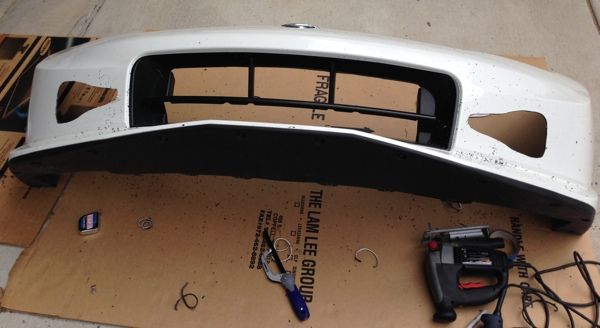 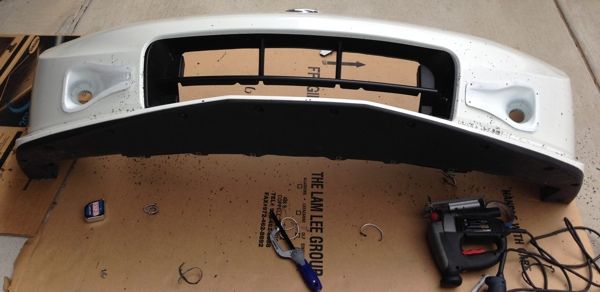 Next, the windshield washer fluid reservoir is in the way on the passenger side. Who needs that much fluid anyways? 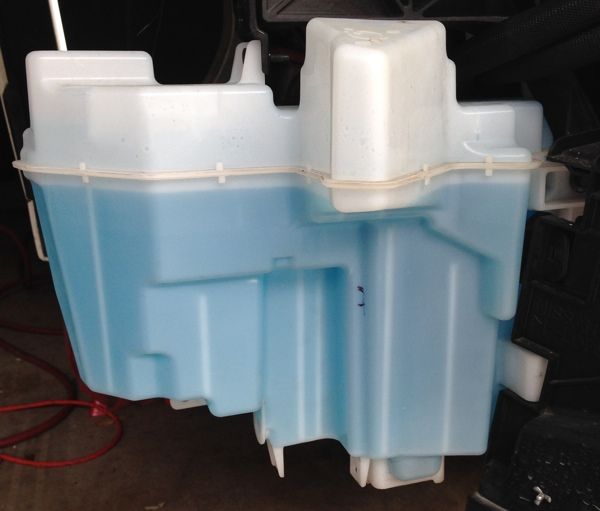 I decided where to cut it & drilled a hole into a part I was going to remove. (This next picture is pretty cool for something so boring eh?) 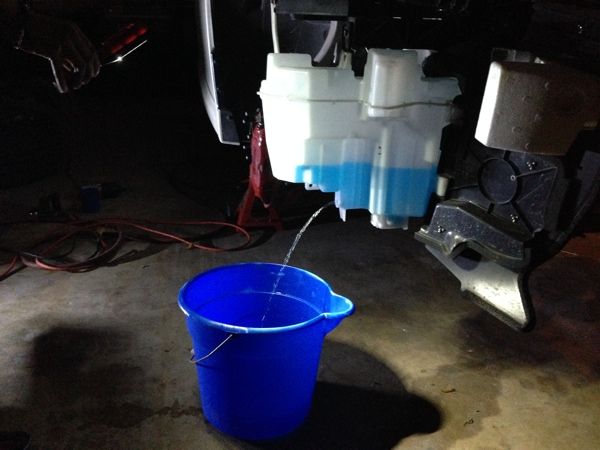 Then I made 3 cuts into the reservoir while still maintaining all the brackets. Next, I cut some plastic pieces to fit the 3 areas I now needed to mend and attached them with Loctite marine epoxy. This takes some convincing to get the pieces to stay before it's dry. Once they were in place, I went over them again liberally with more epoxy. After letting it dry overnight, I added some indoor/outdoor water safe caulking to make sure it would patch any minor holes.  FYI - The reservoir modifications were definitely necessary since the duct hoses begin almost right where the reservoir is, but I did find that the passenger side wheel well cover does come slightly closer to the wheel now. A better solution would be to cut off more of the bottom of the reservoir, but then you'll need to adjust the pump & sensors as well. Next I attached the duct hosing to the ducts. 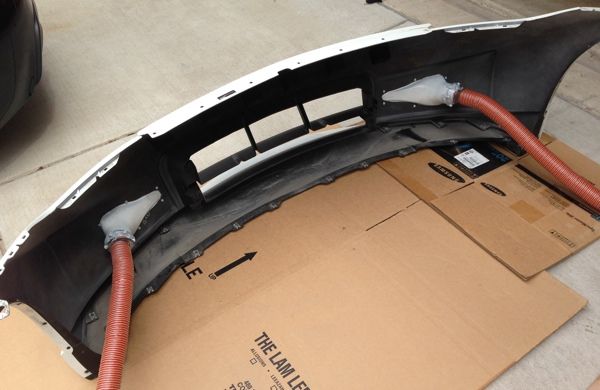 And put the front fascia back on:  And wired the hose around. This was tricky on the passenger side, not only because of the reservoir, but also because I have oil cooler lines already taking up some of that precious space. 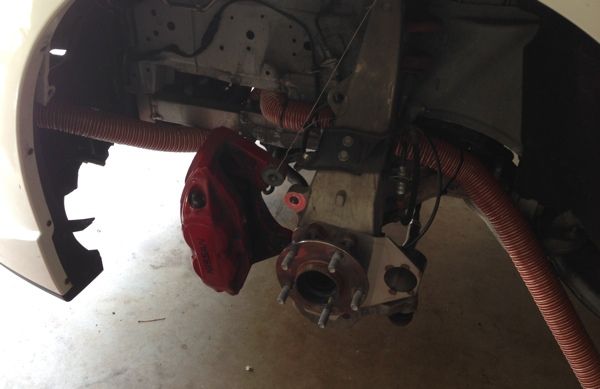 Finally, I attached the hose to the Stillen brake shield I already installed: 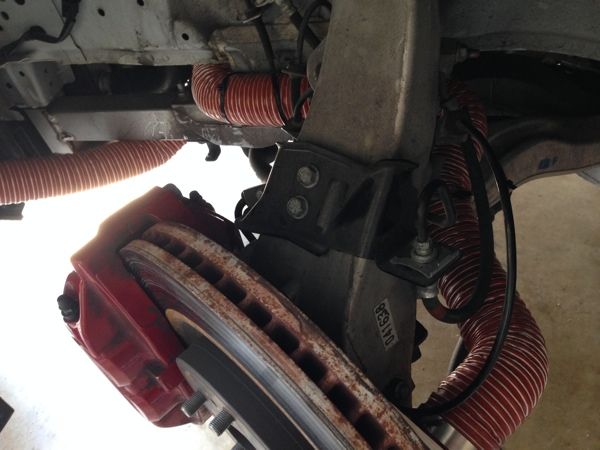 As I mentioned earlier about the passenger wheel well, I had to zip tie it since it was sticking slightly closer to the wheel. But I track 18" wheels instead of 19" anyways, so it shouldn't be an issue. Thanks to Aimee for helping out with the whole build, as well as driving me to Lowe's, Autozone & Wal-Mart! |

|

|
|
04-30-2014, 04:15 PM
|
#3 (permalink) |
|
A True Z Fanatic
 Join Date: Mar 2013
Location: Canada
Posts: 2,130
Drives: 2016 Solid Redz
Rep Power: 247  |
Looks great brother
 May I suggest you getting some white silicone to place around your duct works.... this way they blend into the bumper better and also white screws or white out your screws. It will look 1000X cleaner  Still looks awesome!!! It takes big ones to cut your Nismo bumper 
|
|
|
|
|
04-30-2014, 06:45 PM
|
#4 (permalink) |
|
Base Member
Join Date: Mar 2013
Location: Dallas
Posts: 15
Drives: '13 370Z Nismo White
Rep Power: 14 |
Thanks man. That's a good idea. I'll look into that. I'm not too experienced with using silicone for aesthetic purposes, so I'll have to experiment somewhere first.
|
|
|
|
|
| Bookmarks |
|
|
 Similar Threads
|
||||
| Thread | Thread Starter | Forum | Replies | Last Post |
| O&G's Journal | O&G | Member's 370Z Gallery | 648 | 02-16-2017 03:30 PM |
| My Journal gone | SPOHN | The370Z.com Feedback, Suggestions & Questions | 12 | 11-13-2012 02:12 AM |
| Apoc370z's Journal | Apoc370z | Member's 370Z Gallery | 5 | 06-28-2012 01:22 PM |
| STRYKER Journal | VQStryker | Member's 370Z Gallery | 3 | 04-20-2012 12:12 AM |
| Z BEST Journal | Z BEST | Member's 370Z Gallery | 26 | 01-09-2011 03:19 PM |


 1Likes


 Linear Mode


