
|
Installation of a largest possible street racing radiator for your 370Z - Part 2 Disclaimer: The DYI (Do it yourself ) below is only to share what I have been
|
|||||||
|
|
LinkBack | Thread Tools | Display Modes |
 06-14-2012, 07:46 PM
|
#1 (permalink) |
|
Base Member
Join Date: May 2012
Location: San Jose, Ca.
Posts: 22
Drives: 2010 Nissan 370Z 6MT
Rep Power: 15  |
Installation of a largest possible street racing radiator for your 370Z - Part 2
Disclaimer: The DYI (Do it yourself ) below is only to share what I have been doing for the 370Z and Infiniti G37 cars. If you are lacked of good automotive modification knowledge or experience, please DO NOT perform this task yourself. I shall assume NO responsibilities, whatsoever, for any consequential damage , injuries to you and/or your vehicle in this case if choose to do the work below by yourself. The 370Z in general, depending on what you do to it, is NOT a simple vehicle to work on. If one thing goes wrong, many more can follow since the car has very tight tolerance and very low margin for error. To fix your mistakes can become very costly so be very careful. Modifications basics : Before you start: ONLY drain the engine coolant when the engine is completely cold. Hot coolant can and will injure you very badly. Disconnect the NEG battery terminal Have the A/C system PROPERLY discharged. Never attempt to discharge the refrigerant into the air. It is extremely unhealthy for all of us. 1)) Remove the front bumper assembly. I am not going to tell you how to do this because you can read this procedure from the Nissan factory service manual or search for someone who already have posted this procedure from the DYI section. 2)) After the bumper removal, your Z will look just like this: 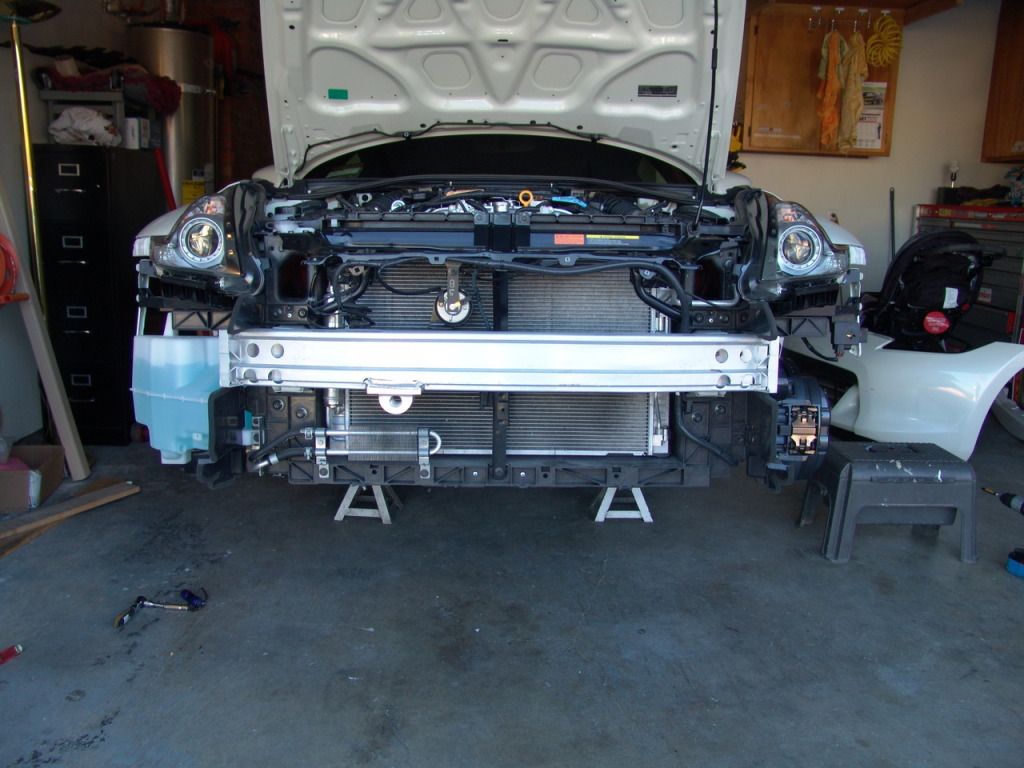 3) Remove the crash bar. 4) Remove all of the front radiator core support reinforcement bar and the rest of the plate and disconnect all of the wirings and the front metal bar as shown below 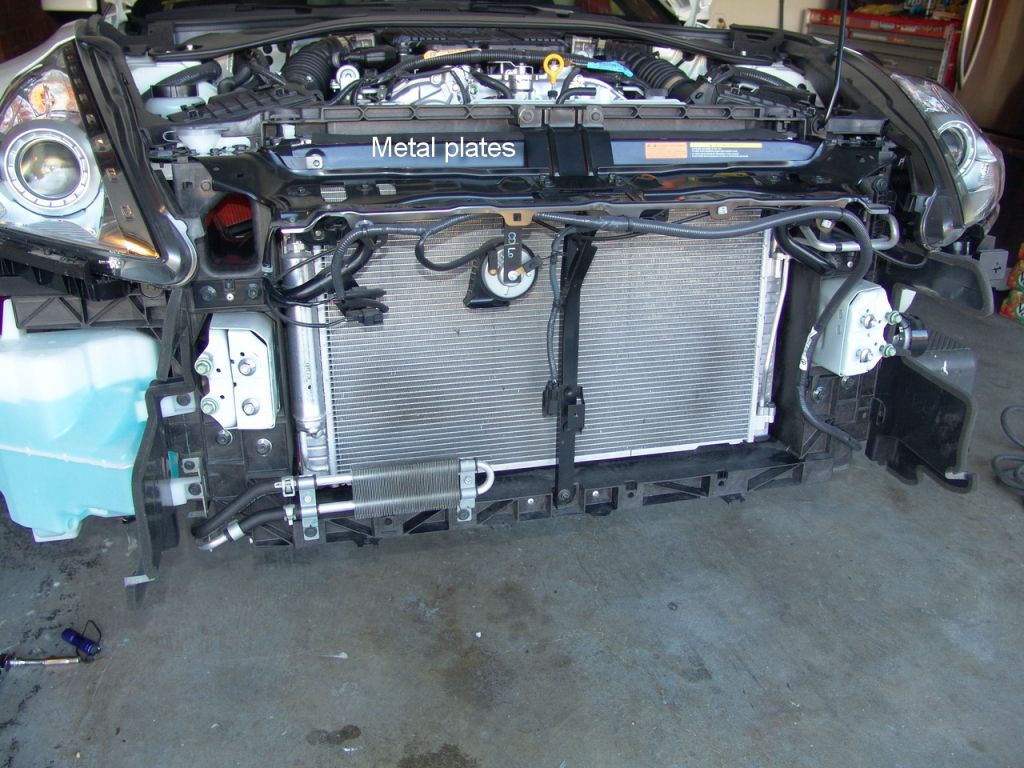 5) Remove the fan assembly and harness. Again, please follow the factory manual instructions 6) Remove the airbag front crash sensor harness and remove the airbag crash sensor. Take care and NEVER drop the crash sensor. Be real gentle with it. If you happened to drop it accidentally, you MUST replace with a new one just to be safe. 7) Remove the 2 intake air boxes 8) Drain the engine coolant. Remember to open the 2 drain plugs in the block as well. 9) Disconnect the 2 radiator hoses, remove the coolant reservoir , A/C condenser pipes and remove the factory radiator and condenser assembly out of the car. 10) Here is how it looks like after the radiator removal. You can see the integrated fan shroud assembly: 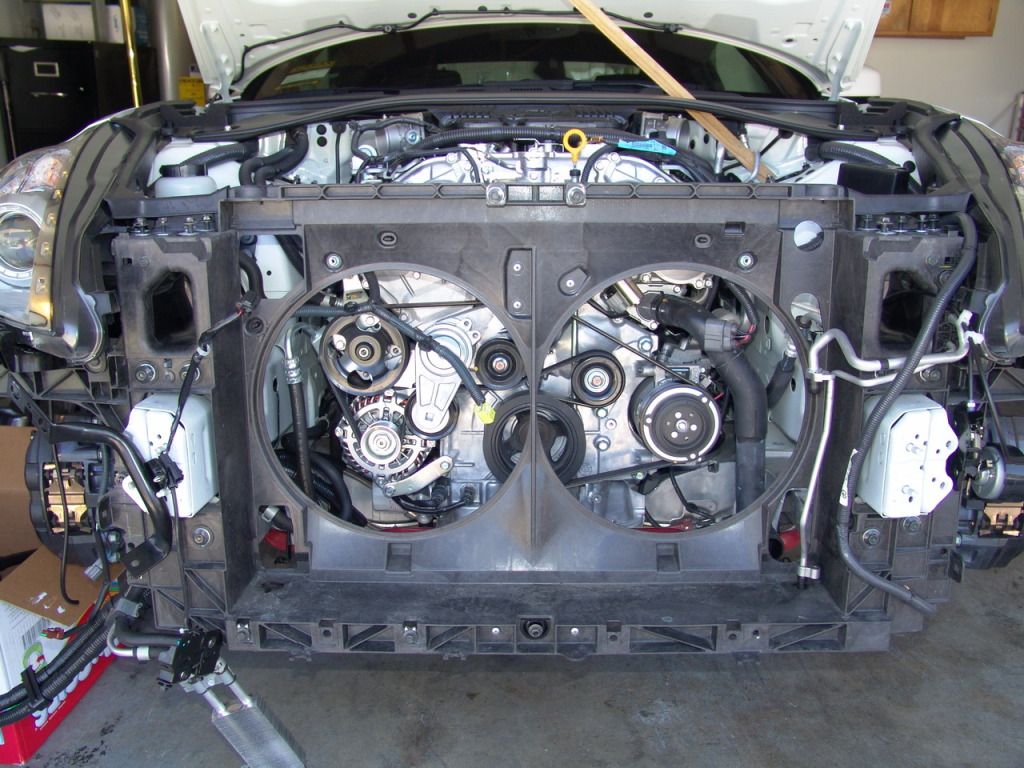 11) Use an appropriate cutting tool and properly cut the factory shroud as shown below. Don't mess this up or else you will have to spend money for the brand new shroud assembly. 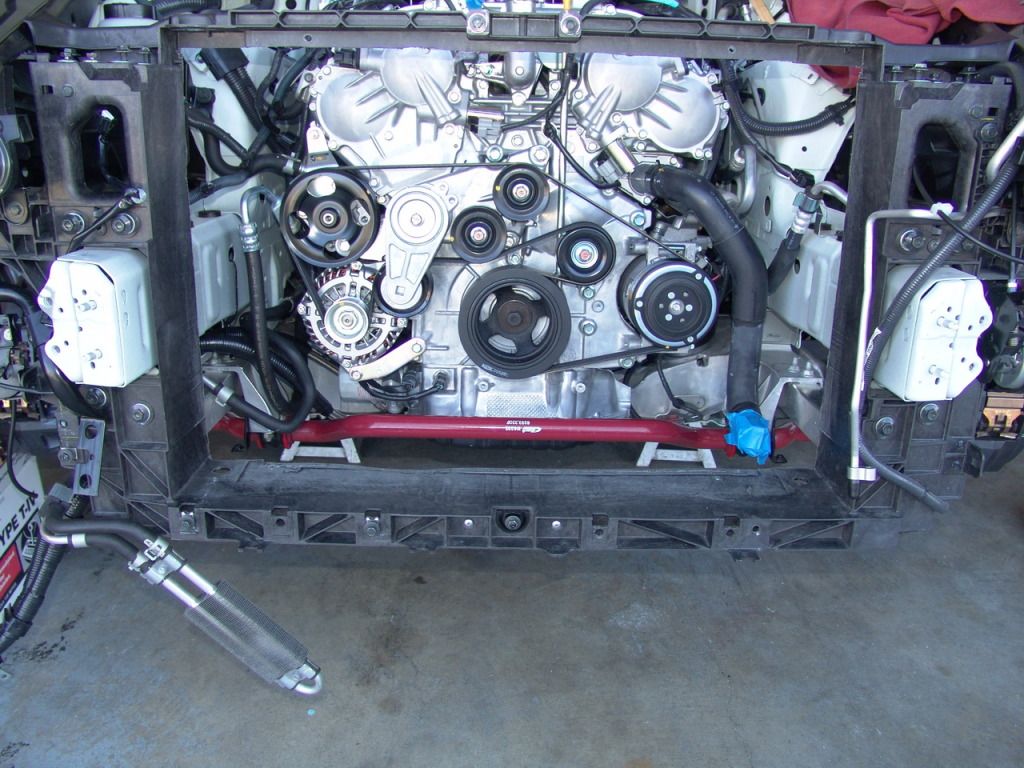 12) This step is VERY , VERY important because it involves safeties for the folks that want to retain ABS in their cars still : a) As you noticed, the ABS front crash sensor was originally mounted on the factory shroud, which was pretty solid with minimal unwanted movements. b) In order to ensure proper ABS operation, the ABS front sensor MUST be mounted very much the same way as factory on this aluminum fan shroud. c) Never attempt to modify the ABS sensor in any way at all. Otherwise, your airbag can deploy inadvertently and causes personal injuries or it might not deploy at all when it needs too. 13) The photos below show how the sensors were mounted on the fan shrouds. Also, you must use Loctite for the mounting bolt because you do not want your bolt to ever come loose. 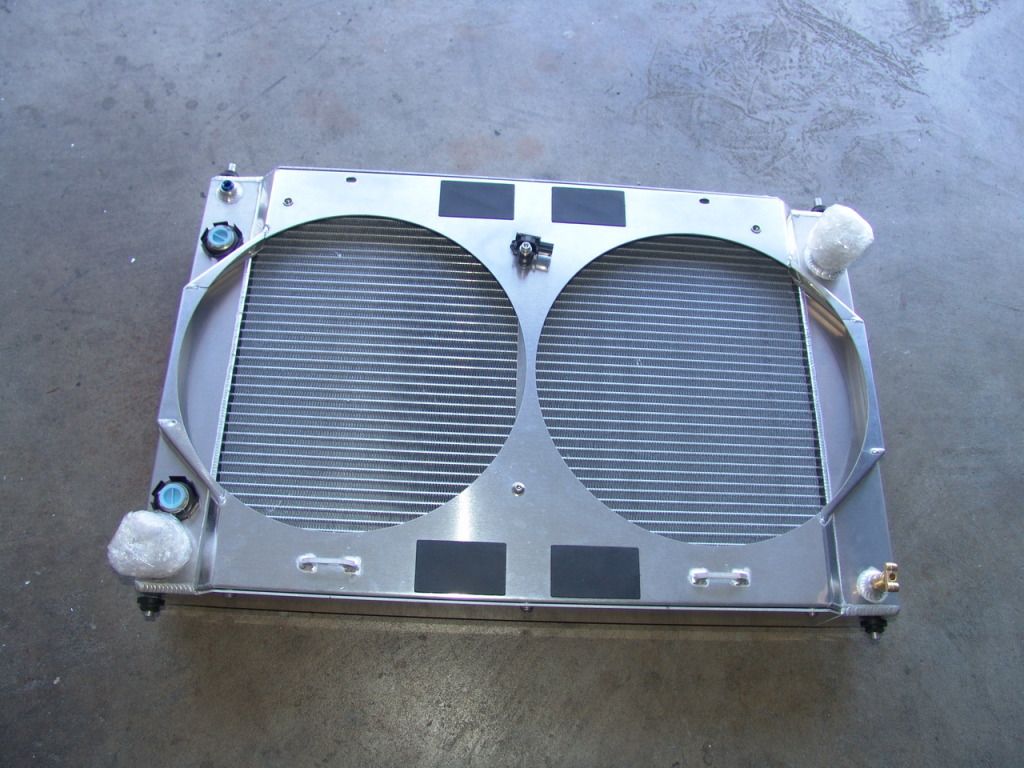 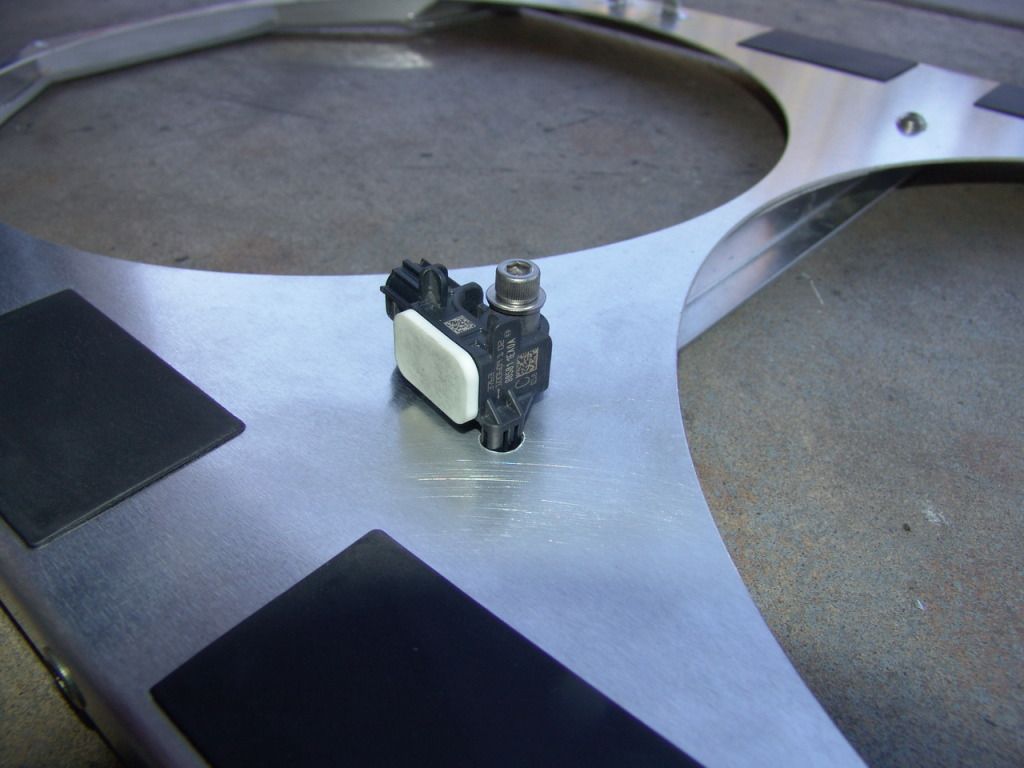 14) Next install the shroud back to the radiator. Then install the factory fan assembly to the shroud as shown below: 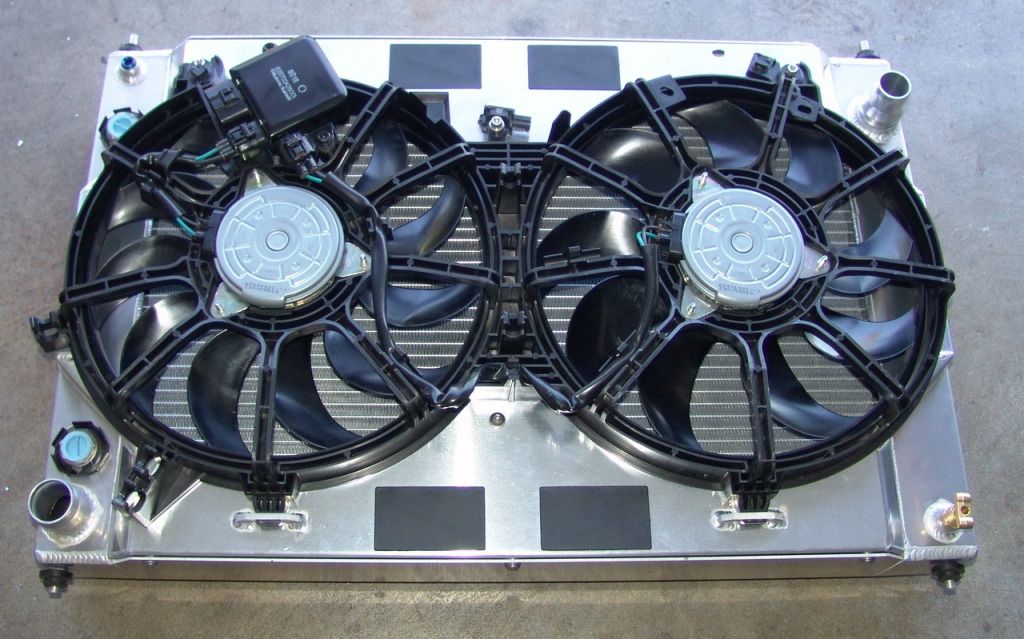 15) There is no way to cut the factory shroud perfectly. So, I fabricated the hardware shown below. Basically, they are the upper and lower braces as well as the two supporting aluminum blocks The purpose for the 2 blocks : Since I has to cut the factory shroud, and that causes the rear vertical strength for the whole assembly to soften. Also, this radiator is heavier than stock. Therefore the blocks will be placed below near the 2 radiator lower supports in order to stiffen the lower mounting surfaces. Install the 2 blocks by sliding it just below the gap between plastic shroud and the lower metal frame. Then attach bolts to hold both of them blocks down. See photos below: 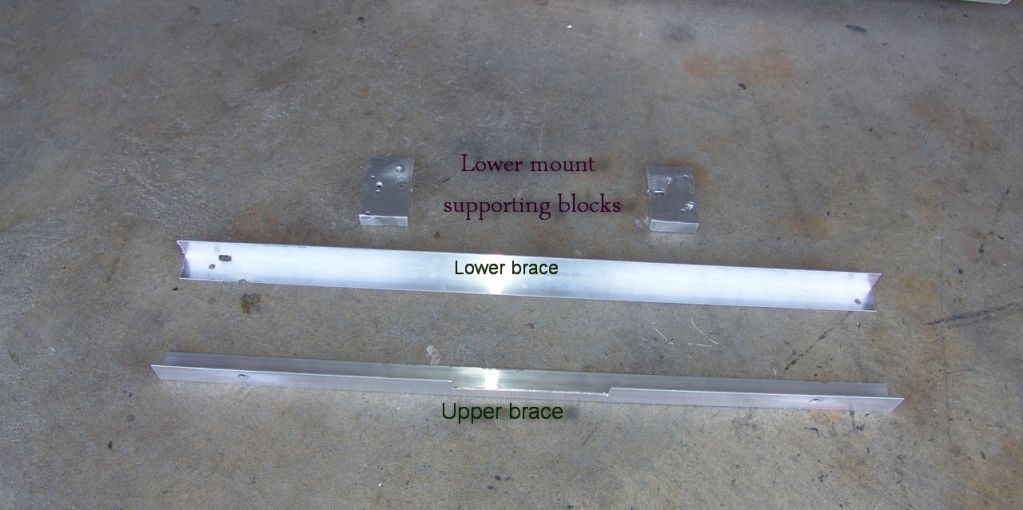 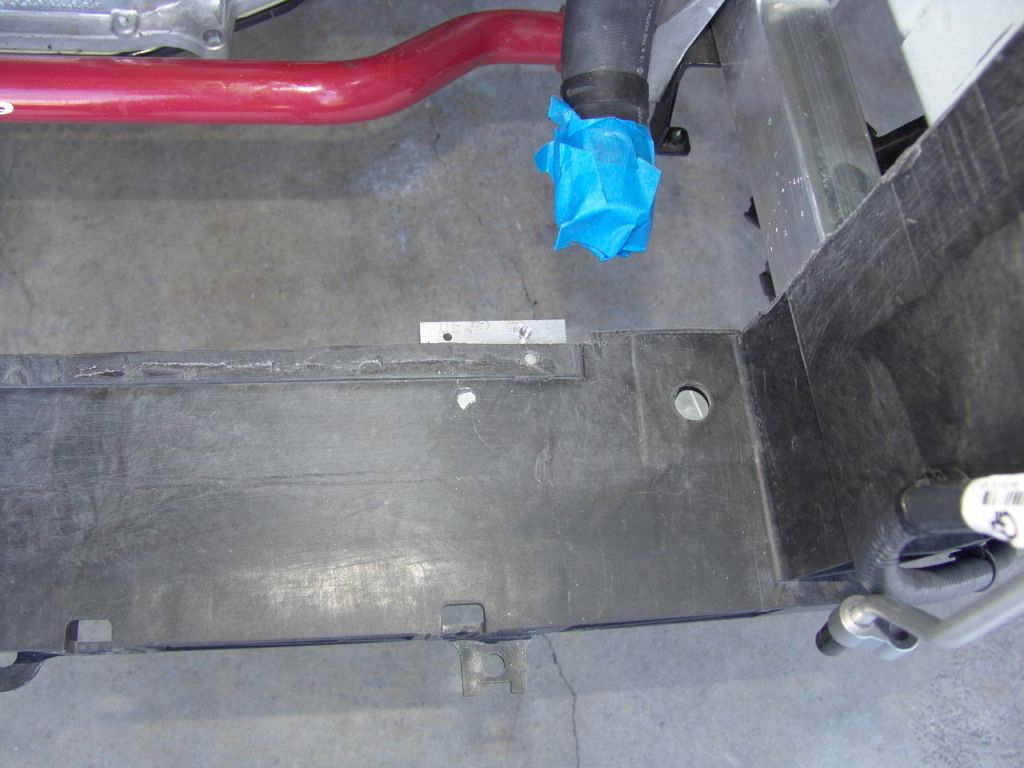 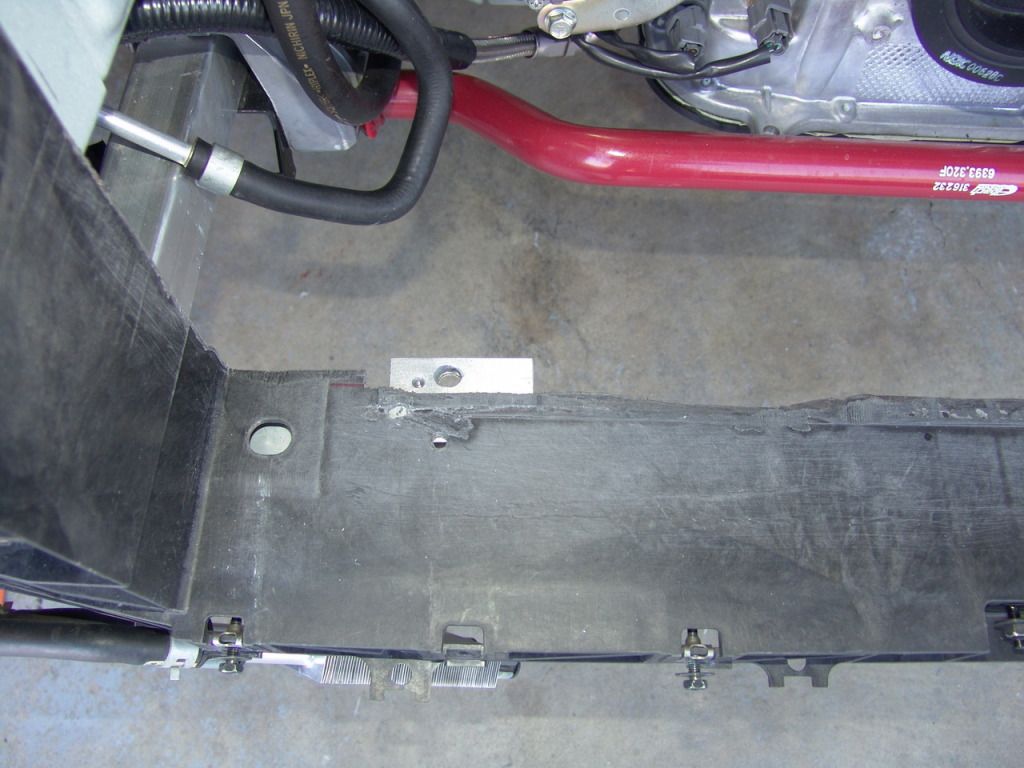 Again, since there is no way to cut the factory shroud perfectly, the purpose of the lower and upper braces is to limit the vertical radiator movement. I limited to 1mm or less. This would still allow the radiator to move within the factory rubber grommets that were designed to mount the radiator in order to prevent cracking, but the main purpose of this small vertical movement is to prevent the front ABS crash sensor to move excessively and possibly cause a false airbag deployment since the crash sensor is mounted on the fan shroud, which is mounted on the radiator in this case.. 16) After installing the lower and upper braces, install the racing radiator into place with 4 grommets. Follow factory installation procedure. 17) Install the condenser to the radiator via 4 bolts 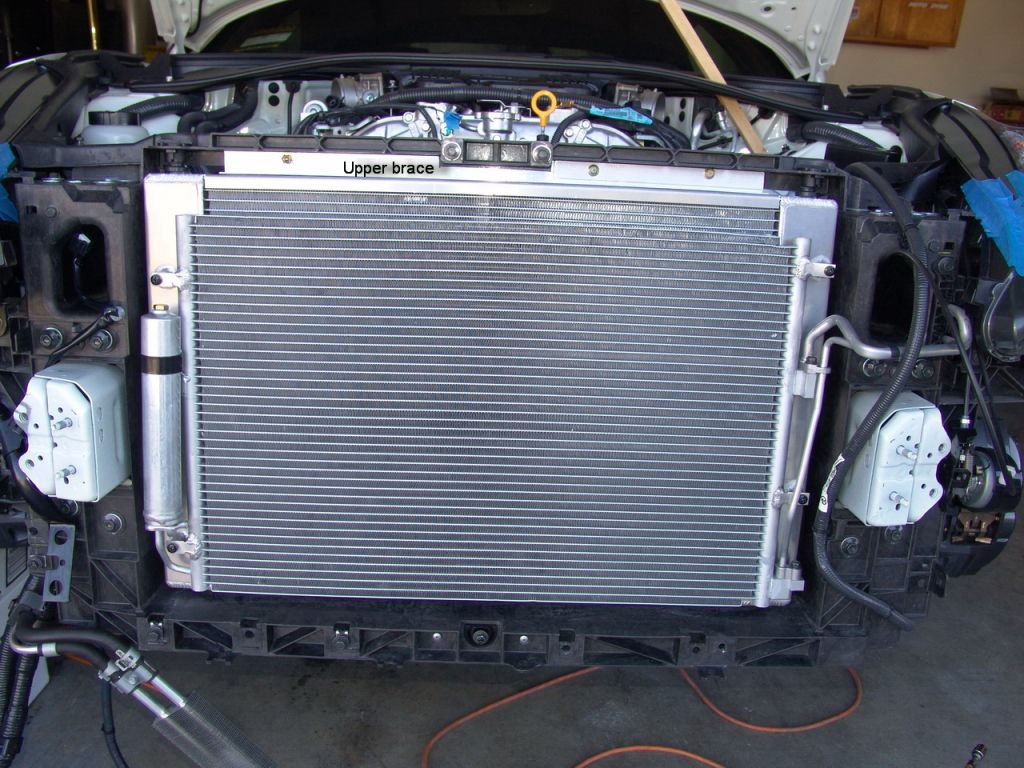 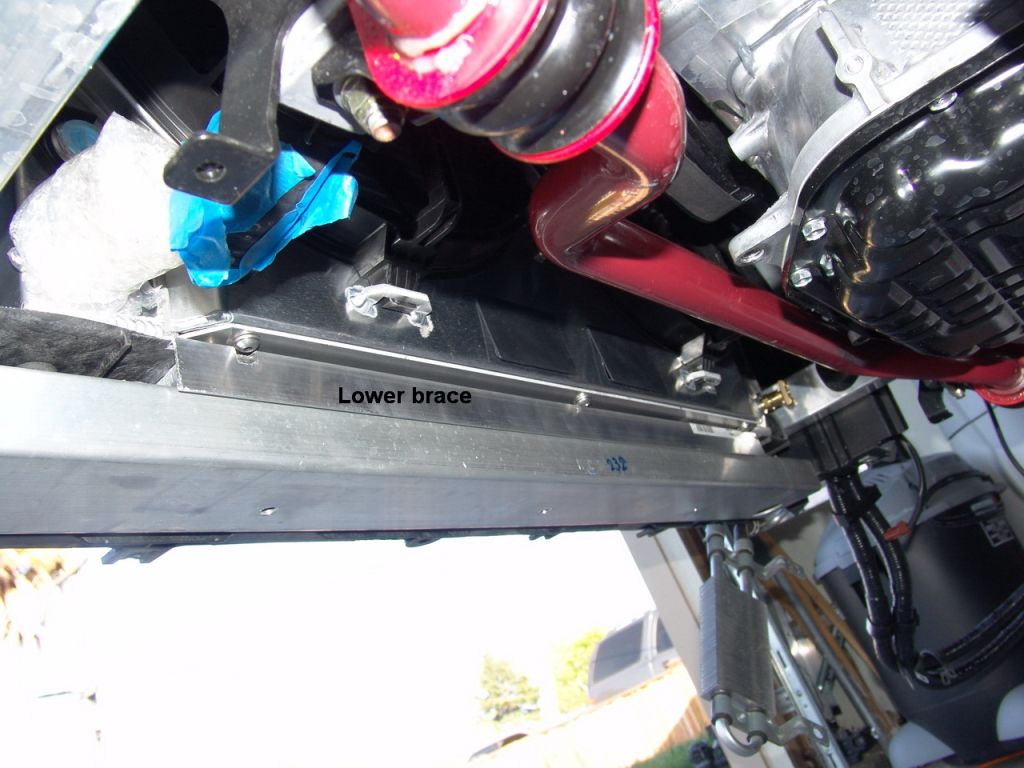 18) Bend the condenser pipes to the appropriate angles, be very gentle and take care NOT to crack these aluminum pipes. Carefully fit them onto the new positions into the new condenser and make sure that there are NO stress on these pipes when you attempt to fit them into the condenser. See photo below: 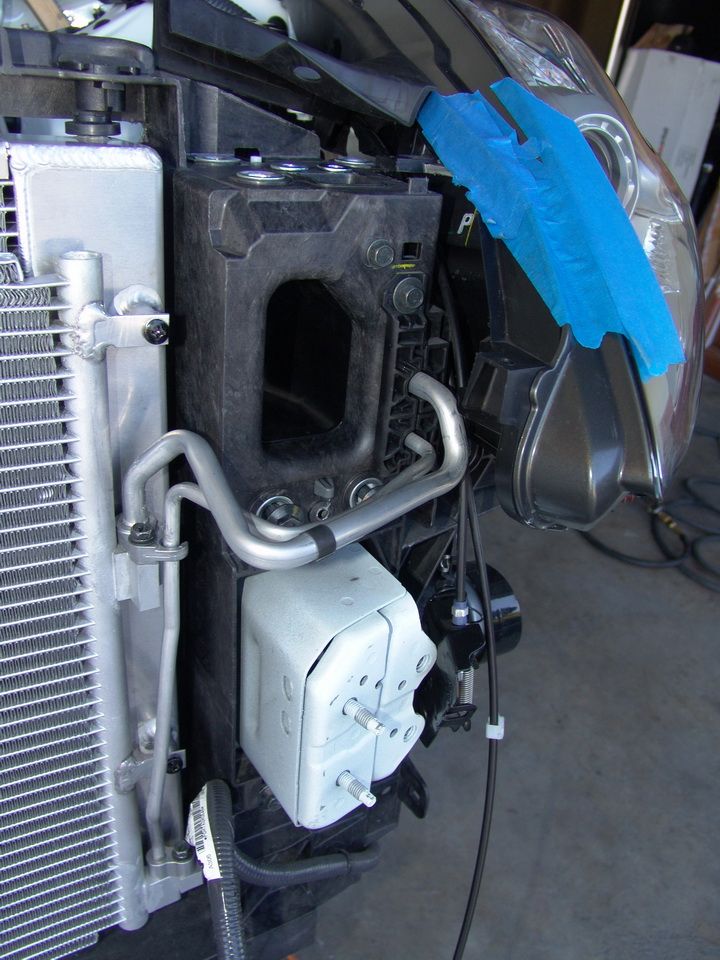 19) Now reinstall the fans and front ABS sensor harness, radiator upper and lower hoses, coolant reservoir and air filter boxes back into the same factory positions. See photos below: 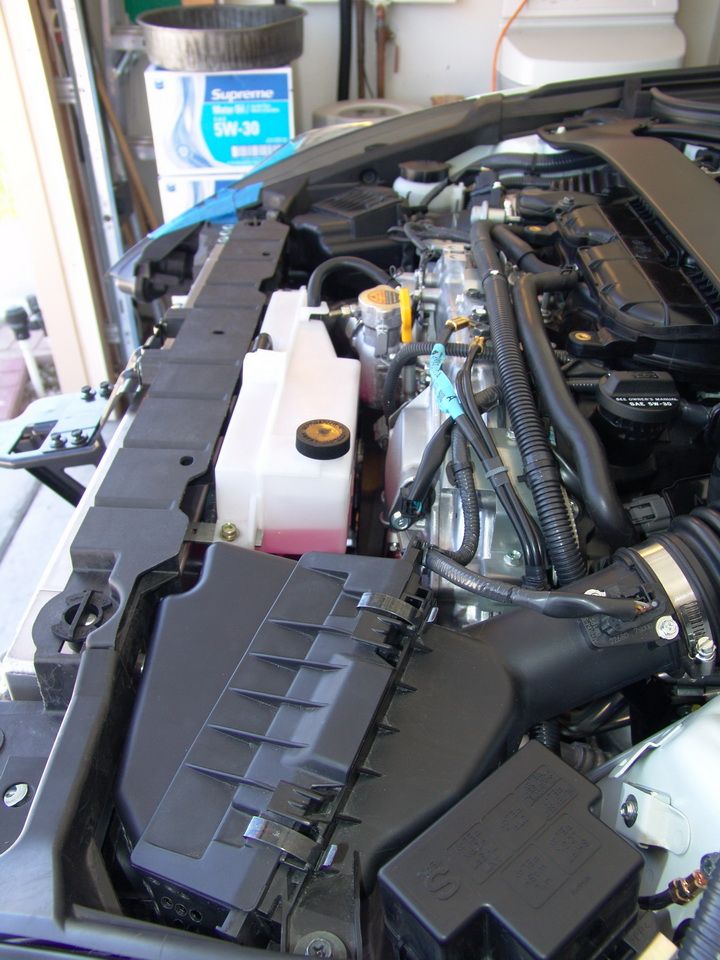 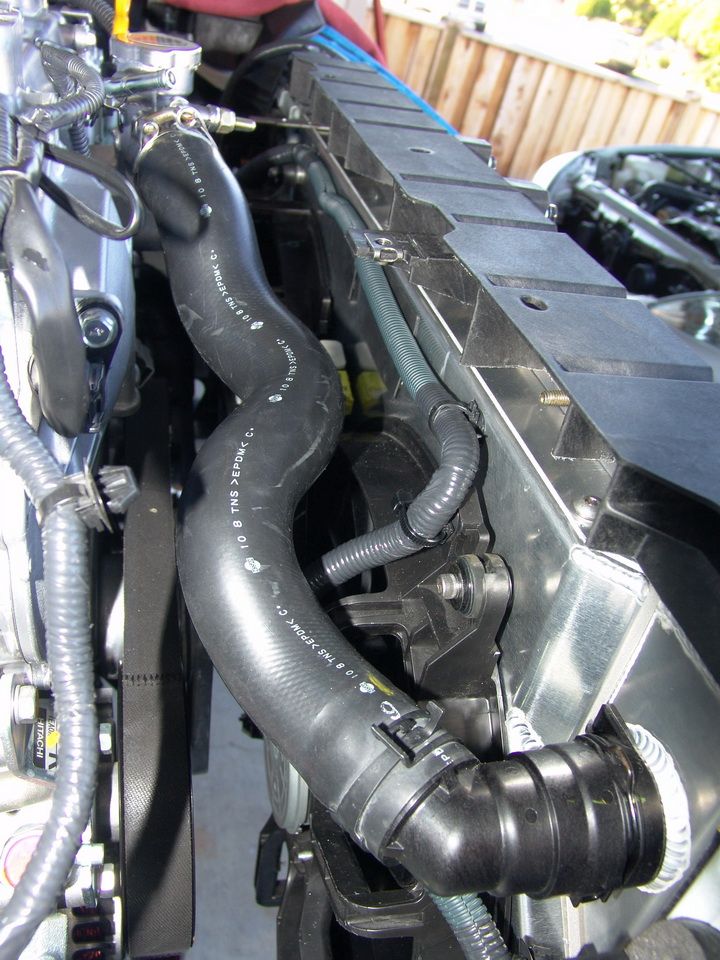 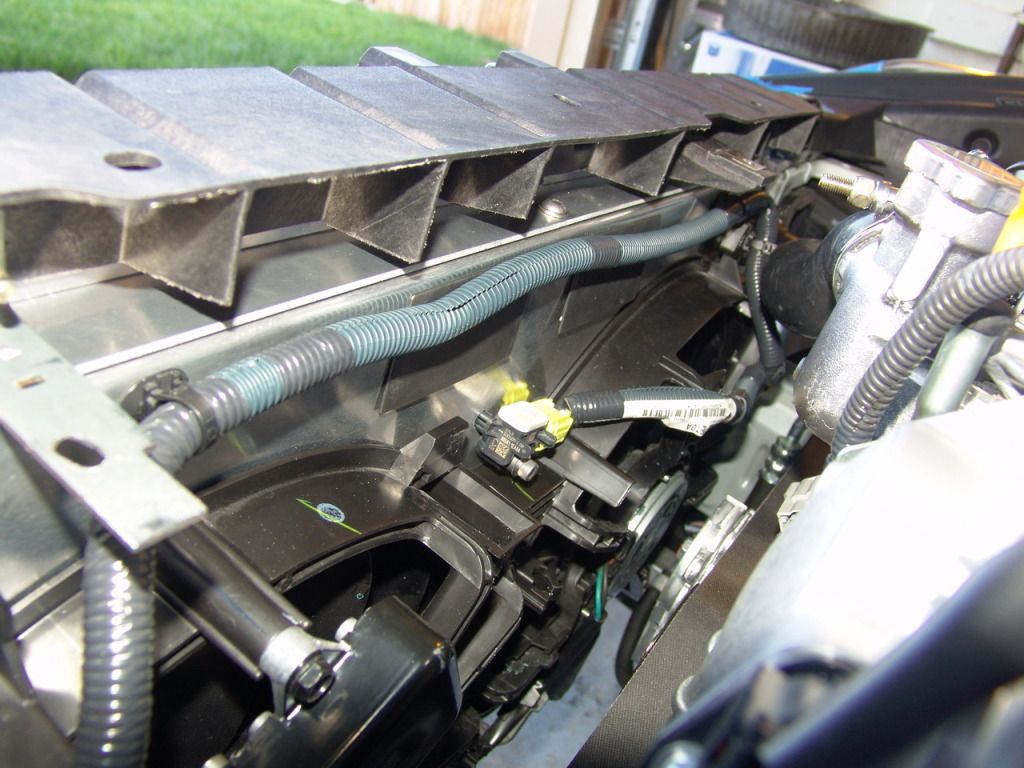 20) Now the FINAL steps : a) You must modify the radiator core support reinforcement bar in order to properly fit this big radiator. See the photos below. b) Use an appropriate cutting device, take your time and custom cut until you can line up the bolts on both ends of the radiator core support reinforcement bar. c) When you trim the reinforcement bar, BE SURE to leave <1mm for the radiator horizontal movement ( back and forth ). DO NOT allow too much movement since this can have a false impact on the airbag crash sensor. This movement is VERY critical so be very careful and pay attention please. d) After you are done trimming and cutting , Tighten the reinforcement bar to specifications. e) Install the rest of the hardware, harnesses and horn. See many photos below 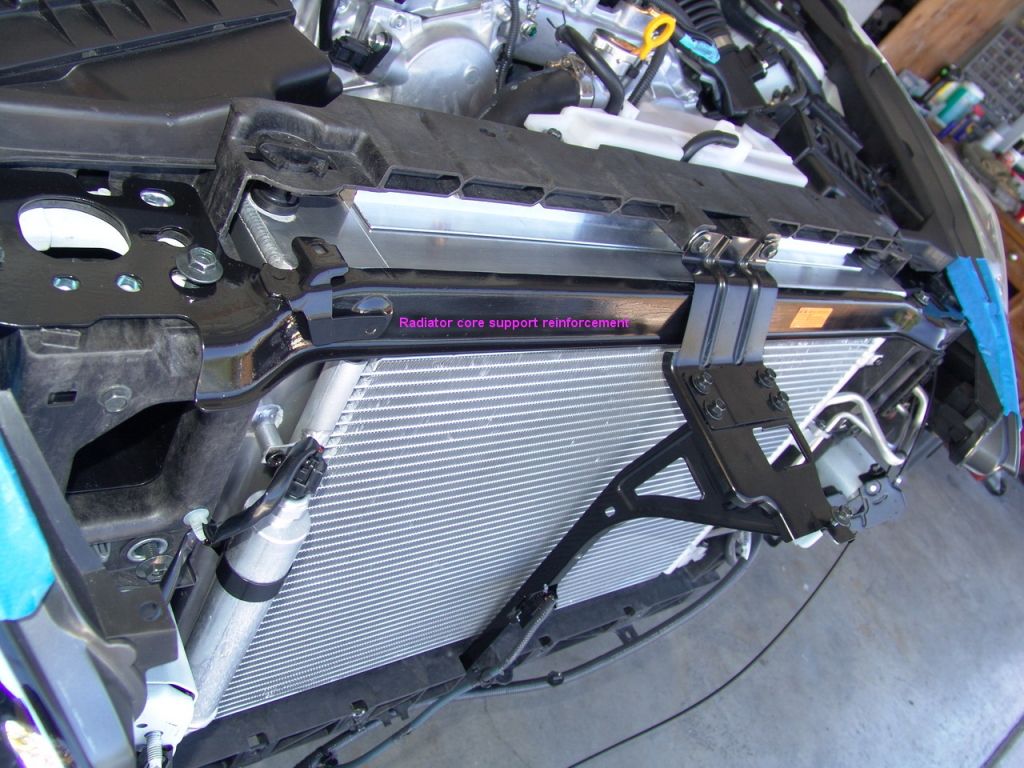 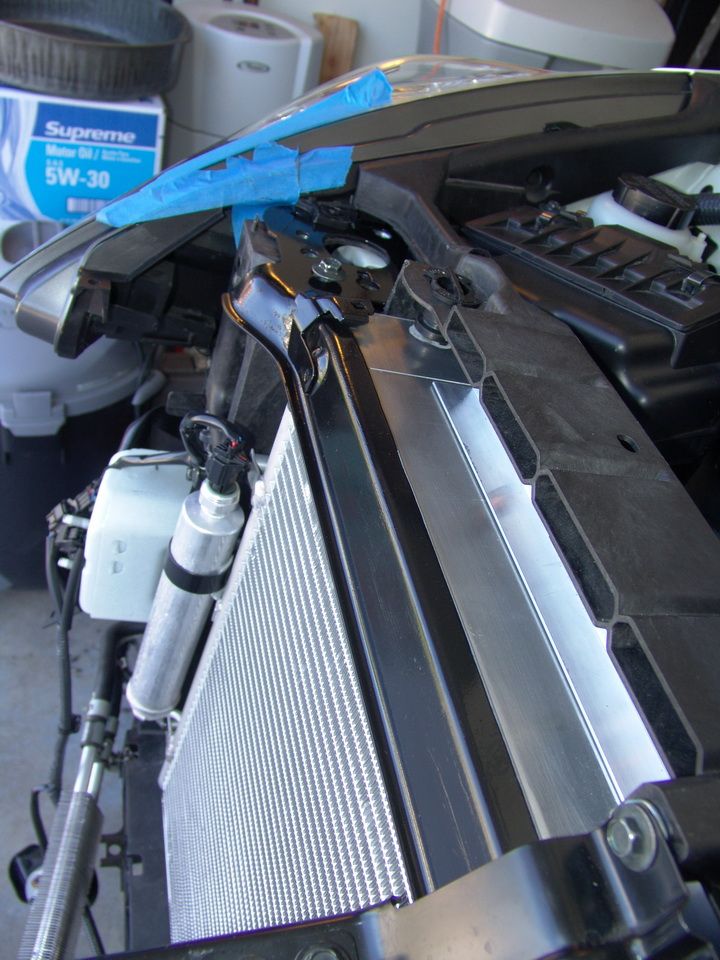 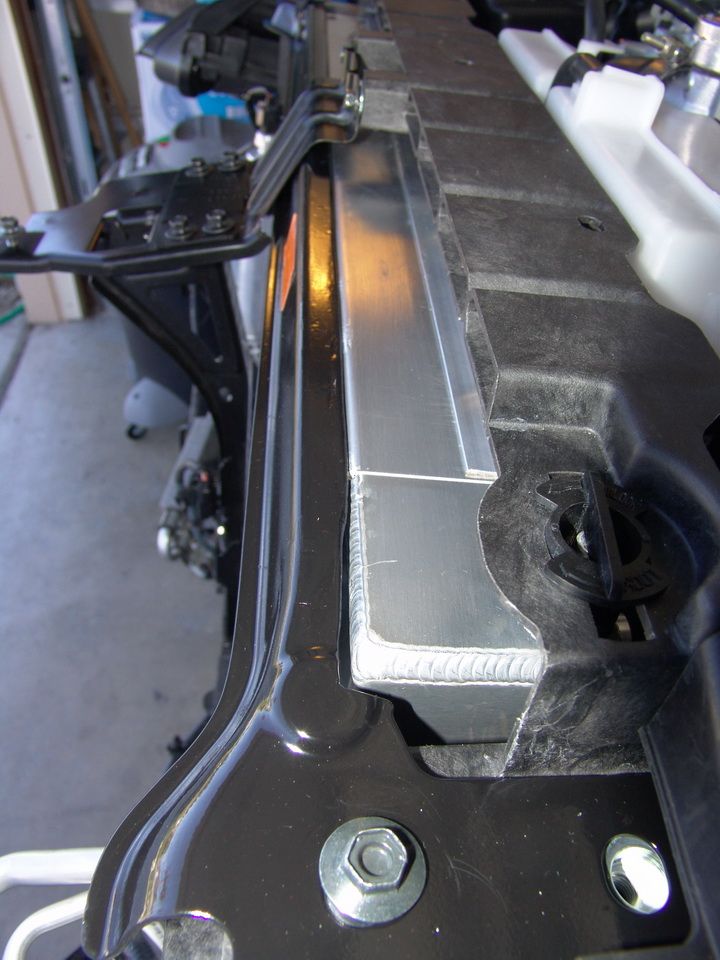 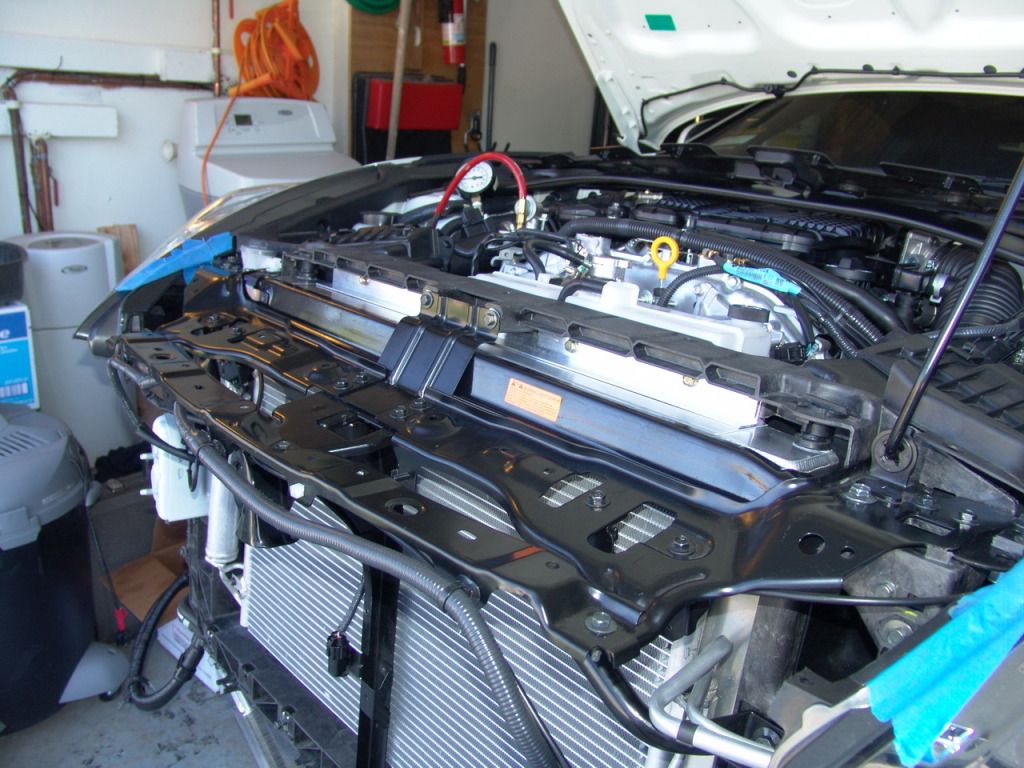 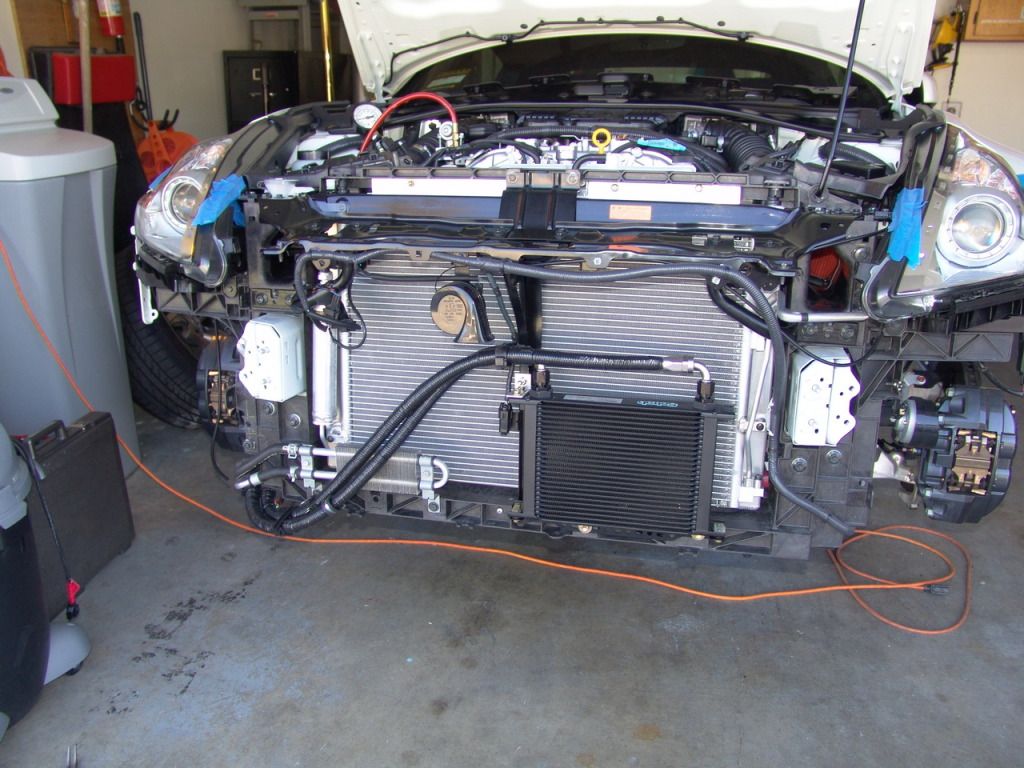 FINAL PRODUCT: Fill and bleed the entire cooling system according to Nissan service manual. You should be able to fill in 12+ quarts of antifreeze if you properly drained the system earlier. Recharge your A/C system to specs Check for leak.... and enjoy 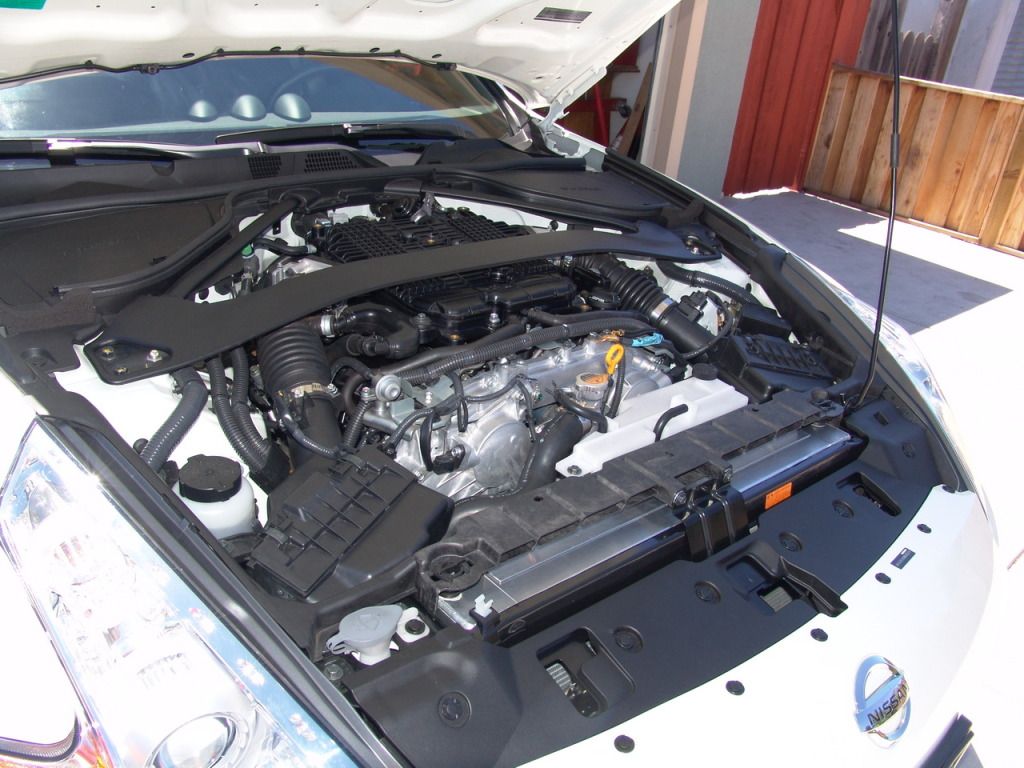 |

|

|
| Bookmarks |
|
|
 Similar Threads
|
||||
| Thread | Thread Starter | Forum | Replies | Last Post |
| MISHIMOTO Radiator Hose Kits & Racing Thermostat |Tunerz Store | Tunerz_Store | Drivetrain/Engine | 21 | 11-14-2012 02:43 PM |
| Installing the largest possible radiator for your 370Z - Part 1 | VQ37VHR-K28 | DIY Section (Do-It-Yourself) | 6 | 06-14-2012 07:47 PM |
| ISF crushed for illegal street racing... | Cell | Other Vehicles | 32 | 10-24-2011 04:40 PM |
| NEW STREET RACING LAWS ! In New York | NIZZING | North East Region | 1 | 03-07-2011 10:30 PM |
| Street Racing on LI (Don't do it!) | Cmike2780 | The Lounge (Off Topic) | 6 | 03-03-2011 09:12 PM |


 3Likes


 Threaded Mode

