
|
I've just installed my EVO-R foglight with now both of its functions active (set to FLASH in reverse, and SOLID ON function controlled by a second hazard switch). First, make
|
|||||||
|
|
LinkBack | Thread Tools | Display Modes |
 12-08-2010, 11:40 AM
|
#1 (permalink) |
|
A True Z Fanatic
 Join Date: Jul 2010
Location: Scranton, PA
Posts: 1,580
Drives: In the fairway
Rep Power: 20   |
I've just installed my EVO-R foglight with now both of its functions active (set to FLASH in reverse, and SOLID ON function controlled by a second hazard switch).
First, make your connections for the foglight from the pigtail on the light to the wire EVO-R sends you (I did these inside because it was about 20 degrees outside, and probably about 40 in the garage): 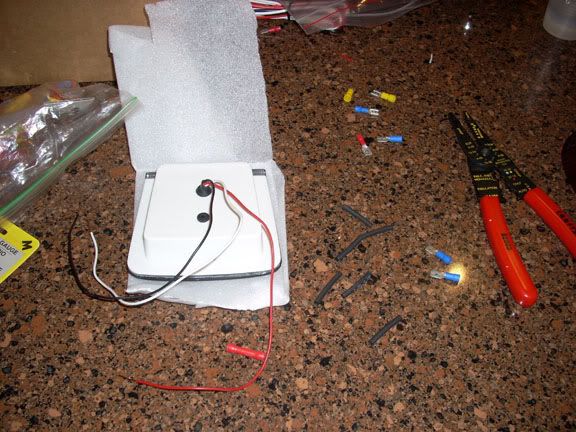 Next, cut the shrink tubing included into 6 pieces and place on all wires: 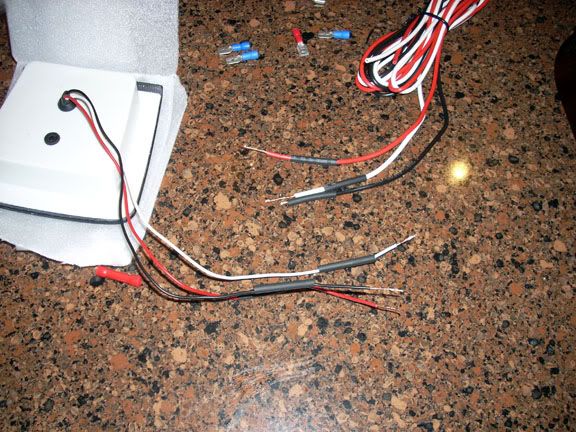 EVO-R included blade style connectors. I prefer the tube style seen in the picture below for a more watertight seal. Your preference! Crimp the connections and shrink the tubing with a heat gun to seal (I did this on our Silestone counters...indestructable!): 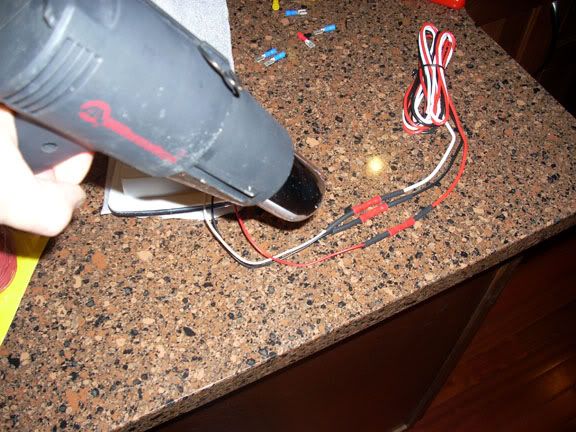 Put the double sided tape on the light housing. You'll need to trim the tape EVO-R sends with the light by about a third so it fits on the frame of the light. I did this inside as well, to keep the doubled sided tape nice and flexible, and pointed a heater at the rear bumper for quite awhile for good adhesion (again, it was a cold day!). To remove the old light, refer to AK370's DIY for the OEM light/harness and the DIY by Simota1. Both are excellent, and also show you how to run a wire up into the cockpit if you opt to connect either function to a switch!  Install the light in the openning (It looks darker in person. The flash of the camera made the lens appear more clear). Remember to reinstall the metal backing plate that helps to support the rear valance (sorry, no pics of that here - easy to do, just 4 snap in connectors): 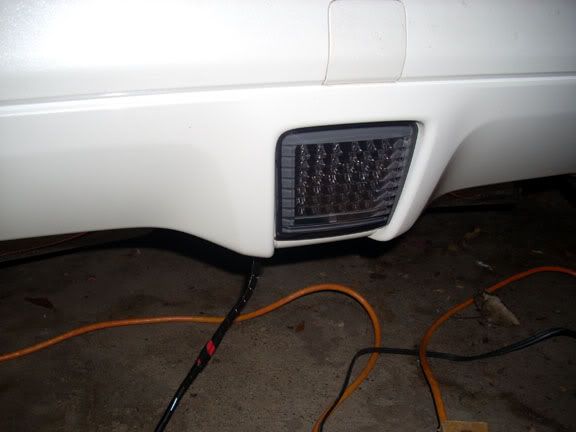 Next, watch SlikNik's Video 1 in the Audio section (it is VERY helpful  ) on how to remove the panels and other stuff in the trunk to get to the wiring harness. One word of caution: when removing the side panels, use a door panel tool like the one in the video for the first 2 clips. Then pull the panel toward the center of the trunk for the last. I cracked a panel being overly zealous with my tool (um, that didn't sound right ) on how to remove the panels and other stuff in the trunk to get to the wiring harness. One word of caution: when removing the side panels, use a door panel tool like the one in the video for the first 2 clips. Then pull the panel toward the center of the trunk for the last. I cracked a panel being overly zealous with my tool (um, that didn't sound right ). Anyway, here is what your empty trunk will look like: ). Anyway, here is what your empty trunk will look like: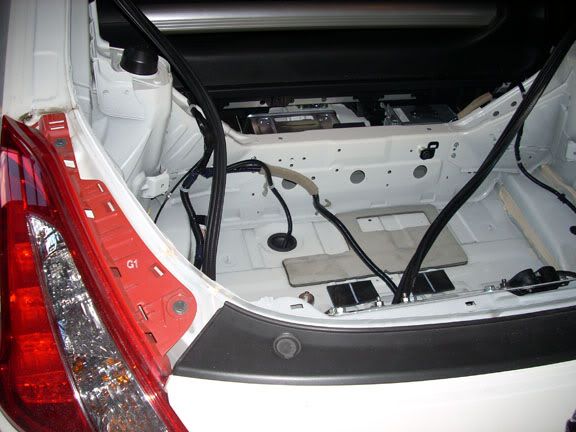 Now, you DO NOT need to remove the tail light! You can, if you want to get to the harness close to the connector. I considered this at first (see below) but then realized I could do the wiring connection all inside the trunk (second pic below). So I sealed up the wiring harness and re-installed the tail light. 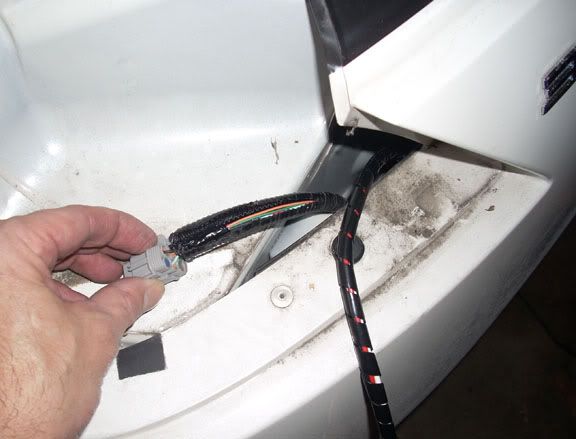 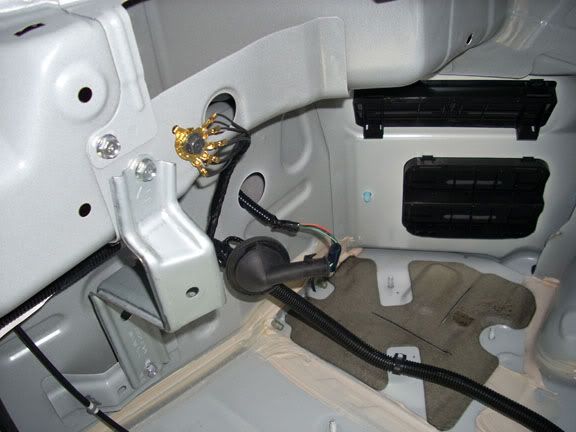 The ORANGE wire is for the reverse lights. This is the one I tapped into with one of these handy connectors: 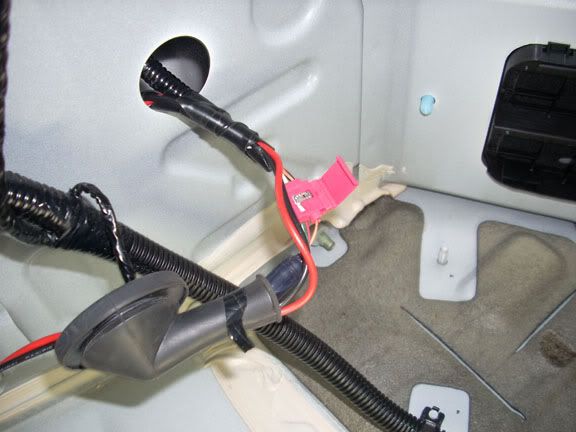 Replace the grommet, and wire up your ground (see the blue connector):  Put everything back together, and enjoy the flashing light! Now for the switched "solid on" function: Purchase a hazard switch from Nissan. Even better, get the connector, too (you can skip the next step if you do!). Cut the housing from around the contact pins so you have room to make connections. With needle nosed pliers, bend the poles in opposite directions - on forward, one back, etc.: 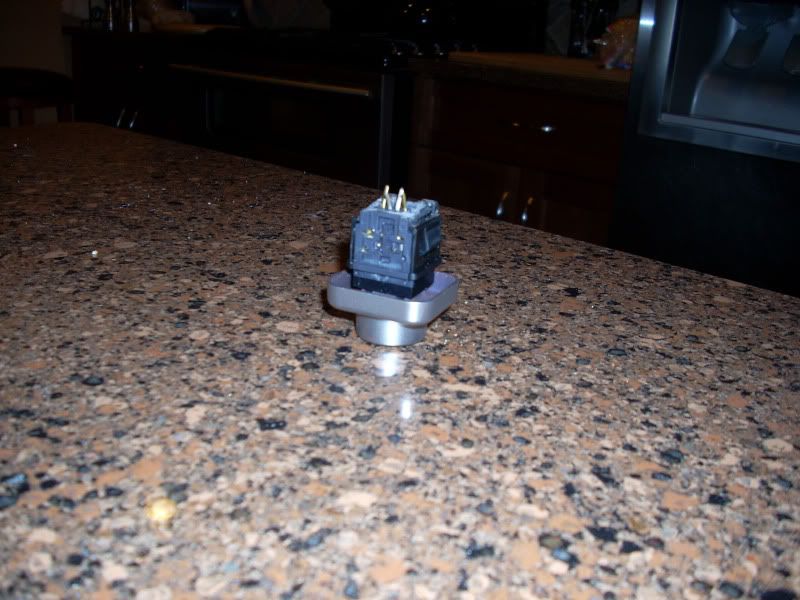 Get some of these .110 female connectors. The fit nicely on the contacts, with just a little crimping with pliers: 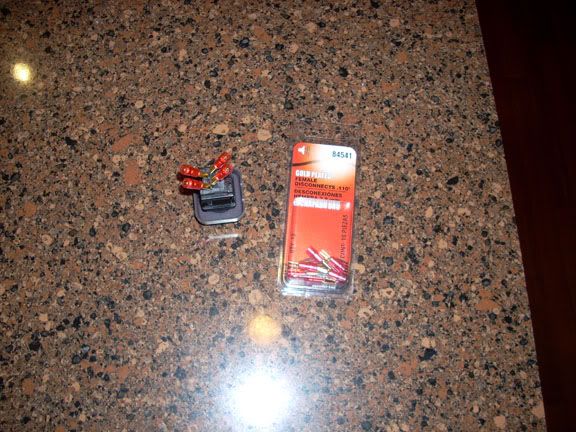 Remove the shift trim. Remove the hazard blank (note: you guys with Syncrorevmatch will have to find another location for a switch) by removing the screws holding the shift boot in place. Insert the new switch. Tap into the yellow accessory wire under the radio for your power (you can see the red wire I ran from the trunk of the car in this picture, too) I ran an inline fuse to the switch just to be on the safe side (not visible in this picture): 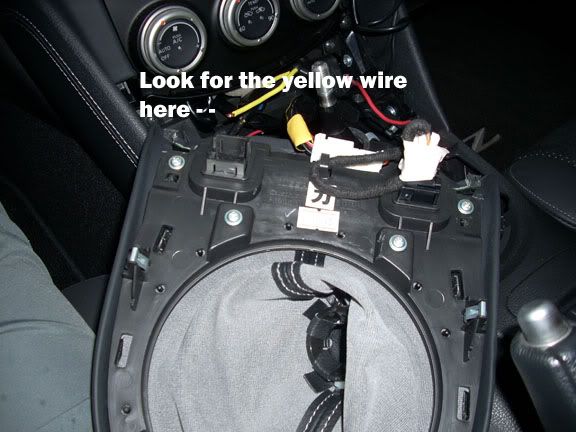 Here is the wiring sequence when looking at the hazard switch, pins on top: 1st pin -ground, 2nd pin - power out to light, 3rd pin - power in from accessory line, and 4 illumination. In the picture below, you can see that I ran a jumper from the illumination of the REAL hazard switch over to my fog switch (it connects with the orange wire on the hazard light switch): 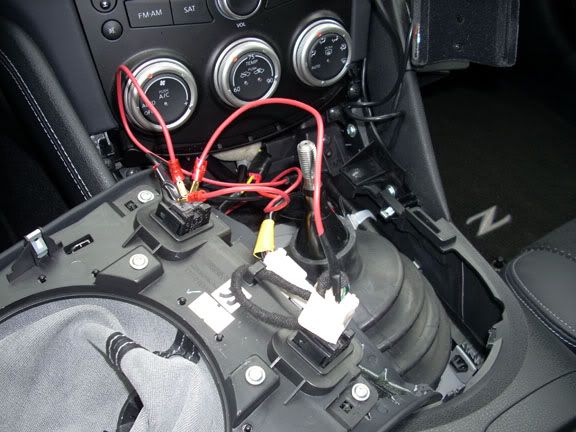 Check to make sure everything works, reinstall the shifter trim, and enjoy your new light and switch! 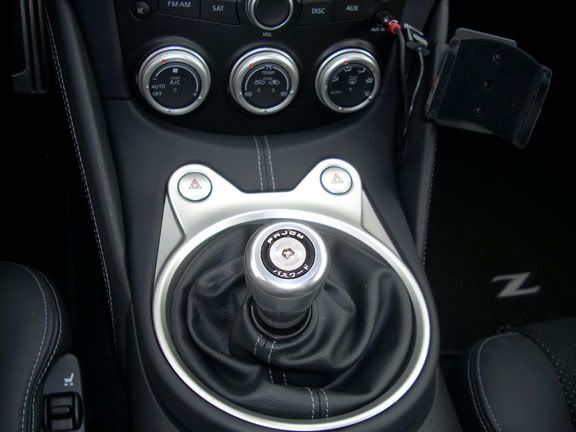
__________________
 Rain, snow, sleet, hail: 2009 Mazda 3 sGT HB Everything else: 2009 370z, PW Touring 6MT Last edited by ProfessorDave; 12-13-2010 at 07:26 PM. Reason: Update to include switch wiring |

|

|
| Bookmarks |
|
|
 Similar Threads
|
||||
| Thread | Thread Starter | Forum | Replies | Last Post |
| Evo R foglight | kidkotic2001 | Nissan 370Z General Discussions | 2 | 04-26-2012 02:59 PM |
| 2012 foglight install - what is it? | scottIN | Exterior & Interior | 5 | 03-12-2012 02:15 PM |
| OEM rear foglight. thanks Z1 | UNKNOWN_370 | Z1 Motorsports | 1 | 01-19-2012 05:57 PM |
| Front bumper foglight install | MY1STZ | Exterior & Interior | 3 | 09-12-2010 09:02 AM |
| CF rear foglight | josh88 | Exterior & Interior | 10 | 05-15-2010 07:21 AM |


 11Likes


 Threaded Mode

