
|
After months of debating, I finally pulled the trigger on purchasing the NAVtool, I got lucky and found one at a local stereo shop that was going out of business,
|
|||||||
|
|
LinkBack | Thread Tools | Display Modes |
 03-10-2010, 01:41 AM
|
#1 (permalink) |
|
Base Member
Join Date: Nov 2009
Location: Hughesville, MD
Posts: 31
Drives: 09 370z TouringSport
Rep Power: 17  |
After months of debating, I finally pulled the trigger on purchasing the NAVtool, I got lucky and found one at a local stereo shop that was going out of business, so for $210 they sold me the NAVtool and a keyhole rearview camera.
 NAVTOOL INC  I popped out the little blue square for my camera. 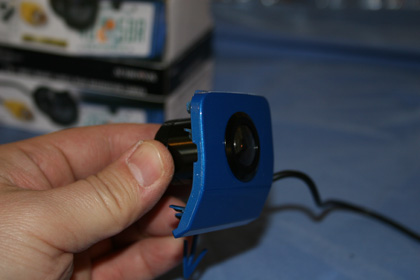 drilled a hole in square to mount camera.  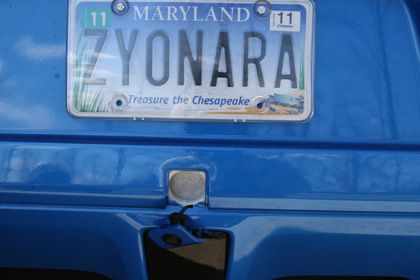 Plug square back in and route wires into the trunk area. 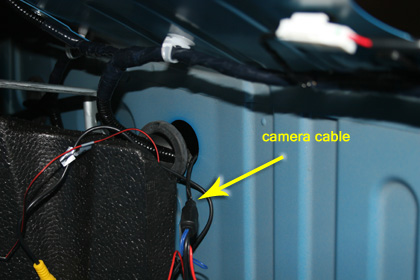 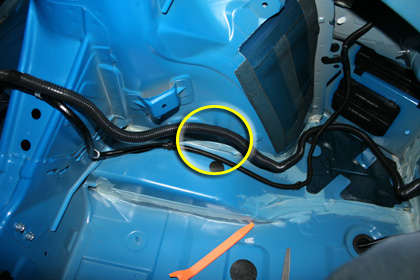 Wrap wires and route to cabin.  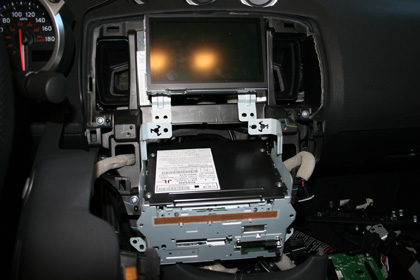 Remove radio and nav monitor.  unplug harness from back of monitor. 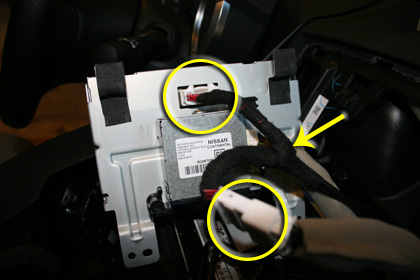 plug in Y-harness that comes with the NAVtool. 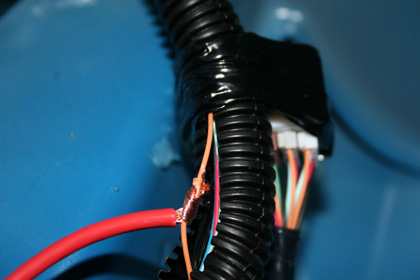 follow wires going into left rear taillight and tap into orange reverse light wire. 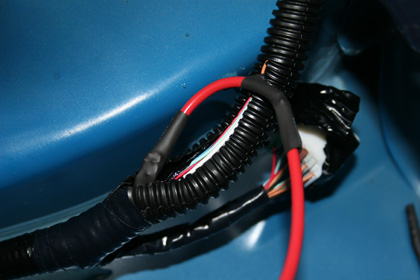 solder and heat shrink. 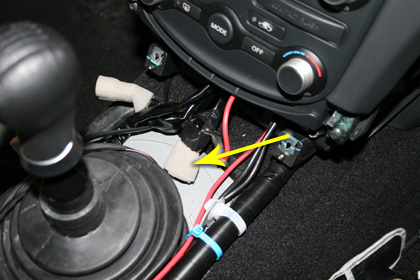 in the black plug that connects to the center console, tap into the yellow wire for acc/on power (note: there are only 2 wires connected to this plug, a black and a yellow wire. 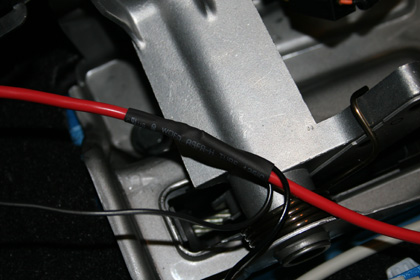 While I was in there, I went ahead and tapped into the same acc/on wire for my radar detector and dvd player. 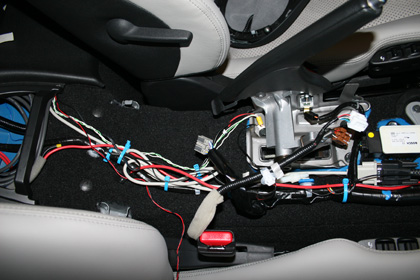 out of the NAVtool, connect the green, black, and 2-white wires to a suitable ground, I chose a bolt on the e-brake plate. Connect the blue wire and positive camera wire to the wire you used to tap into the orange reverse light wire. Notice the black/red wire on passenger seat, that is the toggle switch that will allow you to bypass factory screen for a connected video supply, I have a DVD player for the bypass. 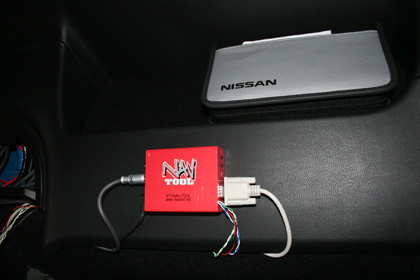 You can put the module in the center console, but I chose to mount it behind my driver seat with two-sided tape. 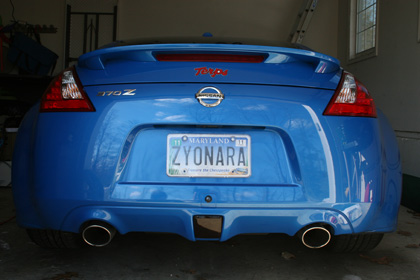 Clean everything up and enjoy! 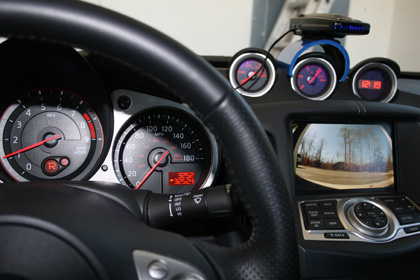 Camera automatically turns on when shifting into reverse. 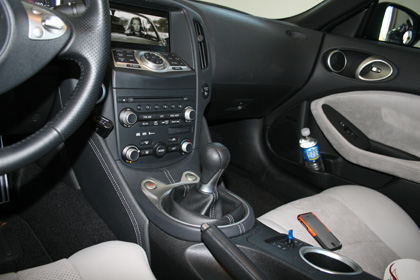 Kill Bill 2 for my passenger with e-brake down and in gear! Hope this DIY was helpful for my fellow Z owners! 
Last edited by Zyonara; 03-14-2010 at 06:51 PM. |

|

|
| Bookmarks |
|
|
 Similar Threads
|
||||
| Thread | Thread Starter | Forum | Replies | Last Post |
| DIY: Rearview Mirror Removal/Installation | jikhead | DIY Section (Do-It-Yourself) | 9 | 05-06-2013 02:43 PM |
| Rearview Camera and DVD | Zyonara | Audio & Video | 10 | 03-10-2010 11:22 PM |
| Rearview mirror | cab83_750 | Audio & Video | 9 | 02-19-2010 05:42 PM |
| ? Re: Compass in homelink rearview mirror | Danny3.7 | Exterior & Interior | 11 | 01-28-2010 02:29 PM |
| what is your choice of slr camera | thispecialk | The Lounge (Off Topic) | 60 | 07-29-2009 01:46 PM |


 4Likes


 Threaded Mode

