So I finally went and did it. You can read the pre-discussion about this idea that took place a while back here:
http://www.the370z.com/vq37vhr/3041-...le-bodies.html
These are two pics I posted in that thread, which are marked up images from the Service Manual, showing the hoses we're talking about and the engine coolant flow diagram:


The bottom line is,
afaik, deleting the TB coolant lines *might* shave some heat off of your intake air (but you won't see it on OBD-II data since this occurs after the sensor), and get some hot coolant lines out of the engine bay. If you live in a cold climate, you might not want to do this, as the purpose of the OEM TB coolant lines is to prevent your throttle plate from icing up and getting stuck in place. Basically, they circulate hot coolant through a channel that wraps around each TB.
In all likelihood, this mod won't do much for you. But on the other hand, it's cheap and easy, so why not

Anyways, on to the DIY job.
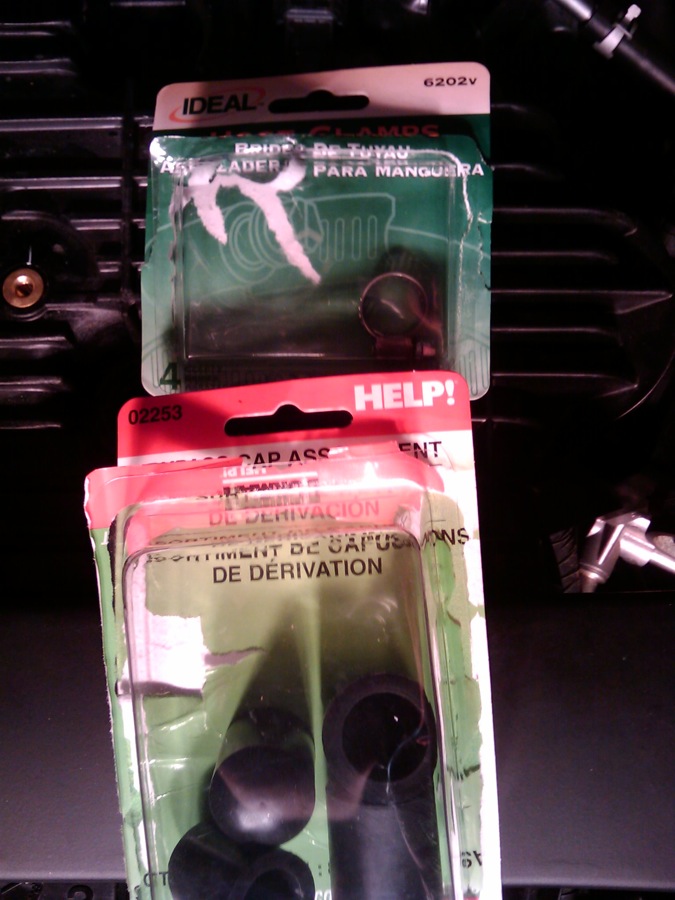
First, these are the parts, which cost less than $10 at your favorite random auto parts store. You need hose clamps (smallest ones you can find), and "bypass caps" (like vacuum caps, but hopefully more resistant to pressurized hot coolant). I'll go into more detail later about sizes and issues with these:
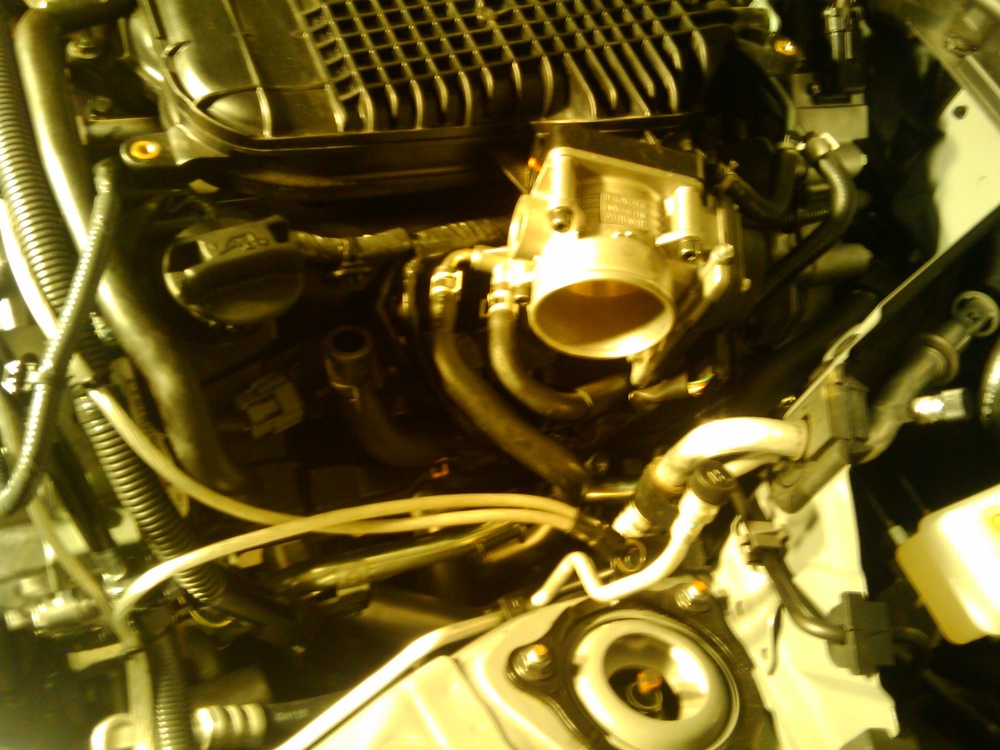
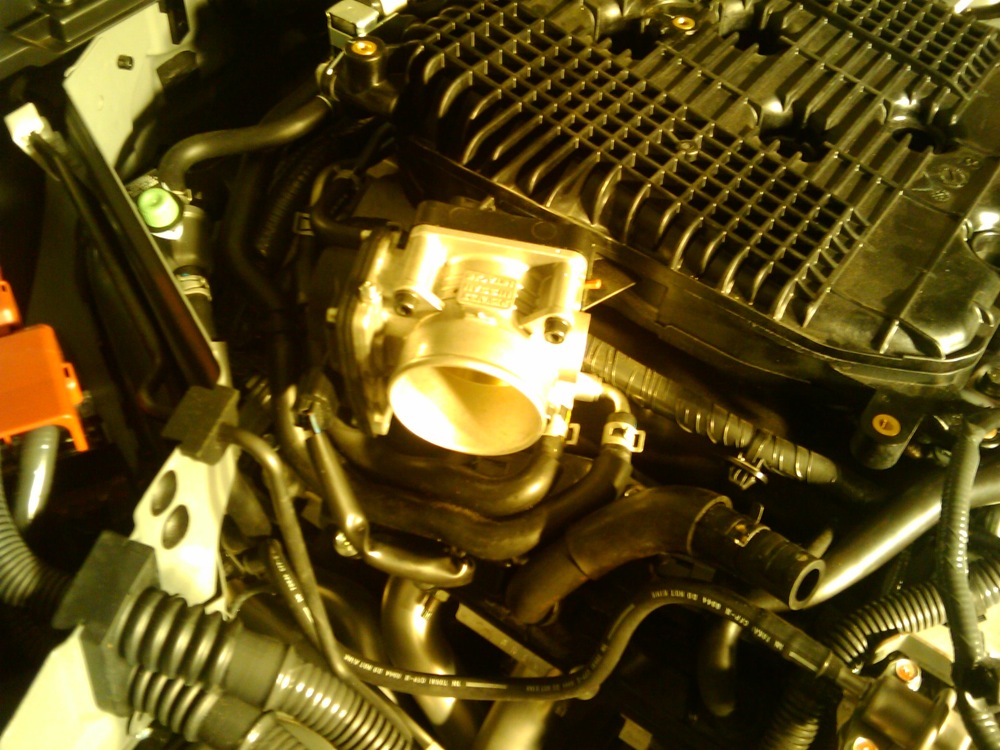
Here's what everything looks like at the start of the job (note, I've already removed the strut tower brace and the upper intake tubes of my Stillen intake. Remove those (or OEM equivalent) before starting):
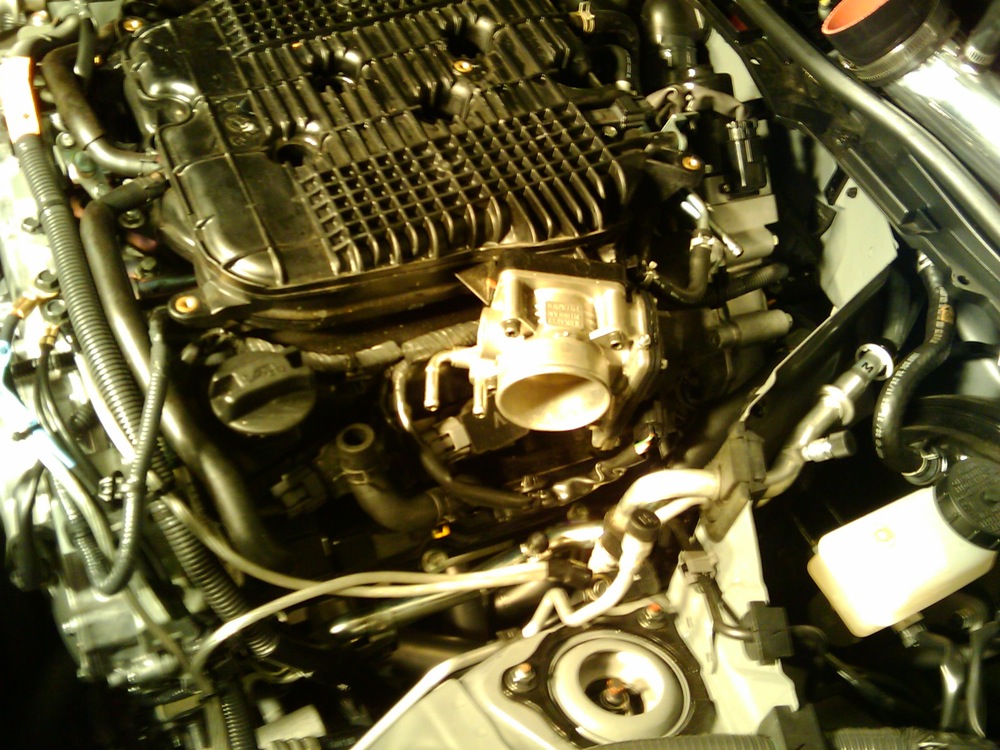
Engine Bay:

Left (driver) TB:
Right (passenger) TB:
 Before going any further, make sure that your car has cooled off enough to relieve pressure in the cooling system, and remove the radiator cap!
I started on the driver's side. First, place some paper towels underneath the TB connections, to catch the coolant that will dribble out:

Now, disconnect both lines at the TB. There will be some minimal dribble (only one is disconnected in the pic, also remove the one next to it):

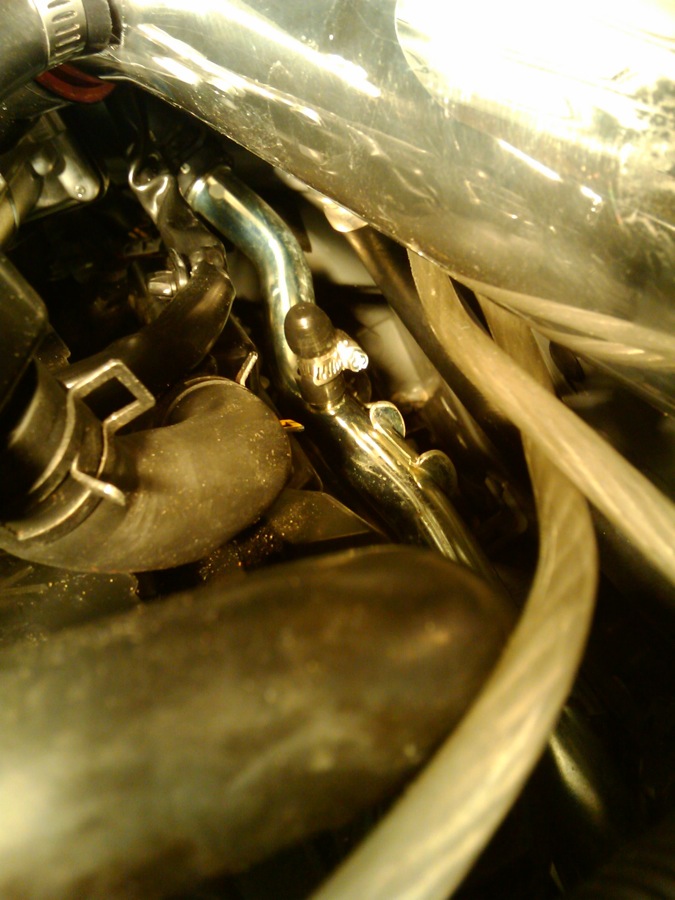
Next, you need to remove the other ends of those two lines. One runs straight into a hard line that runs along the rear of the engine, and is not tricky:

The other runs straight down and T's into a hard line along the driver's side of the engine. When you pull the other end of the hose off at this T, coolant will begin spurting out of the T in a sort of pulsing, arterial bleeding sort of way. You want to have a cap ready to shove on there immediately, and then try to wipe up the mess you made. This pic shows the cap already in place, since I couldn't really take a pic during the spurting
:
This is what the left side looks like when complete:
Now on to the right (passenger) side. Again, prep with towels and start with removing the two lines on the TB itself:

Most of the rest of the right side will be obvious and easy if you made it through the left side. There's one hard part, but there was no way for me to get clear pics because it's back behind the engine
One of the lines from the right TB goes to the other end of that hard line along the back (you removed a line from the left TB to the other end of this tube earlier). The other line dives down behind the center of the engine block. Good luck wedging needle nose pliers and your hand down there to remove the factory spring clamp. What I ended up doing was basically pulling on the hose from above until I yanked it off, clamp and all. It's easier that way.
This connection will also spurt coolant like the T-connection on the driver's side did. Have a cap ready, and get it capped quick. Then have fun tightening a hose clamp onto the cap back there, and you're basically done with all the hard work.
Here's the right side, complete (although you can't see the pita part in the back of the engine of course):

Next, you probably want to blow any remaining traces of coolant out of the throttle bodies themselves as well as the hard line along the back that you removed hoses from. I used a little air nozzle on my air compressor. You don't need a big compressor for this, even a tire inflater would be fine. Having a real compressor and one of these handy nozzles with the conical rubber tips is nice though:

These are all the hoses/clamps you should have left on the garage floor now that they have been deleted from the engine bay:

At this point, I washed out the engine bay a bit by running some water (garden hose) and kinda spraying it down into the engine bay in all the same places that I know I leaked coolant. Should help flush the nasty sticky coolant off and make it not smell so bad when you next start things up. Be sure not to spray water into the throttle body intakes, of course.
Make sure you remember to put your radiator cap back on tight at the end as well, and then reinstall everything else you took off (air intakes, strut tower brace, etc).
Some notes about the caps and clamps for the bleeding hard lines:
In the package of assorted bypass caps I picked up, the smallest sizes were 3/8" ID and 1/2" ID. The 3/8" ID one fit the connections fairly well (although it could have been slightly tighter), but even the smallest hose clamps I could find wouldn't clamp properly onto these. I ended up putting the 1/2" ID caps on top of the 3/8" ones, which added enough outer diameter to make the hose clamps work properly. This setup makes me a little nervous, so I'll be watching these two spots (as well as my coolant and oil temps) like a hawk for the next few days to make sure it works out ok. Probably an even more secure (but uglier) solution would be to cut small lengths of the original hoses, clamp them on with the original clamps, and clamp a bolt into the other ends of these sections to cap off the line.
I let the car warm up in the driveway after install until the oil got up over 160 (coolant had been stable at it's usual driving number of LEDs for quite some time by then), constantly rechecking the caps with a flashlight for any sign of leak. Then I went for a short test drive and came back, and all seems well. I'll update here if there are any issues over the weekend.
Obviously, you're on your own with this if anything goes wrong. Don't do it unless you at least kinda know what you're doing. If at the moment you remove the first coolant line, your engine explodes and kills your dog and sets your house on fire, I accept no responsibility for your stupid actions.