Rationale and Discussion:
So I intend on going to the track occasionally and I wanted to prevent hitting high oil temps and having the ECU go into limp mode, so I decided to buy and install Stillens 19 row (street) oil cooler. Even though I wont be driving the Z in the winter time, we do see low temps in spring and fall where I live and the race cooler would likely keep the oil from getting to operational temps quickly.
There are a few informative and comprehensive DIYs written about oil coolers, but I thought I would document my install because I decided to do it without repositioning the power steering cooler
i.e. placing the oil cooler on the drivers side. In theory, half the work, but it took a lot of time to think things through and lots of eye-ball measuring
you know what they say, measure twice, cut once. Anyhow, hope this helps someone who wants to try a different place to install the Stillen street oil cooler (and likely the race cooler as well). Now, placing the oil cooler on the driver side isnt new
Nismos is on the driver side, and Modshack also placed his on that side too
but, I havent seen anyone do it with the Stillen kit.
I was in contact with Josh at Stillen prior to the install. He explained that Stillen chose to place the oil cooler on the passenger side in order to accommodate an automatic transmission cooler and their power steering cooler. Since I have a 6MT and dont intend on changing out the stock power steering cooler, I thought putting the oil cooler on the driver side would simplify the installation. This way also solves the problem of improper cooling of the power steering fluid due to the PS cooler sitting behind the oil cooler (if you follow Stillens instructions). Some people have just bought more 3/8 transmission cooler line so that they can place the PS cooler on the driver side
but if you could bypass this step, why not?
References:
The DIYs written by MightyBobo and Modshack were great, and definitely recommended reading. Theyve outlined many of the how tos and whats needed, so I wont repeat too much of what theyve already said:
DIY: Stillen 25-row Oil Cooler
http://www.the370z.com/diy-section-d...ttsa-pics.html
Edit: Later, I found Vipor's DIY for his Nismo. He purchased the components separately and also installed it on the driver side:
DIY: Oil Cooler Installation on a Nismo (Damper Included!) - vipor
Please also refer to:
http://www.the370z.com/diy-section-d...3-intakes.html
for removing the front fascia, and
DIY: Nissan 370Z Oil change (AK370Z way) Pictures inside
for how to do an oil change.
Installation with reference photos:
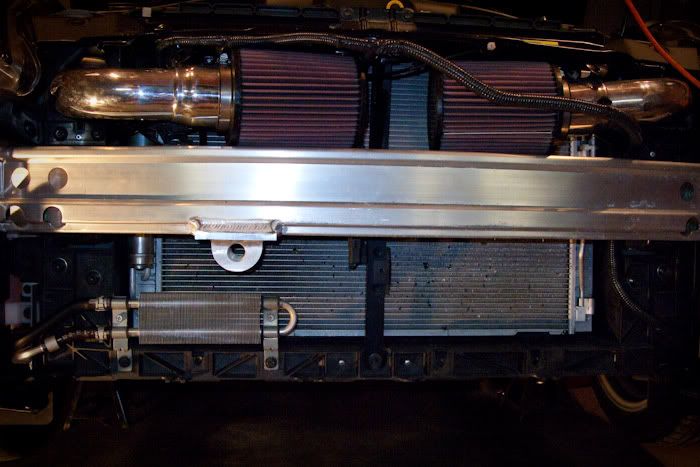
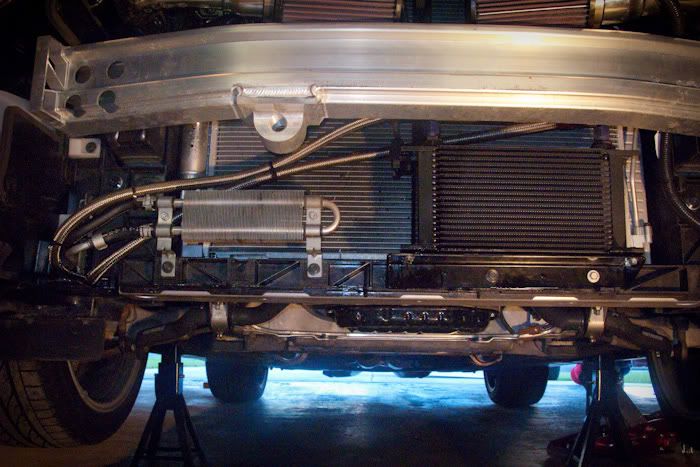
This is what the front will look like after you remove the front fascia and underbody tray. Yes, I do have a Stillen Gen3 intake, and Im sure there is enough clearance behind the metal bumper bar for either the 19 and 25 row (taller) oil coolers to fit on the drivers side. You will have to position it close enough to the centre of the car so that the fitting on the right side of the cooler (when looking from the front of the car) can clear the angled part of the metal bumper bar.
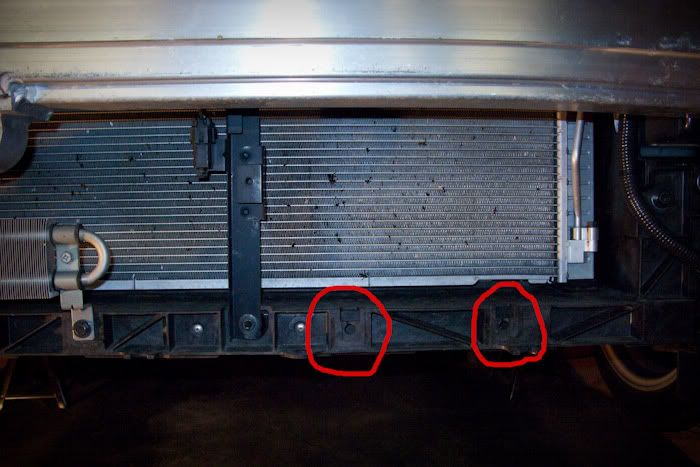
Here are the two pre-molded holes that I used on the plastic cross member directly in front of the bottom of the radiator to mount the cooler bracket.
Drain your oil and remove the oil filter. Someone told me that you could probably remove the oil filter without draining the oil and only lose about ½ quart of oil. I didnt think the oil pan was deep enough under the oil filter to hold that much oil, so I didnt try it.
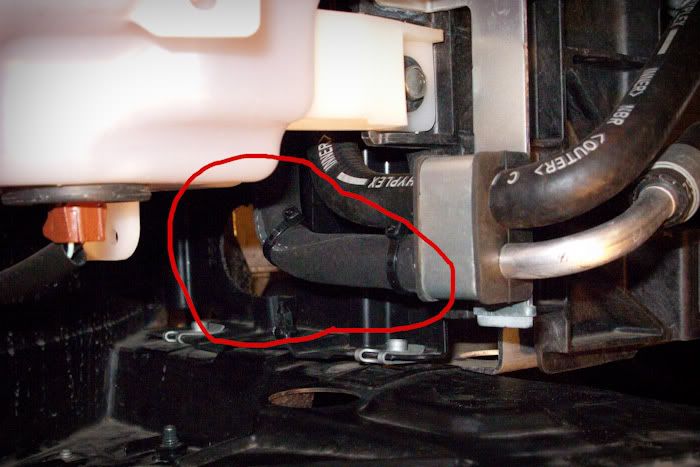
On this vertical plastic piece (passenger side) you will need to cut out an oval-shaped hole big enough to allow the stainless steel lines to exit in front of the front sway bar. To remove the piece you will have to remove a push-retainer from the bottom of the car. Two bolts have already been taken out from removing the underbody tray earlier. There are also two push-retainers on top that can be accessed from the engine bay. It may be a bit tricky, especially re-installation because there isnt much space for you to place your hand or use a tool. Those retainers may fall through the bottom a few times before you get them out/back in. For the large hole you have to make, I cut two 1.5 holes overlapping side-by-side (looks like the MasterCard logo), and then with an X-Acto knife, cut off the widows peak on top and bottom, to form an oval.
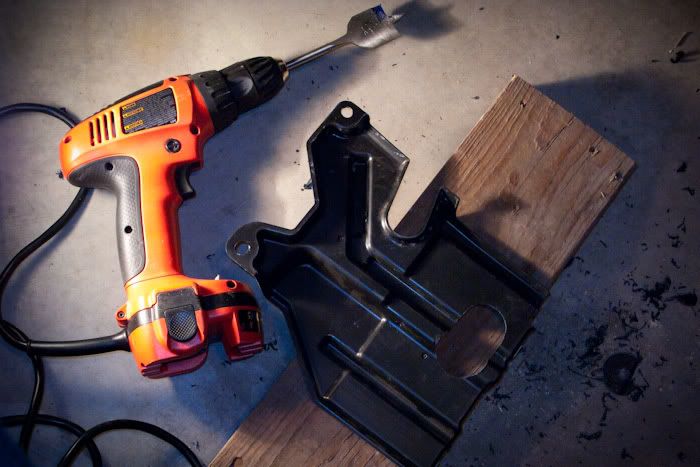
The two pre-drilled holes on the cooler mounting bracket will not be used. You will have to drill two new ¼ inch holes. To determine where to drill these holes, you will have to run the two SS lines from the sandwich plate towards the passenger corner, route them beside the power steering cooler lines, behind and above the PS cooler, and towards the driver side.
Note 1: I was able to route the lines at the front corner of the car without cutting holes on the vertical flexible plastic divider.
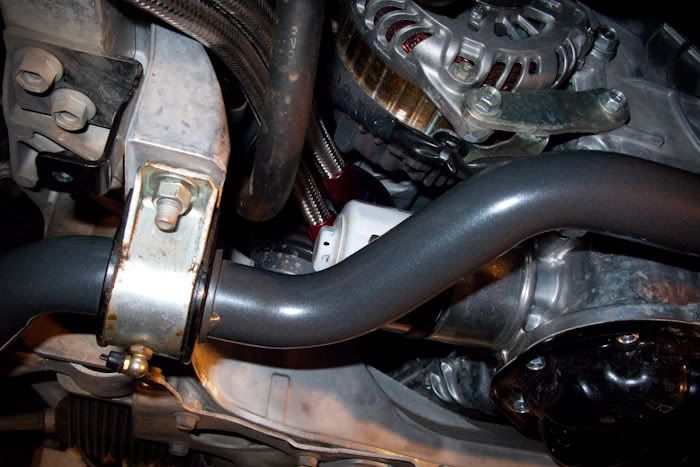
Note 2: based on what Ive read in the Stillen Gen 3 threads, some people have noticed through time, metal tube coming in contact (vibrations) with metal AC lines caused wearing of the AC lines and eventually created a hole. To prevent this from happening to the power steering hard line (lower one), I cut an appropriate length of 3/8 transmission hose (supplied by Stillen to re-locate the power steering lines
which you wont need anymore) and put it over the length of hard line that could come in contact with the SS lines, as pictured below. The vertical divider (between windshield washer reservoir and power steering cooler lines) has been removed.
Heres a picture showing the sandwich plate and oil filter partially hidden behind the Hotchkis sway bar. The stock sway bar is in the same position, only thinner than the one pictured here, so youll have a few millimeters more space to work in. Youll also notice my SS lines are positioned behind and angled up about 40 degrees. I chose this location to give more space to change the oil filter (a bit of a hassle if those SS lines exited at the bottom), and I didnt think there was enough room for the underbody tray to be reinstalled, if the fittings were placed at the bottom.
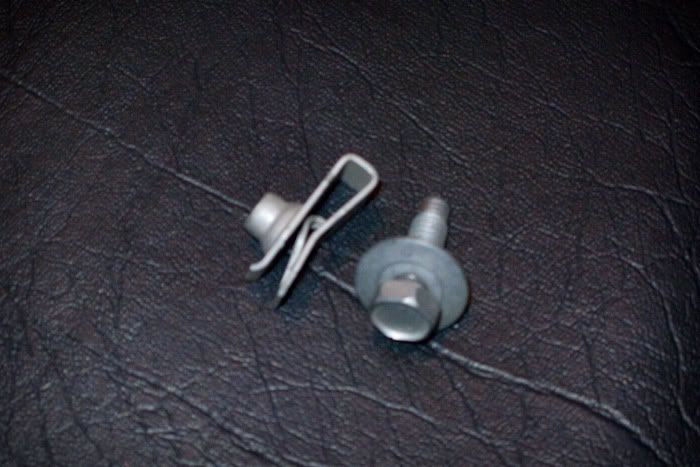
I bought two sets of bolts and speed nuts from a Nissan dealership so that I could use two of the pre-molded holes on this horizontal piece. The bolt is the same as those used for the underbody tray, fascia and various places on the car
pretty much universal. The speed nut has to be the same or similar to that used for the power steering cooler. Just remove one from there and take it to Nissan to make sure you get what you need. The speed nuts off the fascia are too big for this. Nissan couldnt find the exact one I needed, but they had some with the same width, and that worked out fine for me. Speed nuts arent cheap! You could use a different bolt and nut set here I suppose, as long as they dont rust and you can fasten them tightly in the confined space.
Now, make sure you measure, re-measure and re-measure for this part. Find the best way to route your SS lines so that they get as far into the driver side as possible. Make sure there is enough slack in the line. You dont want any kinks and you want to try to avoid contact with sharp metallic objects (like edges/corners of other metallic brackets). I was able to route both lines on the passenger side. I installed the longer line higher up on the sandwich plate. The longer line went to the fitting furthest to the driver side (this was for the outlet...i.e. returning oil to the engine block). This one will determine where the cooler should sit and where you need to drill the two new holes in the mounting bracket. Did I mention, this is the most important part of the install because you have to re-measure a few times? ☺ This is how I positioned mine. The shorter SS line (inlet...moves oil into the cooler) goes into the fitting closest to the centre of the car. I was able to route this one low and behind the power steering cooler. The longer SS line was routed alongside the upper power steering hose, higher up.
Make sure you remove the cooler from the bracket prior to drilling holes, to prevent damaging the cooler. When reinstalling the cooler and bracket, peel off the adhesive backing on the two-sided foam tape. Tighten all 4 screws enough to prevent vibration on the cooler.
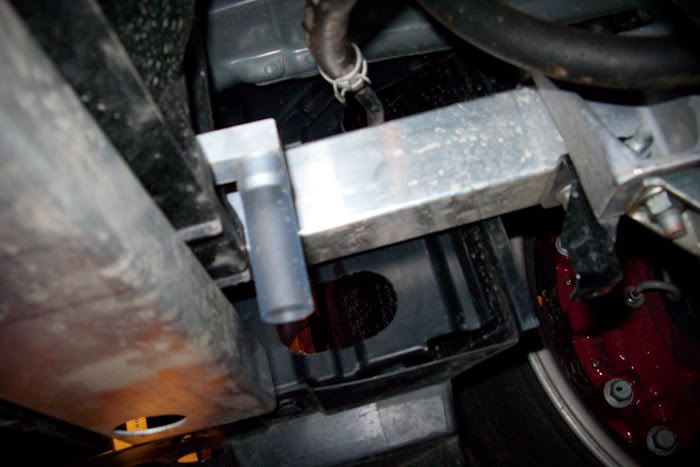
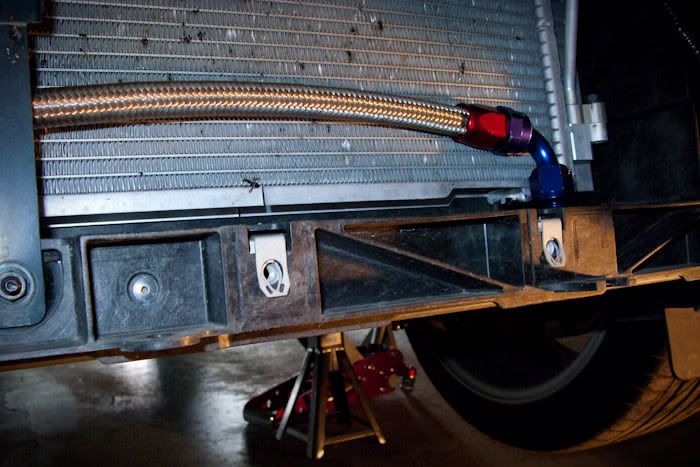
After the install, and after checking to make sure everything is tightened properly, I put 5.5 quarts of oil in and started the car. I let it run to operational engine temperature. While this was happening, I reinstalled the fascia. There were no leaks found. You could feel the oil cooler was a little warm. Heres what the cooler looks like without the bumper and with the stainless steel lines tied in their final position:
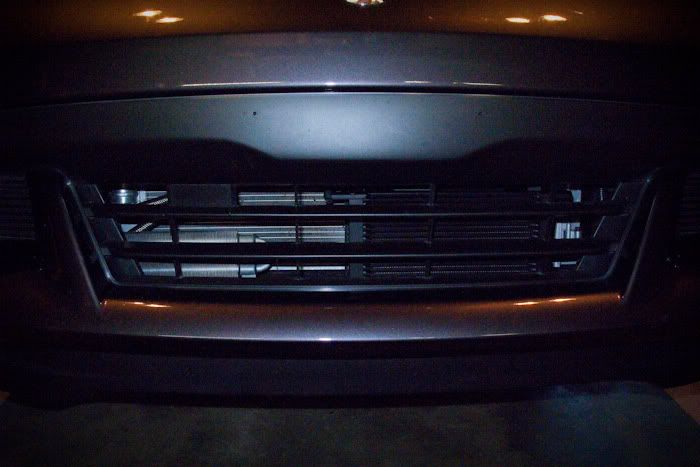
and through the grille:
After lowering the car off of jack stands, I topped up the oil. I used 6 quarts in total, which brought the oil level to just below the upper hole on the dipstick. Ill monitor to see if more oil is needed. Then I took it out for a test drive. I gunned it and flogged it at the lights for about 15 minutes
as much as I could on city streets without being stupid, anyway. This would usually bring the oil temps to 108 degrees Celsius. With the oil cooler installed, the oil temp stayed at 91 degrees C. Not bad.
EDIT: Since the harder you run your engine (the higher the RPMs), the more pressure goes through the lines and cooler. After a few good runs, have a peak behind the grille and see if there are any leaks at the connections. I found that there was a slow leak at one of the adapters because the adapter was a little loose. Even though I tightened them to 29 ft-lbs, as the instructions recommended, I was able to tighten quite a harder to stop the leak.
Again, hope this is helpful.