Thanks for the confidence building, I hope to not disappoint.

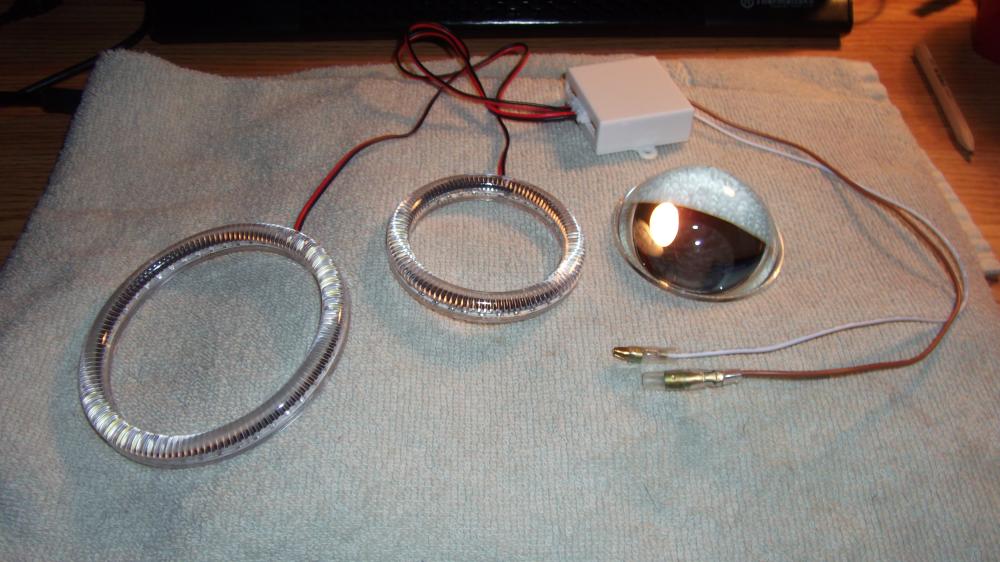
What I am using:
G35 Clear Lenses size 2 5/8 – TRS (THERETROFITSOURCE.COM)
Halo 90mm from (THERETROFITSOURCE.COM)
Halo 70mm from (THERETROFITSOURCE.COM)
No need for resistors the halos already come wired to 12V resistors..
Sledge Hammer if I mess it all up !
What I am thinking: (Not a hole lot)
The Turn signal mod I am trying to stay with the stock bulb but I will remove the turn signal shroud and take off the stock plastic lens and replace it with the G35 lens. Some modification to the shroud will be needed to get the lens to fit. The Halo will mount on the outside and should be small enough to fit into the shroud. The reason for the G35 lens is its shaped like a bubble so when inserted into the shroud there is a void the Halo ring can rest in with a little 2 part epoxy to hold it in place. Not sure what needs to be cut out and modified, not sure how to do it. I am working through this as I go and will post the details.
The projection light mod, the halo should fit perfectly in the valley of the projection light shroud based of DIY’s already done in the forum. Using a little 2 part epoxy will hold it in place. Both Halo’s are wired into the control box provided by LightWurkz and the control box will be wired into the parking light harness. This seems to be how others have done it, there have been some issues with LED flickering or burning out I don't think its were they are wired but how. Using resisters seems to get the power supply at its optimal level for the LEDs. I am curious what LightWurkz is using. 200 ohm 1 watt seems to be a good bet, others have used 150 ohm 1/8 watt & 200 ohm 1/8 watt resisters. I will go with 200 ohm 1 watt and see what happens.. I am not a smart guy but Javier seems to be.
Quote from Javier: Hi. I'm thinking of doing the same to my headlights but my numbers indicate that I should be using 200 OHM resistors at 1 watt. The LEDs are runnung at 26mA not the 20mA that they are designed for so the current draws .762 watts. Therefore you should us at least a 1 watt resistor not 1/4 or 1/2. My numbers are as follows: 12 v devided .060mA (3 leds in series) = 200 ohms. Please let me know what you think. I just do not want to be opening these headlights once a year. The way I see it the current is greater than the resistor can handle and they may burn up.
DIY: Headlight LED's and blackout
The Shroud mod, To split apart the head lights I have a cardboard box all taped up and will stick a heat gun into to warm them up enough to pull apart. If it doesn’t work it’s off to the oven.. I am planning on filling in the squares were people insert LEDs as run way lights; using body filler and sand paper to smooth it all out. I have Carbon Fiber Vinyl I want to run in place of LED’s. Also thinking of wrapping the shrouds and painting the rest Black Satin. Then Carbon Fiber wrap the reflector. Not sure yet. Worried about the heat from the lights. ..
Total mod: If I mess it up I will be looking for a 370Z donor car anyone live in Tampa


I have to work Monday but planing on posting updates each night with pictures.