Mounting Location
In order to be uniform, I wanted to mount both sides in the same location. When I removed the stock air boxes and put the Typhoon's on, I had pretty much settled on the fact I was going to use the ear tabs that were now vacant as the mounting location for my catch cans. One concern I had with this mounting location was interfering with the air flow to the Typhoon, but once fitted the can is not blocking the air coming into the bay from the fang vents. I don't feel it is disturbing normal air flow enough to worry about. The two mounting locations are shown below.
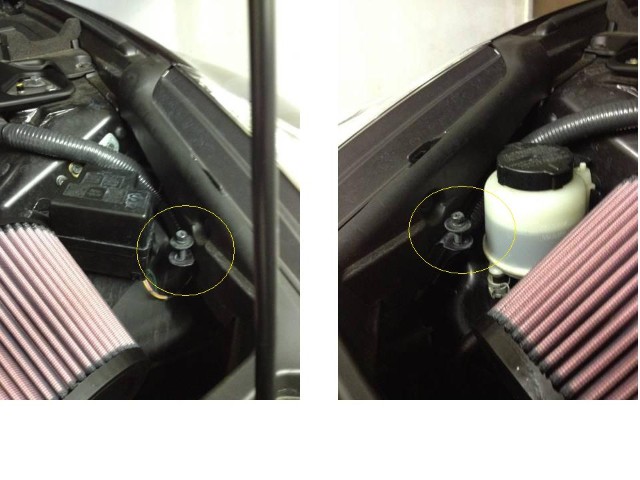
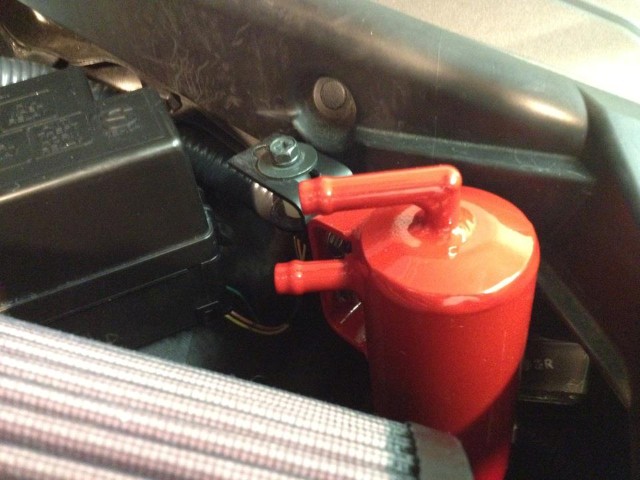
I went to Home Depot and got a couple 3/4" aluminum spacers, and used the stock bolt that used to hold the air box on the ear tab. The spacer gave it just enough lift that made clearance all around perfecto. I test mounted one can (below is the driver side) to make sure clearance was good, and also that it would not interfere with the hood closing.
 Trimming the Lines
According to the packaging, using electrical tape you bind where you want to make the cut. Then use a fine hacksaw blade. I opted to whip the Dremel out with a metal cutting wheel to speed things up. The tape keeps the SS braiding in place. Blow out the line with an air hose to remove any stray fibers. The tape stays in place, and is covered and hidden when you slide the clamps on.
I did discover that cutting the lines as recommended, with a fine tooth hacksaw blade, sucked. It creates to many stray fibers, takes forever, and the cut I ended up with was raggedy looking. I had much better luck using a metal cutting wheel with my Dremel. Tape the cut area tightly with some good quality black electrical tape. The tape will stay behind after cutting to keep the SS sheath in place, and is covered up by the Magna Clamps. The resulting cut was nice and neat and the cutting was much faster, so I ended up using that method to cut all the lines. It does create some mess inside the tubing when the cut is done, so I had to make sure I blew out the residue and had nice clean tubing.
Line Runs
I decided on 26" lengths for my can outlets (clean air back to the intake) and 18" lengths to feed the cans from the PCV valves. With these lengths, I actually could have ordered one less 3' section. The two 18" runs can be accomplished by cutting a 3' section in half.

At first I had them laid out to go under the intake, but bailed on that due to the fact the hoses exiting the valve cover were getting kinked a little too much to my liking. After settling on a route going over the intakes, I actually liked it better cosmetically as well. The nipples coming out of the intake manifold are actually offset (up and down) more than I thought. This throws off the lengths being equal on both sides a little bit. If I had it to do over again though, the passenger side can outlet hose would have been 27", and the driver side can outlet hose 25".
Another advantage I accidentally stumbled on by ending up with the routing I chose is that it will make it easier to empty the cans. Just remove the mounting bolt, and there is enough play in the lines to raise the can upward to get access to the drain plug and empty. No need to unhook any of the hose connections, which for a lazy guy like me ended up working out great. If I had routed the hoses under the intakes, as originally planned, that would not be possible.
For some reason, the valve cover outlet nipple on the passenger side seemed a little bigger than the opposite side. I got the driver side on fairly easy, it was some muscle power to get the passenger side hose to go on.