Part 2: The Gauge Itself.
I decided on a pretty awesome looking (feature-wise) gauge from Spek-Pro:
ProParts - Gauge Controllers, Mounting Pods. That listing shows it as 0-150 PSI, but the current model they're shipping is actually a 0-120 PSI gauge face with a 0-150 PSI pressure sensor. It's a little pricey at $255, but IMHO worth it. The basic rundown on the features of this gauge:
52mm (2-1/16"), digital internals with analog-style display
LED Backlight: several different colors for the main backlight, red needle.
3 Buttons along the bottom of the faceplate for programming menus: you can pick the backlight color, set the brightness, recall the last peak value, calibrate the gauge to zero sensor pressure (w/ engine off), and set high- and low- pressure alarm pressures.
Regardless of your chosen backlight color, when the pressure is low or high enough to trip one of your alarm settings, the gauge backlight switches to flashing red.
There's an alarm wire output that you can hook up, which will ground a small 12V load to do whatever you want it to do.
Full details on the features, wiring, and programming are in this rather poorly put together but informative instruction manual:
http://www.propartsllc.com/pdfs/Pressure.pdf
I didn't use the dimmer wire (supposed to dim the gauge with the headlights/dimmer for your dash). I tried hooking it up to the dimmer+ and dimmer- lines used by the factory radio harness, but had no luck making it work, so I left it disconnected. It could be that I just didn't do something right at the time though. The brightness is easy enough to adjust from the gauge's buttons in any case.
I did make use of the alarm wire though. I went down to a local electronics shop and picked up a small 12V Piezo Buzzer rated for 75dB. You could search somewhere like Mouser to buy something similar online, e.g.
this 95 dB one, they have a pretty wide selection of them there. My 75dB is loud enough to really be annoying, but I haven't yet had the chance to see if it's loud enough for windows down on the track with a helmet on. If not I'll upgrade it later. In any case, any reasonable piezo buzzer is well under the 1.5 Amp limit for the gauge's alarm wire, so you don't even need to use a relay or anything. Keep in mind the gauge's alarm "output" is a switched ground: you hook your buzzer's negative terminal to the gauge output, and your buzzer's positive terminal to an ignition-switched +12V source.
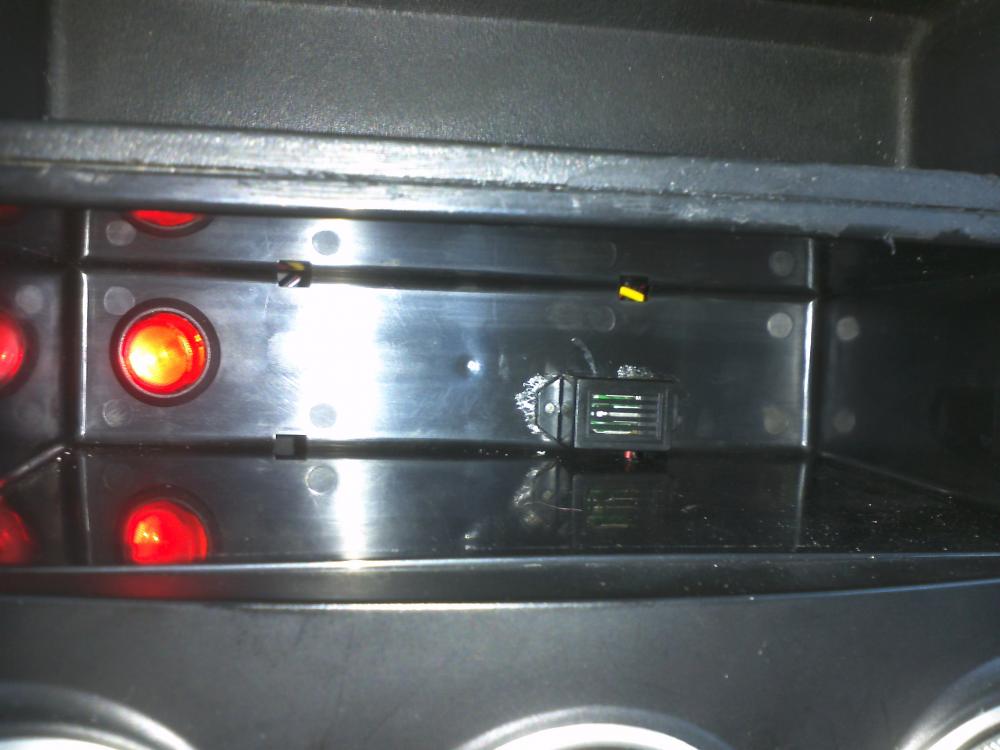
The problem with wiring up that alarm and setting an appropriate low pressure point on the gauge though, is that anytime I'd want the ignition on and the engine not running, the alarm would be sounding off the whole time due to the gauge being powered up and reading 0 PSI. I thought about putting a killswitch on the alarm itself, but then I figured I'd flip it off and forget that I did so, which ruins the whole point. So instead I wired up a lighted on/off switch for the whole gauge itself. This allows me to shut off the gauge+alarm if I'm going to have the ignition on and engine off for a while, and it's really obvious if I leave it that way when I start driving because the whole gauge is powered off (duh, turn the switch on).
As far as mounting for all of this goes (the gauge, the switch, the alarm buzzer), for now my center dash config is still a lid-less cubby and 2 empty DIN-sized pockets where the radio used to be. Later I'll probably upgrade to the "standard" of just a flat faceplate over this area to mount hardware on, but for now I mounted the gauge inside the cubby, and the switch and alarm hidden in the back of one of the DIN pockets.
This pic is the DIN pocket w/ the switch+alarm, obviously:
And this horrible shaky video is me playing with the gauge while the car is half-warmed-up. The brightness setting is just too high for the camera, hence the blurry look of the lit-up parts of the face. I roll through the basic settings menus (peak display, high alarm setting, low alarm setting, backlight color, brightness). On the way through, I set the low alarm high enough to make it trip at my current pressure just so you can hear it go off and see it flash, and then set it back to zero after.
Warning: partway through this video, I trip the alarm, and you're going to get really annoyed at the buzzing sound long before I get back through the menu system to set the low pressure alarm back to zero. Have your mute button handy: