
|
Sam recommends servicing the filters every other oil change, so I have been performing the service every 6k miles. The filters are located in the passenger side bumper where the
|
|||||||
|
|
LinkBack | Thread Tools | Display Modes |
 04-23-2012, 08:16 AM
|
#1 (permalink) |
|
Enthusiast Member
Join Date: Apr 2011
Location: The 49th State
Posts: 296
Drives: NISMOSIS
Rep Power: 16   |
Sam recommends servicing the filters every other oil change, so I have been performing the service every 6k miles. The filters are located in the passenger side bumper where the windshield washer reservoir used to be located. As with all DIY, you are responsible for the safety of yourself and your vehicle. If you are not comfortable or do not have the correct tools, please consult with a shop.
I purchased a new set of K&N filters and put them on. I cleaned the original filters and will re-oil them when it is time to service the filters again. This way, I always have a clean set of filters on hand all of the time. I will probably replace them entirely every year or so. Probably not necessary, but it is peace of mind. Parts and Tool List
Step One Jack up the passenger side and put the car on a jack stand. Remove the wheel for the most room to work. I got some aluminum puck jack adapters from SimTec Motorsports that work safely on the lift points near the front wheels. Remove the passenger side wheel for full access to the fender protector. 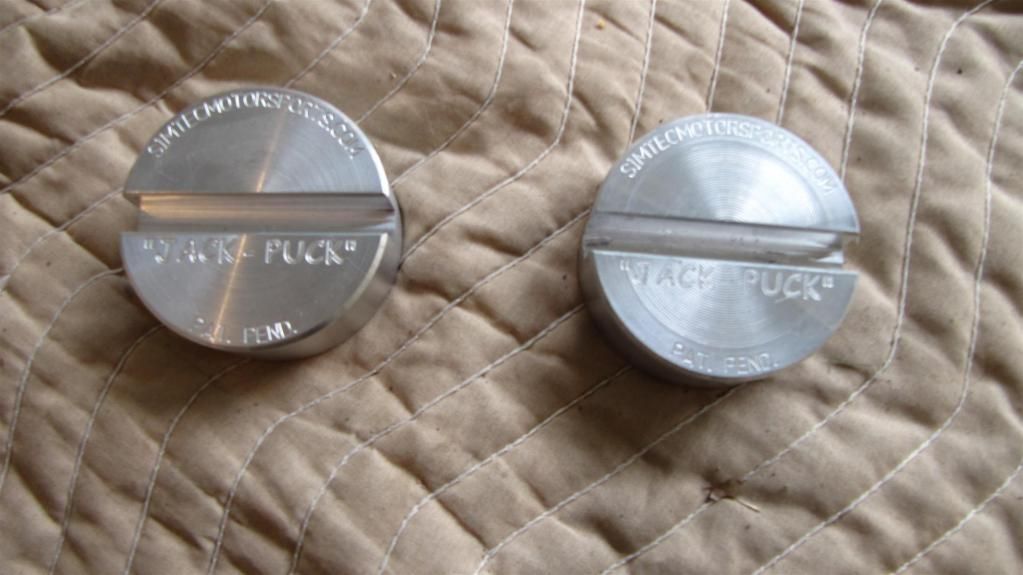 Step Two Remove several pop clips and pull out the fender protector. This is really easy; I think there were 5-7 pop clips. Remove all of the clips and just pull out the fender protector 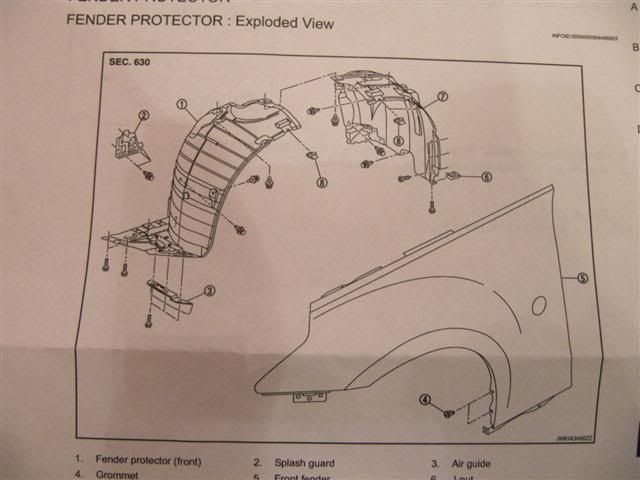 This is NOT all of the clips but shows the location of several of them. You should get the general idea. 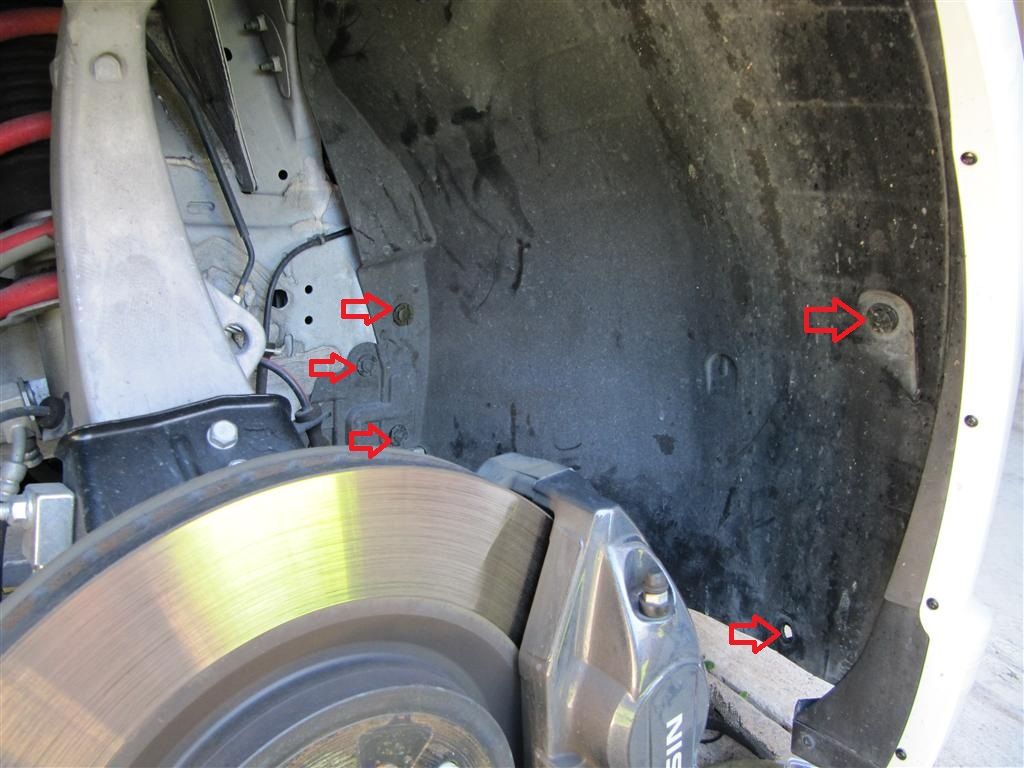 Step Three Use a 10mm socket to loosen the clamp and pull off the filter. Replace with the new filters or clean and re-oil the original filters. This shot shows the filters and arrows show the clamps. 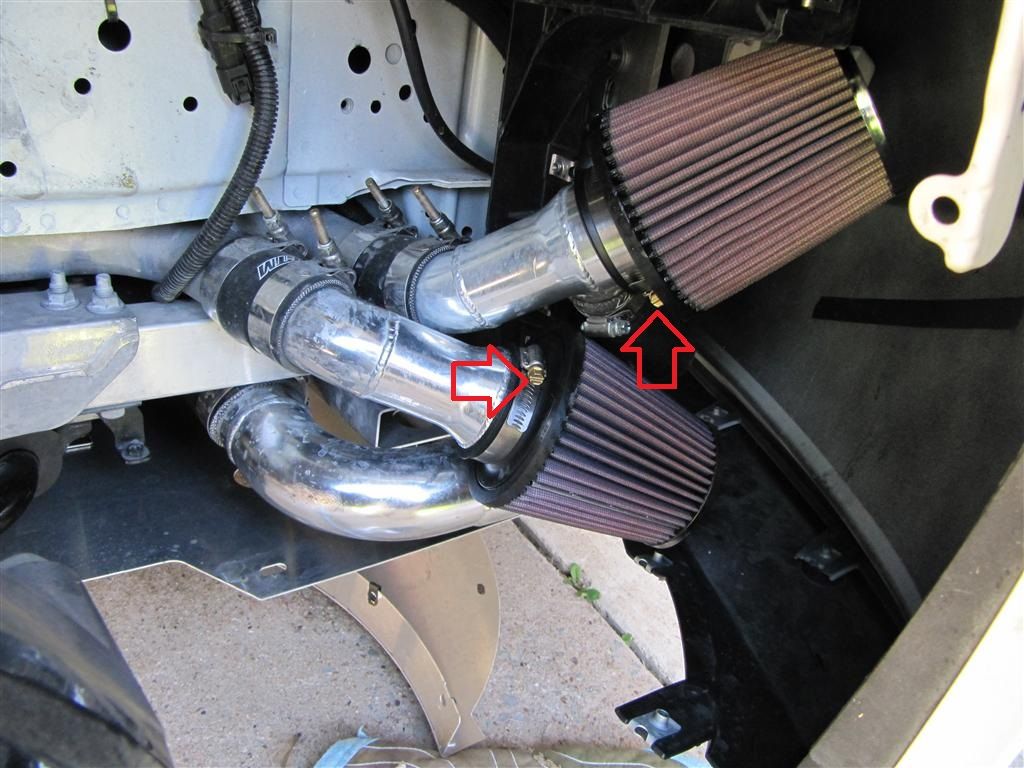 Step Four Reinstall the fender protector with the pop clips, put the wheel back on, put the lug nuts back on, lower the car back down, and then torque the lug nuts. This DIY was designed just to show current and potential GTM Stage 1 supercharger users how easy it is to service the air filters. I hope someone finds this useful. Last edited by wind.zero; 04-23-2012 at 08:18 AM. |

|

|
| Bookmarks |
|
|
 Similar Threads
|
||||
| Thread | Thread Starter | Forum | Replies | Last Post |
| GTM Supercharger Stage 1 w/ F.I. LTH | theDreamer | Forced Induction | 140 | 03-16-2013 04:50 PM |
| [FOR SALE] Used Gtm stage 1 supercharger kit | Jamaica | Parts for sale (Private Classifieds) | 58 | 06-20-2012 09:12 PM |
| GTM supercharger stage 1 videos | Fezzik | Forced Induction | 23 | 05-10-2011 11:34 AM |


 Threaded Mode

