
|
 06-11-2010, 01:34 PM
|
#4 (permalink) | |
|
Base Member
Join Date: Sep 2009
Location: Santa Clarita, CA
Age: 52
Posts: 113
Drives: 09 135i Convertible
Rep Power: 17  |
Quote:
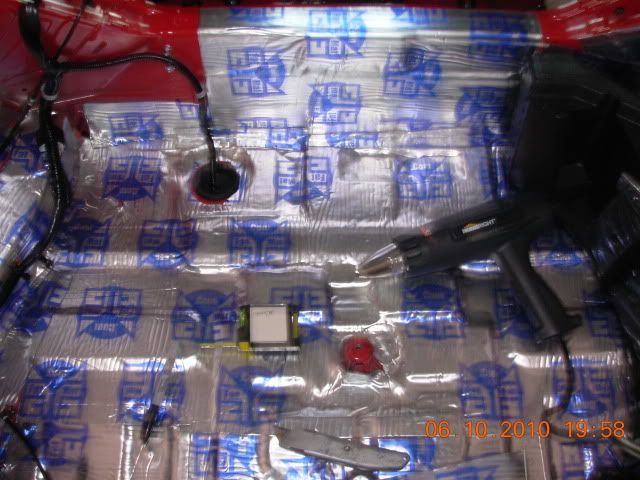
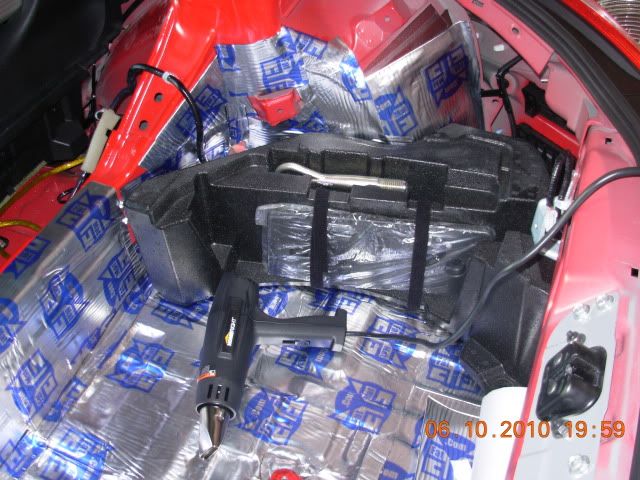
I'm getting ready to do this as well... I bought my stuff from fatmat.com. They have a 50ft package deal (comes with roller and a box-cutter) for $80. 50^ FatMat Sound Deadener Noise Killer I also found, that Elemental Designs sells their low end sound-deading stuff for $1/sq.ft. Elemental Designs 
__________________
Mod's: Berk HFC's / Berk CBE / NISMO Suspension / JDM badge / Cobb AP Tune / ModShack Oil-cooler Parts on hand, but not installed: Rear Fog light / AIT NISMO Front Bumper Mod's wanted: Powder-Coated Stock-Sport Ray's / Sway Bars |
|

|

|
|
06-11-2010, 02:57 PM
|
#5 (permalink) | |
|
Track Member
Join Date: Mar 2010
Location: Denton,TX
Age: 39
Posts: 738
Drives: 07' Sky Redline
Rep Power: 367  |
Quote:
WOOT! WOOT! Thank you Kindly! 
|
|
|
|
|
|
06-12-2010, 08:30 PM
|
#8 (permalink) |
|
A True Z Fanatic
Join Date: May 2009
Location: Central Florida
Posts: 1,884
Drives: '12 Corvette GS 6M
Rep Power: 20 |
Please check out Second Skin, since they are a sponsor. I've used both their stuff and eDead from Elemental Designs, and I can definitely say Second Skin seems to be higher quality. This is coming from a huge Elemental Designs fan, having owned many subs, speakers, and an entire 7.1 setup in my living room.
You can check out my DIY guide that I made while installing Second Skin here: DIY: Sound Deadening The Hatch |
|
|
|
|
06-12-2010, 09:00 PM
|
#9 (permalink) | |
|
Enthusiast Member
Join Date: Jul 2009
Location: Pearland TX.
Posts: 257
Drives: 2009 370z red auto
Rep Power: 17 |
Quote:
That's a great idea !!! always support here , I only used what i had left over from years ago setting in my garage.. |
|
|
|
|
|
03-23-2011, 04:17 PM
|
#10 (permalink) |
|
Base Member
Join Date: Mar 2011
Location: Texas
Posts: 124
Drives: 370Z
Rep Power: 16 |
OK I started removing all of the panels from the rear trunk area in preparation for the installation of the Fatmat. Unfortunately, I am having difficult removing the side panels that cover the back part of the wheel wells. I can't seem to figure out where the release mechanisms are. Does someone have a diagram describing the release points for those rear panels? I would greatly appreciate it.
|
|
|
|
|
03-23-2011, 04:35 PM
|
#11 (permalink) | |
|
A True Z Fanatic
Join Date: May 2010
Location: Calgary
Posts: 1,861
Drives: 90 and 15 GMC Sierra
Rep Power: 422 |
Quote:
|
|
|
|
|
|
03-23-2011, 04:35 PM
|
#12 (permalink) | |
|
A True Z Fanatic
Join Date: May 2010
Location: Calgary
Posts: 1,861
Drives: 90 and 15 GMC Sierra
Rep Power: 422 |
Quote:
Check stickys. |
|
|
|
|
 |
| Bookmarks |
|
|


 Linear Mode


