Engine Build
So I guess I had better get on with the good stuff huh? I think I've kept people at bay long enough. some of you may have seen my photos floating around; I've had them uploaded for several days now to continue updating the thread but apparently I have once again reached my picture limit(sadly). I really need to find some place simple and easy to use to archive all these pictures. Anyway, on with the show!
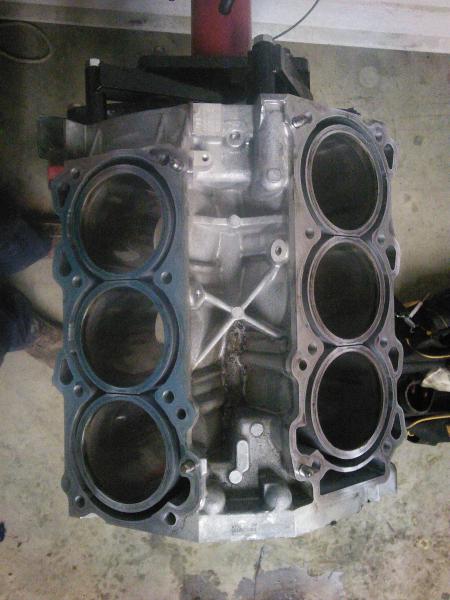
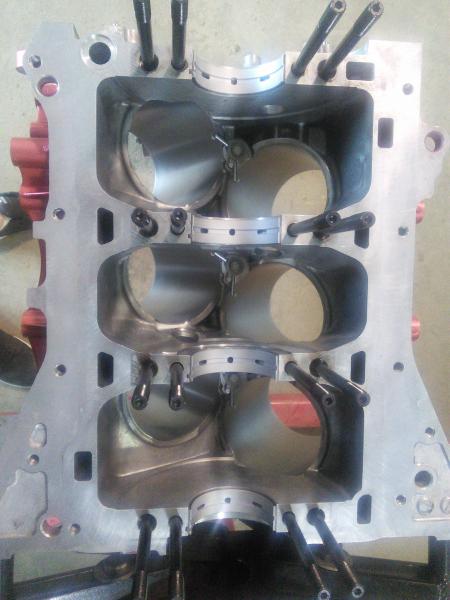
so with the motor torn down. . .
and the cause of death determined. . .

the block was then sent to Stan Ray & Sons (machine shop) on 4/15/2014 and I began to order new internals and parts to build the motor.
received the block back by Friday with a fresh .020 bore over; opted not to deck the block as the engine didn't die due to a head gasket failure and gasket material was removed from the entire block via either a razor or brass bristle brush in a dremel.
From the beginning of this build I wanted to set out to do some things differently than most. I didn't want to stop at 550whp I wanted to go 800 or beyond; I didn't want a 10 second car Instead I've decided to shoot for 9's because lets be honest for the kind of money and work I've put into the car a 10 second pass just wouldn't feel. . . "satisfying" to say the least. I also decided I would rebuild my own motor. mind you this isn't my first VQ rebuild, but I will tell those of you whom may get the idea after myself, this isn't like installing your stillen gen 3 intakes or a CBE. This requires serious mechanical aptitude; EASILY $1000 in tools alone and also the know how to "properly" use said tools (standard main/connecting rod oil clearance in your block is around 14 TEN THOUSANDTHS to put things in prospective for those of you slightly interested).
moving on; in the mean time that my block was being bored I started experimenting with some ideas and throwing them around in my head. Here was the start of the thought process.
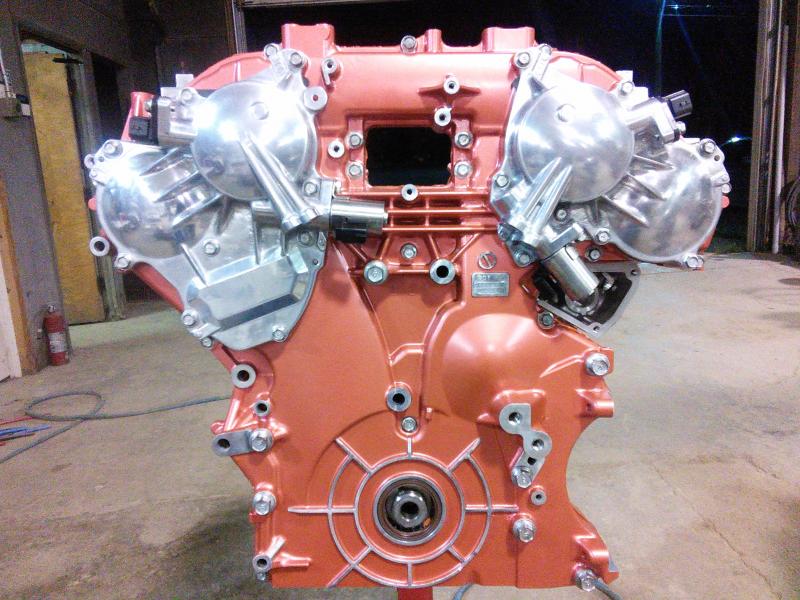
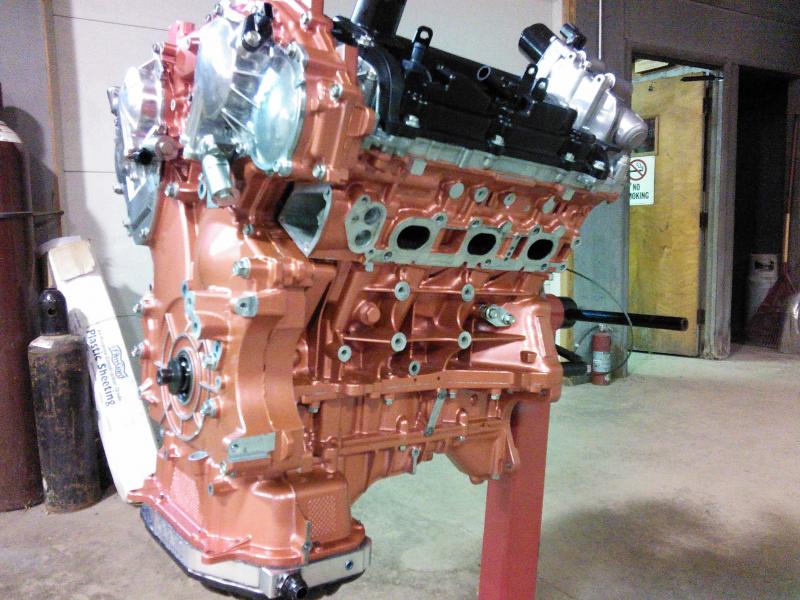
"Ricey" or not I liked it; several others agreed it would be sweet so I decided I would go forth painting my engine red with a slight metallic flake. Not so much metallic that it looked like a care bear $hat all over it but just enough to make a subtle change to the appearance under the right light.
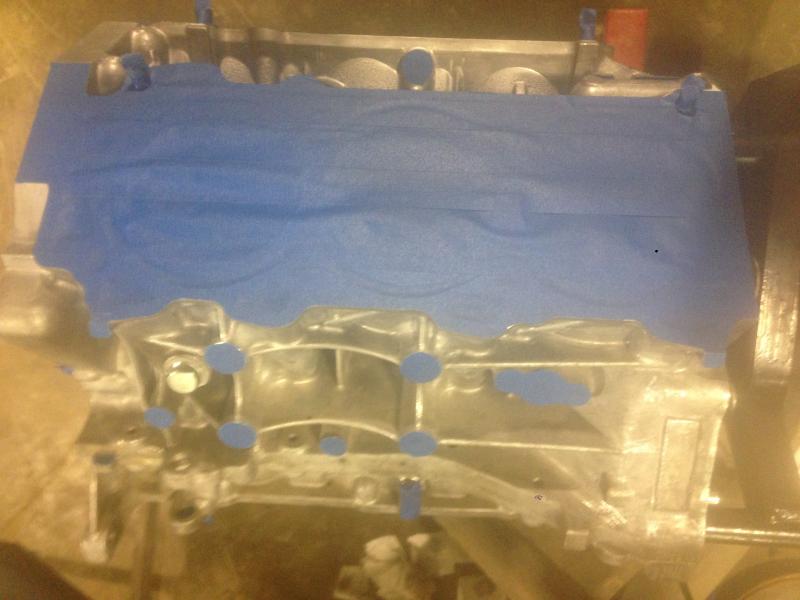
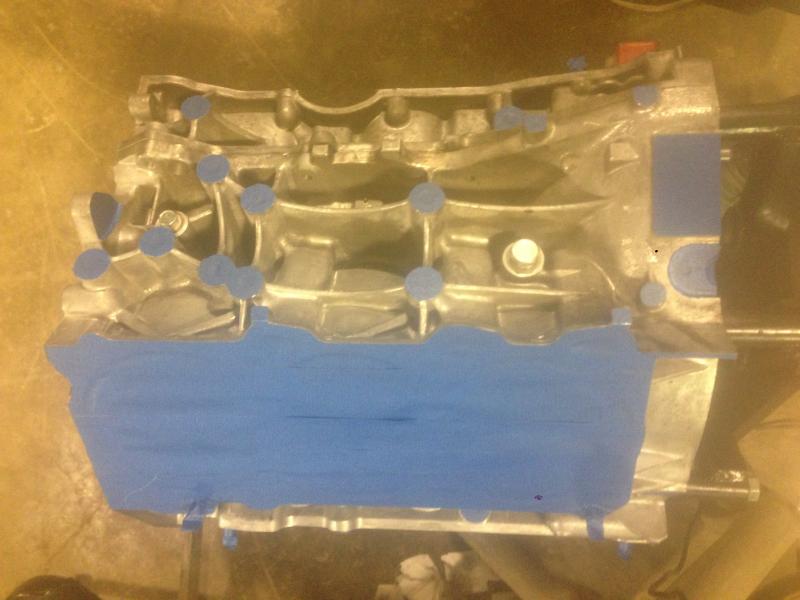
little did I know that pulling this off would take an unbelievable about of surface preparation! never the less this was a self done build so I was adamant to prevail. After easily three evenings of meticulous preparation it was finally time to paint the short block.
Here was the outcome.
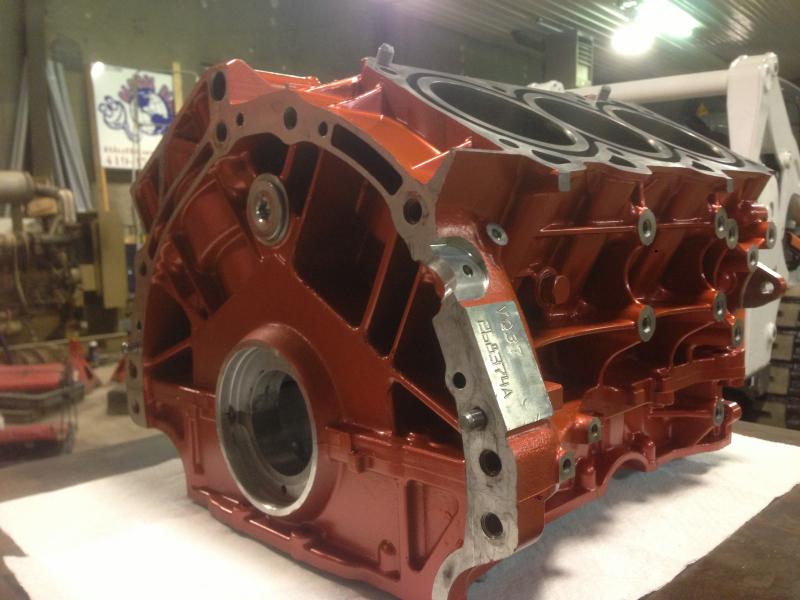
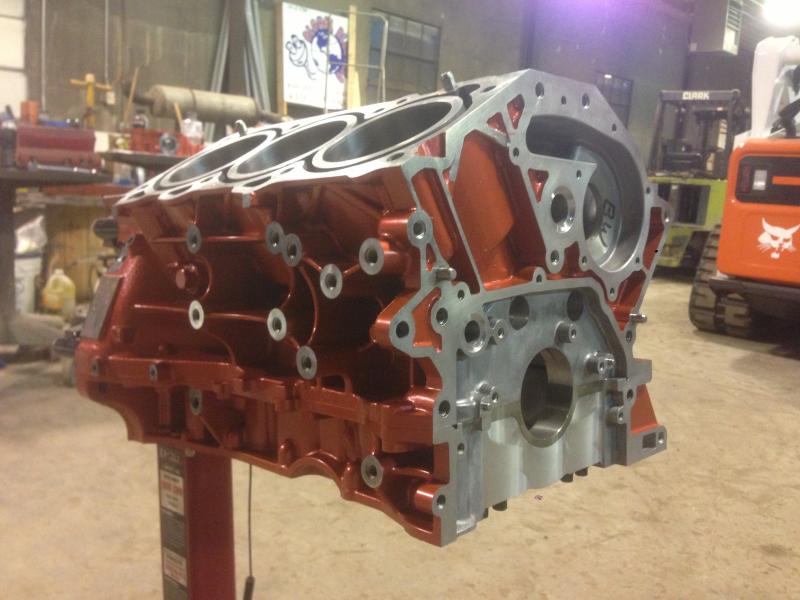

For my first time ever doing something like this I had to stand back and pat myself on the back. "not too shabby" I must say.
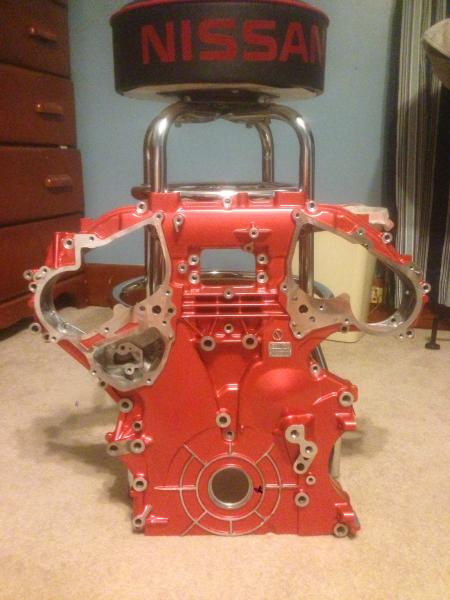
I moved on to the timing chain assembly and It arguably may have turned out to be my favorite piece of the whole process.
I was intending to polish this instead but there is already an Indiana guy here (pretty local) with a bad@ss pearl white nismo that has a polished timing chain cover. I didn't want him to feel like I was stealing his idea while we were at local car shows together so I took a different route.
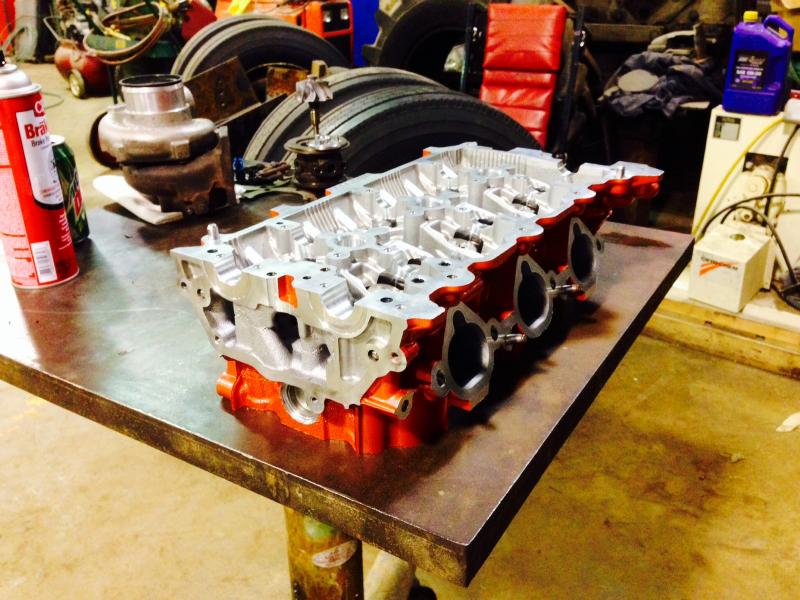
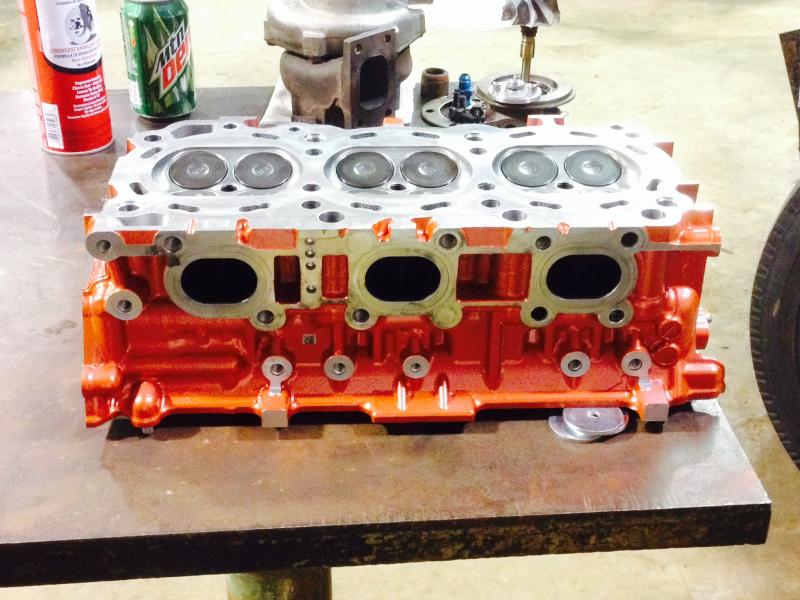
Cylinder heads were up next. once again several days in preparation. I went ahead and cleaned up all of the carbon from the bottoms of the valves too just for the sake of "freshening things up"
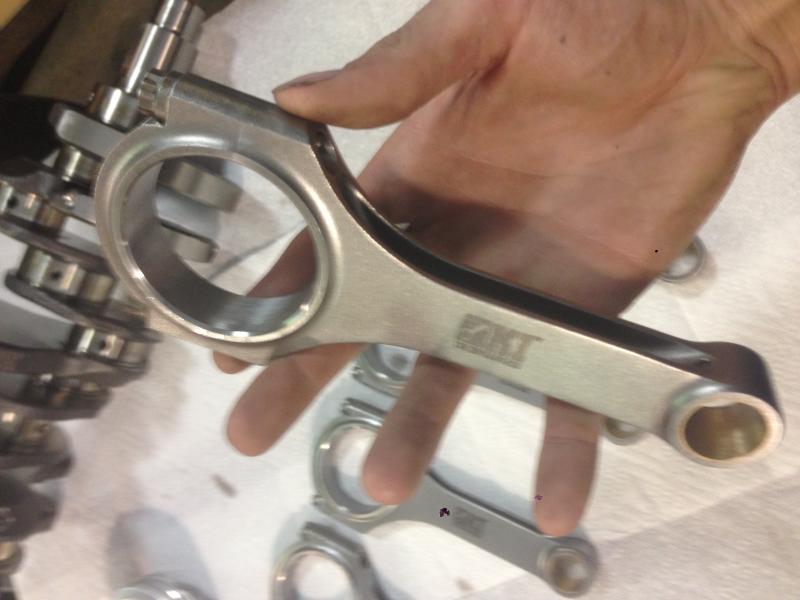
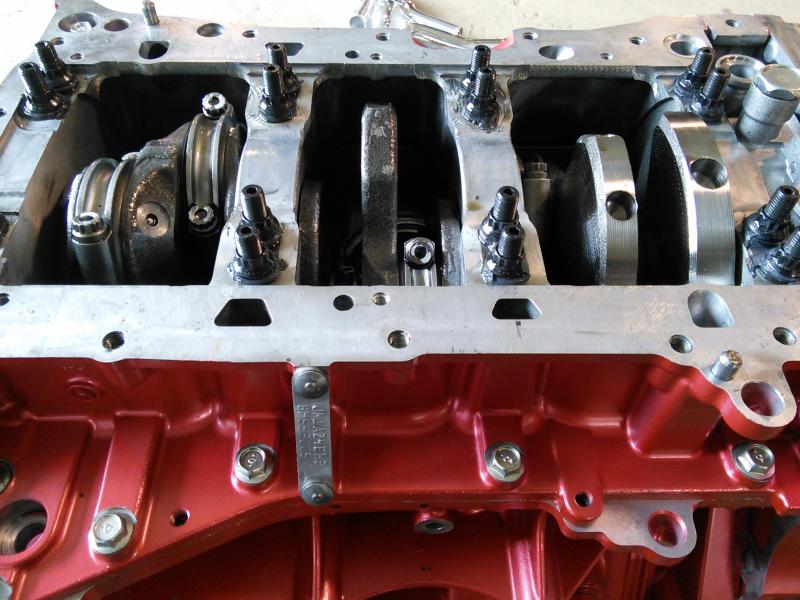
with all the paint out of the way It was time to begin work on the serious stuff. I began to check connecting rod-crank journal clearances get bearings sized and ordered;
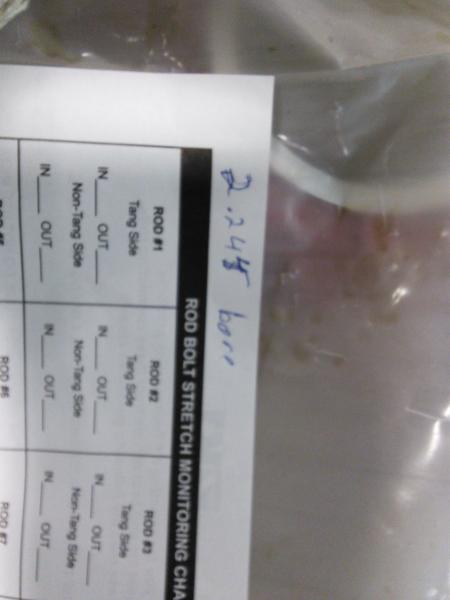
as well as the main journal to main bore to verify the bearings I received from motion lab were the right size(went ahead and installed the ARP main studs as well); Unfortunately they were not.
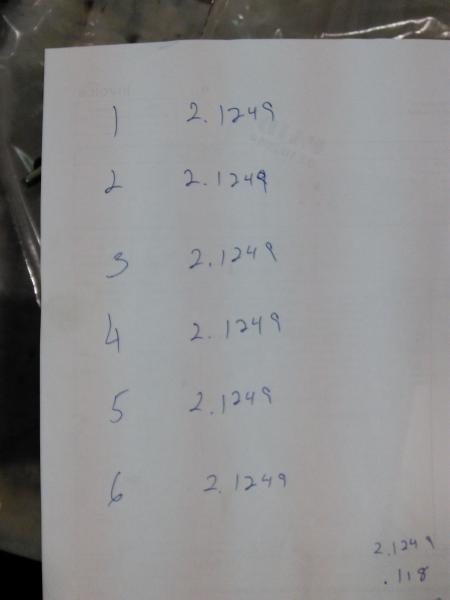
and so stopped my dealings with motion lab. NOT because they are a bad shop; they are an awesome group of guys I spoke to Alex on what seemed like a daily basis for the longest time trying to iron out gremlins and spoke to both he and Todd for an hour and 15min about tuning and a little more in depth insight on what could have happened to my factory short block. I was just infuriated that when I had shown Alex this picture in an email he "politely" pretty much called me a dumbass for trying to tell him my bearings were .010 too large and stated instead that I had a bent crank. I went ahead and bit the bullet held my toungue and purchased as second set of bearings the proper size at my local Nissan dealer at the same time I purchased my connecting rod bearings.
took probably a week or better for all of the bearings to arrive from California but the day they did assembly began immediately.
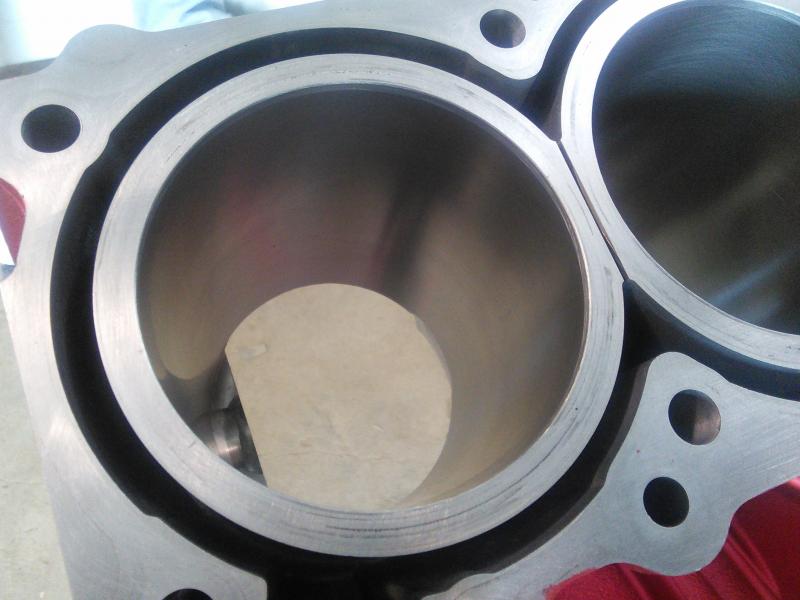
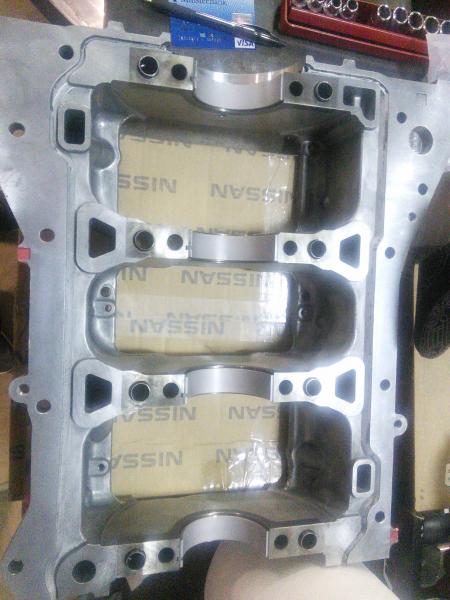
ooohhhhh pretty cylinder walls again haha waiting for a new rotating assembly.
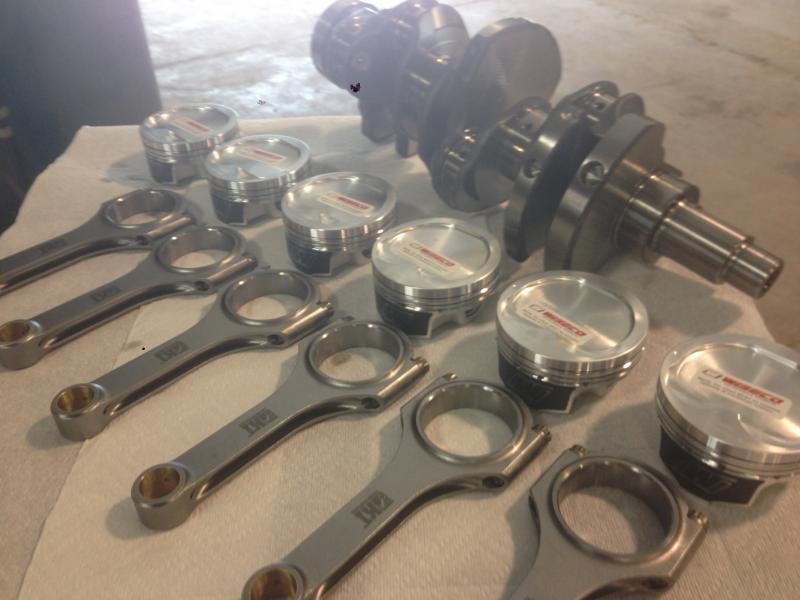
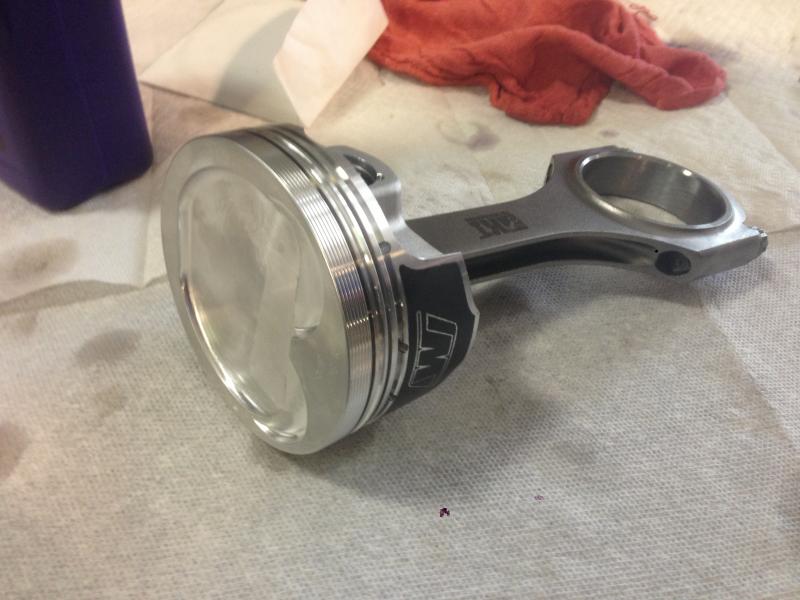
first connecting rod and piston installed

full rotating assembly finished, and torque turned; with head studs and head gaskets

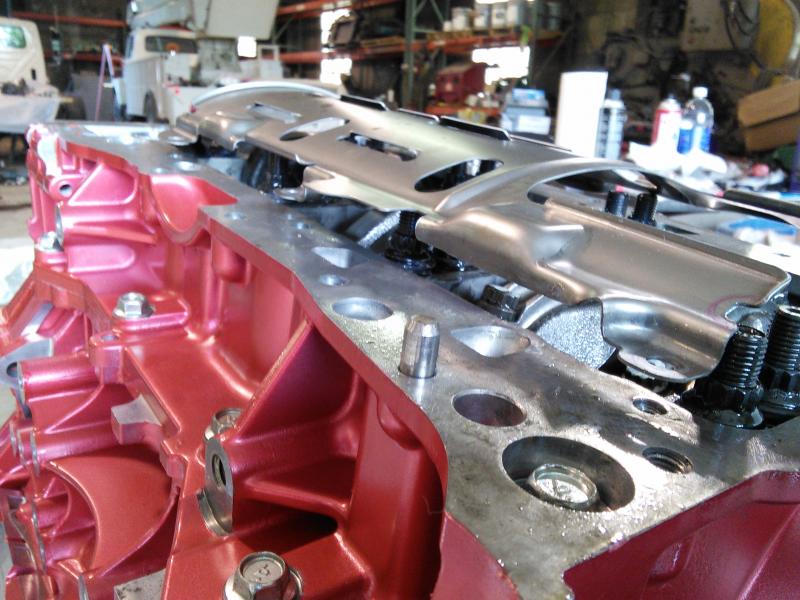
heads/exhaust cams installed as well as VVEL cradles polished and installed

rear timing chain cover installed along with oil pump, water pump, and chain guides+tensioner
(note: wait to install the chain guides until after you have installed the cam gears otherwise youll never be able to make enough slack in the chain to properly fit it on.)

Full timing assembly set

Front timing cover installed along with polished cam gear covers and front main seal(sensors were installed to close up the spots that were unnecessary to leave open to chance any sort of air born contaminants.
that wrapped it up for the first evening. I would resume the next day after work.
8-6-2014 update:
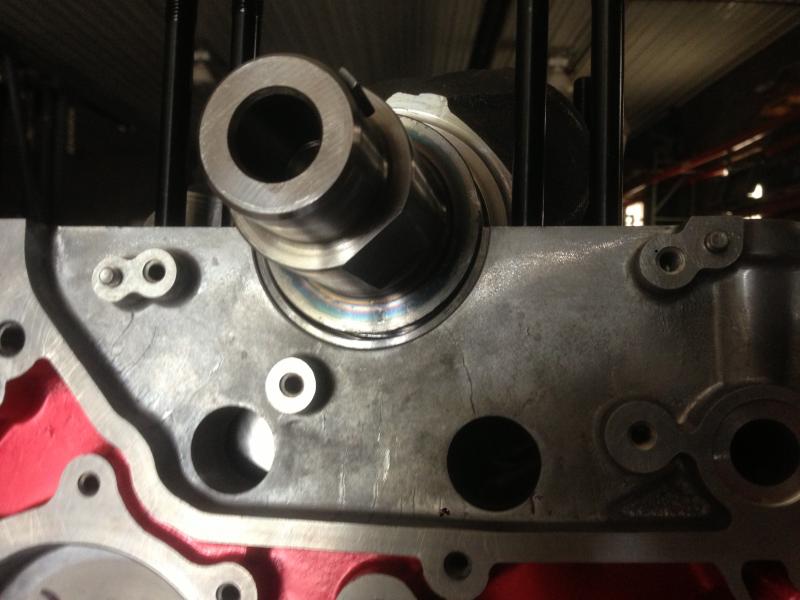
continuing on I found my final road block in my built engine. Being that the factory "Main studs" are a 12pt flange bolt style stud, and the ARP main studs are a "true" stud and nut style main stud, the ARP studs are taller than our factory OEM Nissan main girdle studs.
Because of this your crank windage tray no longer seats properly to be bolted to the main girdle.
now my first thought was "oh I can just space the windage tray up off the studs like the LS guys can do"
Nope. there are two baffles in the upper oil pan that prevent that from happening

so your only options are to either
A) grind the baffles off of your oil pan(idiotic) or
B) adjust the windage tray to fit around the studs as it did the factory suds
Heres my finished product
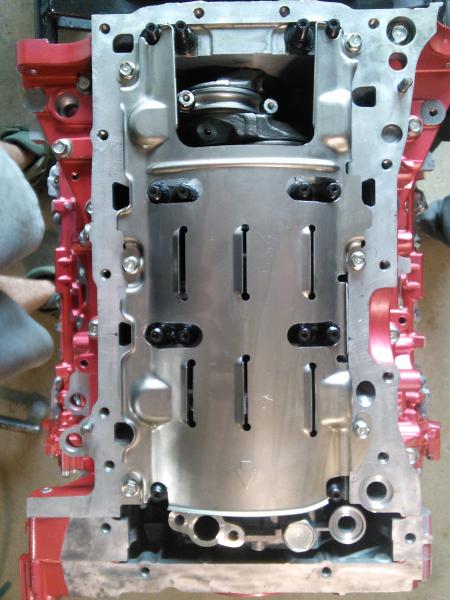
upper oil pan installed and properly fitted

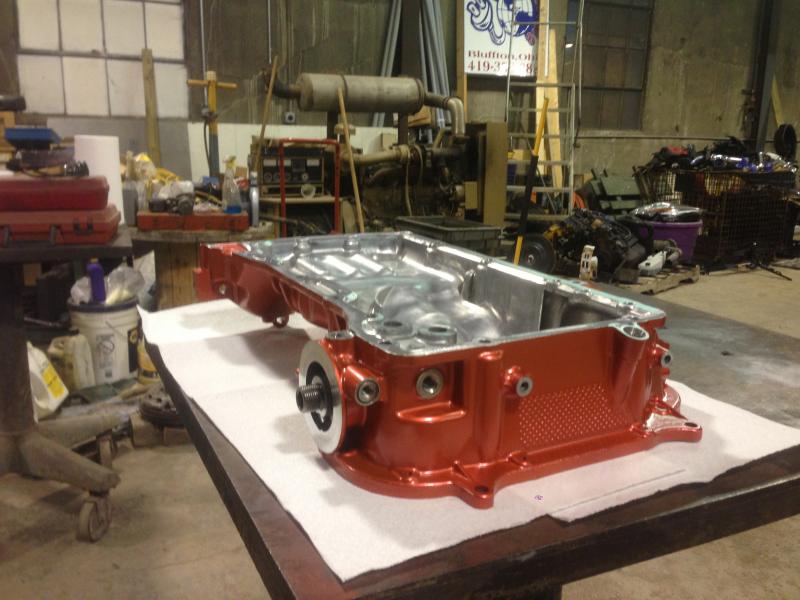
Oil pan spacer and pan installed
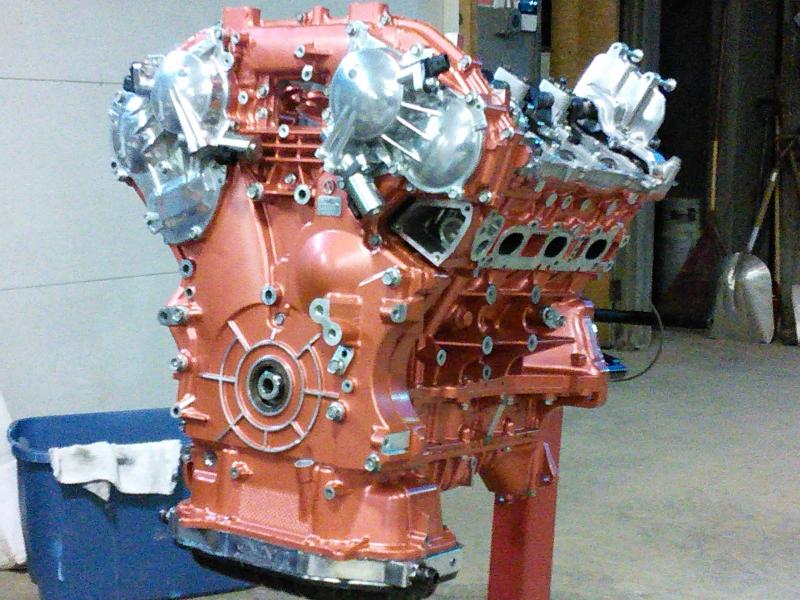
valve covers and VVEL actuators installed
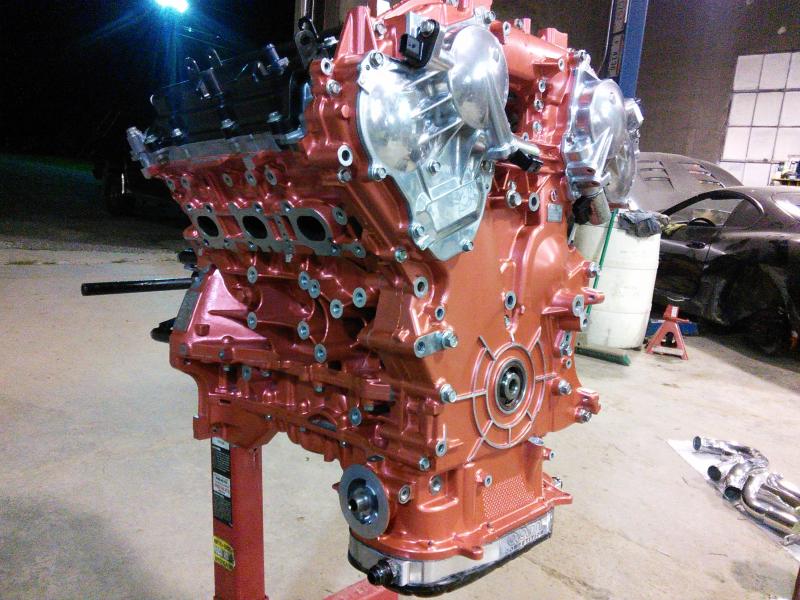
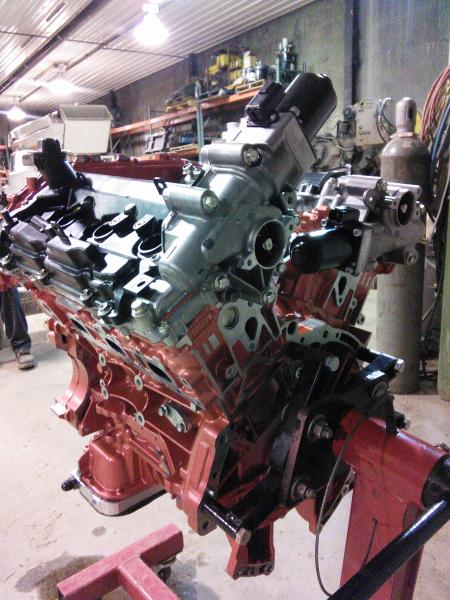
and finished!

that's all I've got for now guys will keep the updates coming soon!
