Ok as usual i have horrible luck but it is what it is. Before leaving Ft Riley for Germany i had someone back into my Z with a hitch. Im guessing its a truck due to the height. The result when i came out in the morning was a lot of warped plastic and a nice tear from top to bottom. Since the car was about to be in transit i ordered a bumper and put zip ties into the stock one to keep it together in the meantime. Due to a lot of delays the car ended up shipping without the new bumper and it is VERY expensive to get one shipped to Germany SO...i finally decided to attempt the repair on my own. Thankfully this is about as complex a single repair can get on the front bumper. A single hole or something similar on a flat or curved surface would be a lot easier and quicker.
If you liked the DIY please add REP! If you have suggestions on how to do it better by all means post it up and help your fellow forum members out!
Now down to buisness!
Cost: $50 give or take a bit for currency conversion. This also included a 6 pack of beer tho... I was quoted a LOT more to have a local German do the repair.
Time Required : Based on size and complexity of repair but anywhere from 2hrs - 1 day. (i played BF3 while i waited for stuff to dry...)
The tools you will need are as follows:
>Sharp Knife
>Scissors
>Large Strainer or similar with a fine mesh
>Primer Paint
>Big hot Glue gun or something else to melt the plastic on the bumper (even a lighter would do but its not preferred...)
>Putty knife or plastic spades for applying the resin.
>a "FLEXIBLE" resin. I used a German brand i bought at the local OBI but something like this
BONDO will do.
>Sandpaper 40 through 800 grit as required.
>Rags
>Bottle of rubbing alcohol
>Masking tape
>Sharpie
>Heat Gun
>Vacuum for sanding dust
STEP 1.) OK First things First. Find the area that needs the repair and use the Heat Gun to heat up and help mold any warped plastic. The purpose of this is to keep your repair area as SMALL as humanly possible!
STEP 2.) OK now that you have figured out your repair area, cut out the warped plastic and paint that you can NOT mold back into shape. Leave a 45 Degree sloped edge to the cut for the mesh later.
 STEP 3.)
 OK now take your strainer and pull the mesh out of it. I got a large flat one from the PX which worked perfectly. Then line it up against the hole you cut and mark the area to be cut out with the sharpie. Try and stay as close to the edge of the mesh as you can so you don't waste any for later pieces. On some repairs you will be able to just use one piece. Since the repair i am doing has 6 separate facets i ended up having to use 3 separate pieces.
 STEP 4.)
 Make sure your pieces of mesh fits the hole to be repaired.
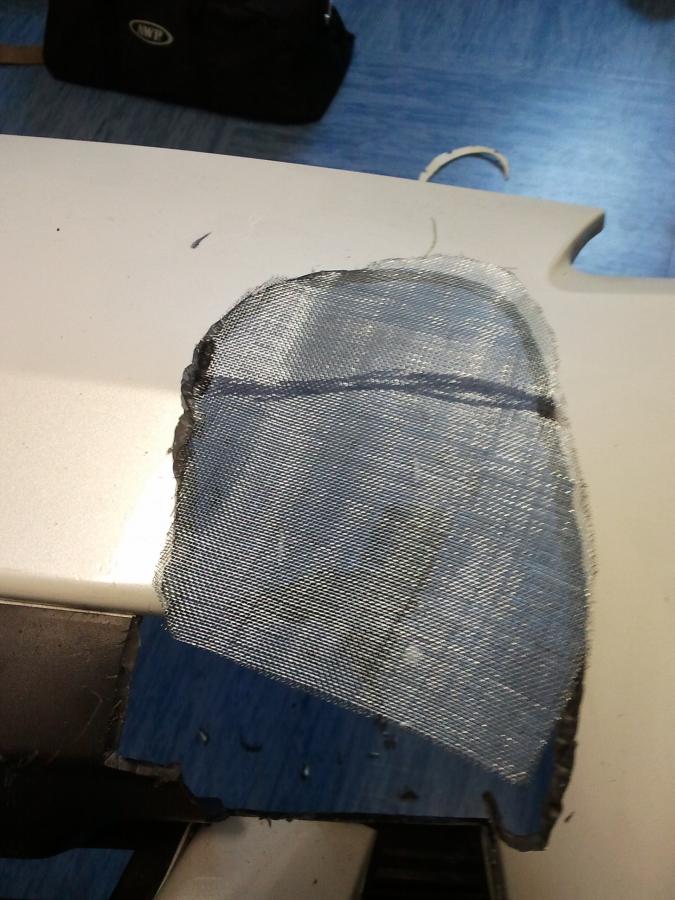
Then go ahead and start to melt it into the plastic. The point of the mesh is to give the resin a flexible, yet firmly anchored, backing to adhere to.

Once you have all your pieces in you can join them together to make applying the resin easier by melting a little bit of the extra plastic shavings and "gluing" them together. Form ruff curves and lines by bending the mesh in the needed areas. Remember it does NOT have to be perfect. Once you sand the resin you will be able to sort out the lines.
 STEP 5.)
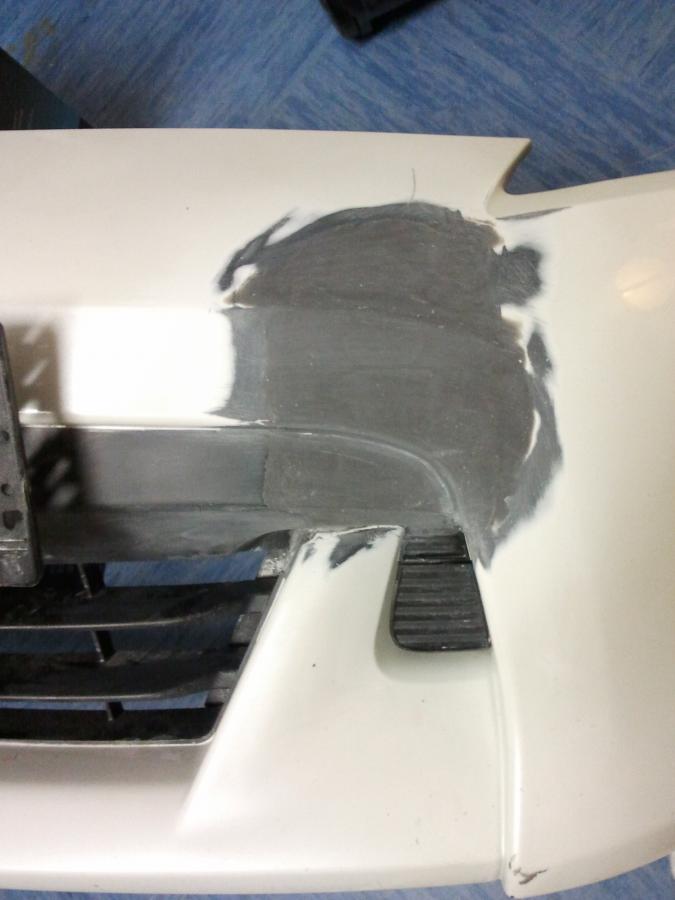
 Now that you have the mesh in it is time to apply the resin! This is going to take multiple layers so take your time in between layers to allow them to fully cure and harden before sanding. DO THIS IN A WELL VENTILATED AREA!
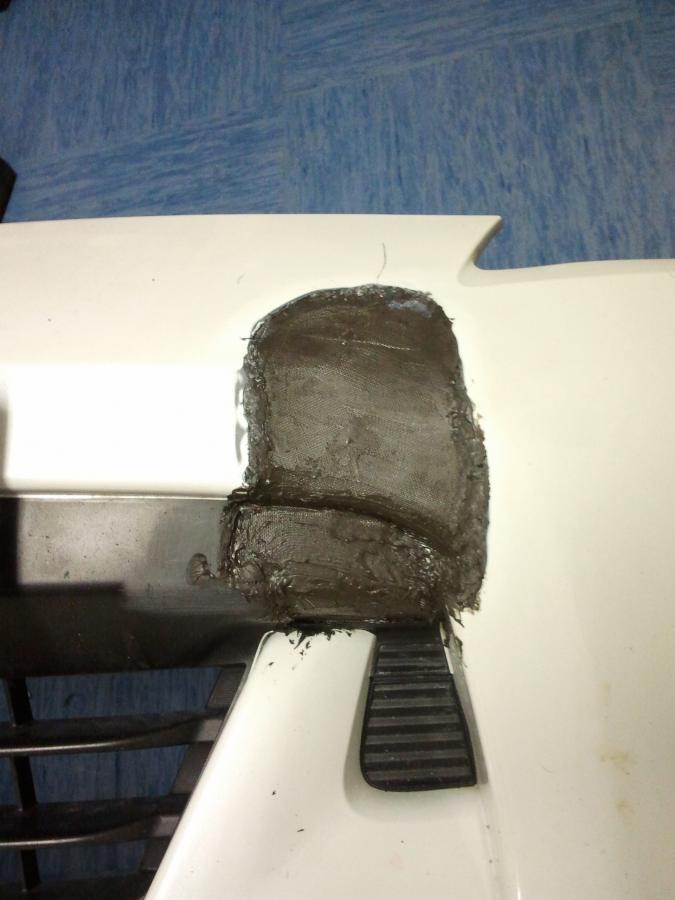
I opted to sand in between each layer to get any of the rough high spots out of the way. It is important to not put on to much resin in one go. The reasoning here, as it was explained to me, is that each layer sort of flexes against the next and its a stronger repair if it has multiple layers. (not sure how true that is but i did it anyways!) After sanding use the rubbing alcohol and a rag to get off all of the dust and debris then allow the alcohol to fully dry before going on to the next layer.
Another thing to note is that this is where i started to rough in the lines.
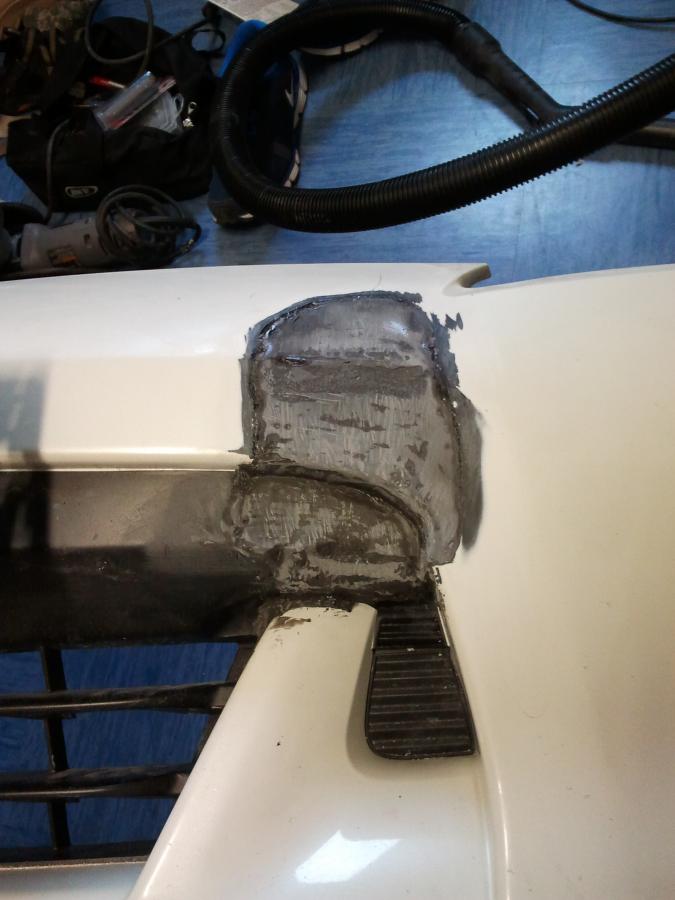
You can also use any extra resin and put a coat on the back of the repair for added strength. Remember tho the bumper sits flat against the foam block on the front bumper bar so if you add resin or depth to the back of the repair the bumper may not fit back on the car, or you will damage the repair in the attempt to get it back on the car.
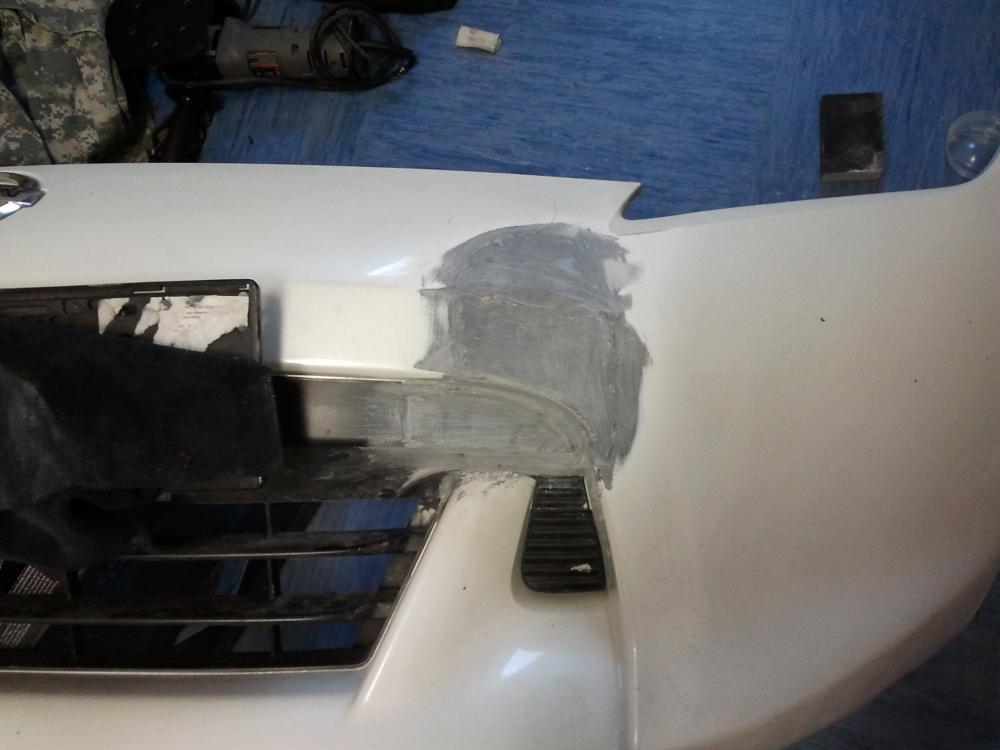
STEP 6.) Ok now that you have the rough shape of the repair done you can go ahead and start to do the fine sanding and prep the bumper for paint. This is the step that took the most amount of work since i had 6 separate facets to the repair and the curve there in the corner was a nightmare. Best advice i can give you is rough it in and then slowly work your way finer with the sand paper. Take your time and don't rush anything and it should turn out fine.
Here is a perspective shot:

And here is a close up:
Notes:
Dont leave extra mesh in the center like i did in the first pic. I ended up having to cut a second piece that fit better. The issue here is it can cause problems down the road on the sides of the repair which lead to cracking.
Take your time when melting the mesh into the edges of the repair. Like with the first note, this is probably one of the most important steps. If you didnt take your time and melt it fully it can pull apart later and again..lead to cracking.
Use the vacuum to pick up the large ammounts of resin dust you will create. If you forced to do this inside like i was due to weather it will help keep the whole work area clean!